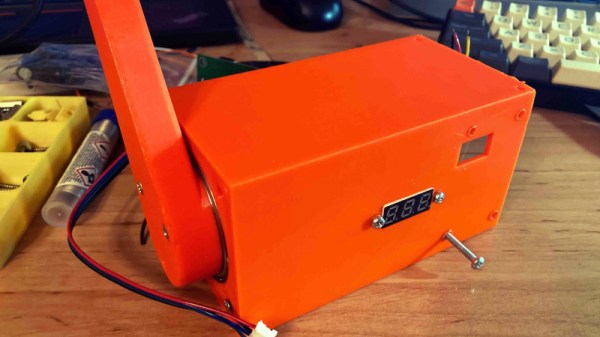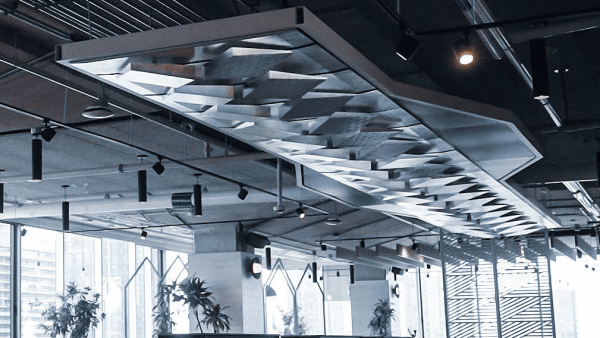
No office space is complete without some eye-catching art piece to gawp at whilst you mull over your latest problem. But LED-based displays are common enough to be boring these days. Kinetic art pieces are where it’s at, and this piece called Flux is a perfect example.
Commissioned for the Toronto office of a very popular e-commerce platform and constructed by [Nicholas Stedman], Flux consists of twenty identical planks on the ceiling, arranged in a line forty feet long. Each plank has a pair of rotating prisms, constructed from a stack of foam sheets, finished with metallic paint. The prisms are spun by individual stepper motors, each of which is driven by a TMC2160-based module, making them whisper-quiet.
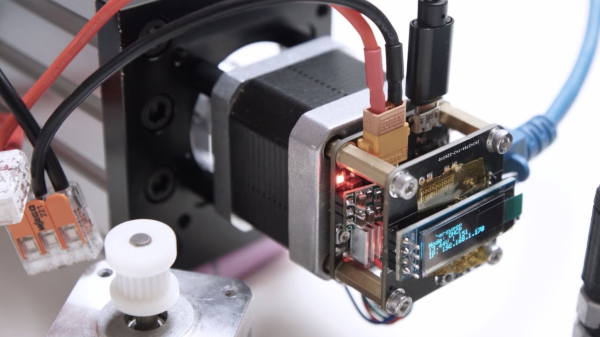
A simple 3D printed bracket holds a small PCB holding an AMS AS5600 rotary magnetic encoder, onto the rear of the stepper motor. This allows for closed-loop feedback to the shared Arduino, which is very important for a sculpture such as this. Each Arduino is hooked up to a Raspberry Pi, running a simple application written in node.js which is responsible for coordinating movement, as well as uploading updated firmware images as required. A simple, but very effective build, we think!
Even more fun are kinetic art installations that are reactive to some data source, such as Adad, which visualizes lightning strike data. If these builds are just too big and complex, we’ve seen many examples of smaller desktop toys, such as this 3D printed tumbling chain demo for example.
Continue reading “Flux: A Forty Foot Long Kinetic Art Piece”
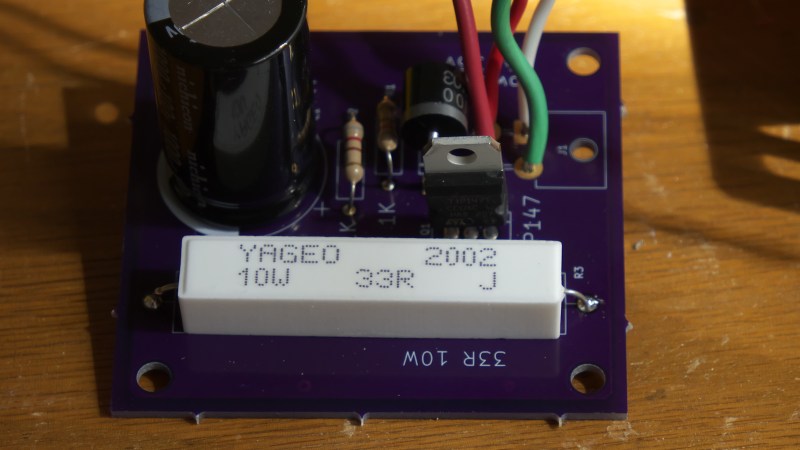
 making uploading firmware a breeze. To that end, a USB port is also provided, hooked up to the uC with the cheap CP2102 USB bridge chip as per most Arduino-like designs. The thing that makes this build a little unusual is the ethernet port. The hardware side of things is taken care of with the