Slice Through Your Problems With A Shukran

We’d wager most hackers are familiar with FTDI as the manufacturer of the gold standard USB-UART interfaces. Before parts like the ultra cheap CH340 and CP2102 became common, if you needed to turn a USB cable into a TTL UART device, “an FTDI” (probably an FT232RL) was the way to make that happen. But some of the parts in the FT232* family are capable of much more. Wanting to get at more than a UART, [linker3000] designed the Shukran to unlock the full potential of the FT232H.

The FT232H is interesting because it’s an exceptionally general purpose interface device. Depending on configuration it can turn USB into UART, JTAG, SPI, I2C, and GPIO. Want to prototype the driver for a new sensor? Why bother flashing your Teensy when you can drive it directly from the development machine with an FT232H and the appropriate libraries?

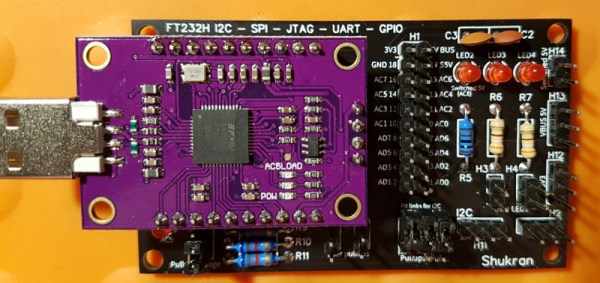
The Shukran is actually a breakout for the “CJMCU FT232H” module available from many fine internet retailers. This board is a breakout that exposes a USB-A connecter on one side and standard 0.1″ headers on the other, with a QFN FT232H and all the passives in the middle. But bare 0.1″ headers (in a square!) require either further breadboarding or a nest of jumper wires to be useful. Enter the Shukran. In this arrangement, the CJMCU board is cheap and handles the SMT components, and the Shukran is easy to assemble and makes it simple to use.

The Shukran gives you LEDs, buttons and switches, and a bunch of pull up resistors (for instance, for I2C) on nicely grouped and labeled headers. But most importantly it provides a fused power supply. Ever killed the USB controller in your computer because you forgot to inline a sacrificial USB hub? This fuse should take care of that risk. If you’re interested in building one of these handy tools, sources and detailed BOM as well as usage instructions are available in the GitHub repo linked at the top.

Unlocking Hidden Potential In IvyBridge ThinkPads

Upgrading the BIOS in older computers is a great way to get a few more years of life out of old hardware or improve its performance. ThinkPads are a popular choice around these parts, but often flashing new firmware involves directly programming the chips themselves. Luckily, there’s a new flashing tool for some older Thinkpads that is much simpler.

The ThinkPads involved are the xx30 models with IvyBridge processors built around 2012, and a tool called 1vyrain now allows unlocking the bios without disassembling your computer. This means that there’s support for custom BIOS images such as coreboot, and in certain computers this also allows for overclocking, replacing WLAN hardware, and a number of other customizations. It will also allow you to disable the Intel management engine, which is not something we tire of talking about.

If you have one of these older computers floating around, some new RAM, an SSD, and this update will get you well on your way to a computer that feels brand new at virtually no cost, and the upgrades to the BIOS that you can easily make now only add to that. ThinkPads are a popular choice, especially for their hardware, but you do need to make sure that the software on them is trustworthy too.

Header image: Ashley Pomeroy [CC BY-SA 4.0].

Stacks Of Spring Washers Power The Drawbar On This CNC Mill Conversion

With Tormach and Haas capturing a lot of the entry-level professional market for CNC machines, we don’t see too many CNC conversions of manual mills anymore. And so this power drawbar conversion for a Precision Matthews mill really caught our eye.

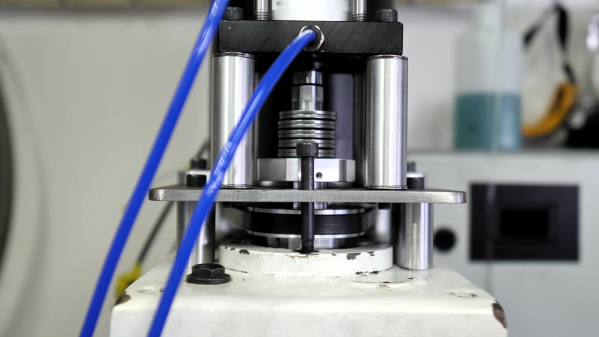
What’s that, you say? Didn’t [Physics Anonymous] already build a power drawbar for a mill? They did, and it was quite successful. But that was based on a pneumatic impact wrench, and while it worked fine on a manual mill, the same approach would be a bit slow and cumbersome on a CNC mill. For this build, they chose a completely different approach to providing the necessary upward force to draw the collet into the collet holder and clamp down on the tool: springs. Specifically, Belleville spring washers, which are shaped like shallow cups and can exert tremendous axial force over a very short distance.

[PA] calculated that they’d need to exert 2,700 pounds (12,000 Newtons) of force over a length of a couple of inches, which seems outside the Belleville washer’s specs. Luckily, the springs can be stacked, either nested together in “series” to increase the load force, or alternating in “parallel” to apply the rated force over a greater distance. To compress their stack, they used a nifty multi-stage pneumatic cylinder to squash down the springs and release the collet. They also had to come up with a mechanism to engage to machine’s spindle only when a tool change is called for. The video below details the design and shows the build; skip to 11:32 to see the drawbar in action.

We’re looking forward to the rest of [Physics Anonymous]’ conversion. They’re no strangers to modifying off-the-shelf machines to do their bidding, after all – witness their improvements to an SLA printer.

Continue reading “Stacks Of Spring Washers Power The Drawbar On This CNC Mill Conversion”

If You Need A Measurement Tool Just Build A Measurement Tool

[Darlan Johnson] was working on a wearable project and needed a way to measure the change in voltage and current over time. 

Most measurement tools are designed to take snapshots of a system’s state in a very small window of time, but there are few common ones designed to observe and log longer periods. It’s an interesting point, for example, many power supply related failures such as resets occur sporadically. Longer timescale measuring devices could pick these up.

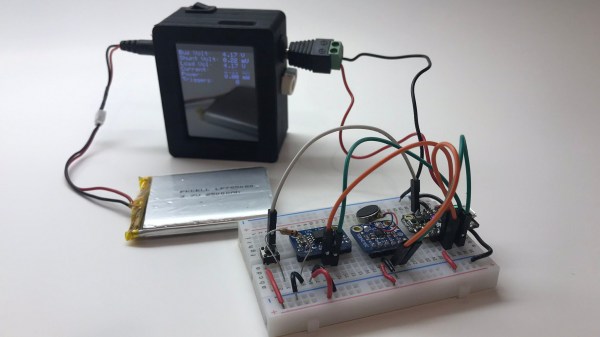
[Darlan] had a ton of Feathers and shields lying around, and combined them into the needed instrument. An INA219 current sensor records the measurements. They are then displayed on a TFT and logged to an SD card. Everything is bundled into a neat 3D printed case along with a battery for wireless operation. A set of barrel connectors provide the breakout to split the wires for the current measurement.

It’s a neatly done hack and we can see it as a nice addition to any hacker’s measurement drawer.

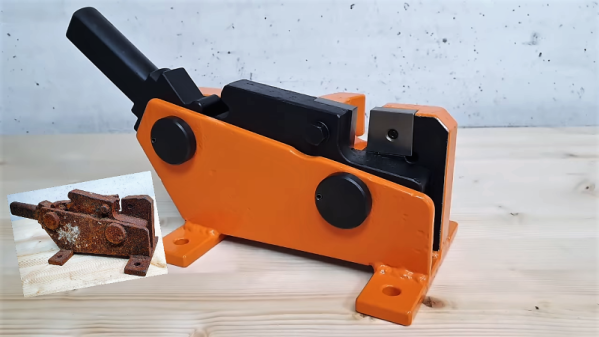
Restoring A Rusty Rebar Cutter

We’ve all probably come across hunks of junk that used to be tools, long-neglected and chemically welded into a useless mass of solid rust. Such items are available for a pittance at the local flea market, or more likely found in an old barn or rotting on a junk pile. They appear to be far beyond salvage, but with the proper application of elbow grease and penetrating lubricants, even a nasty old seized-up rebar cutter can live again.

We honestly almost passed up on the video below when it came across our feed. After all, a rebar cutter is a dead-simple device, and half the fun of restoration videos like those made by [my mechanics] is seeing all the parts removed, restored, and replaced. But it ended up being far more interesting than we expected, and far more challenging too.
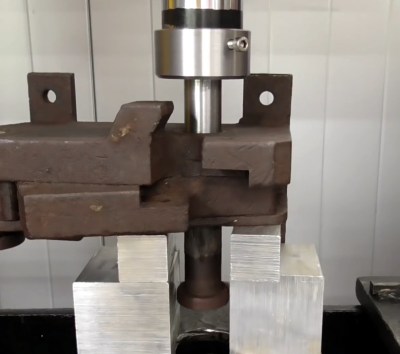
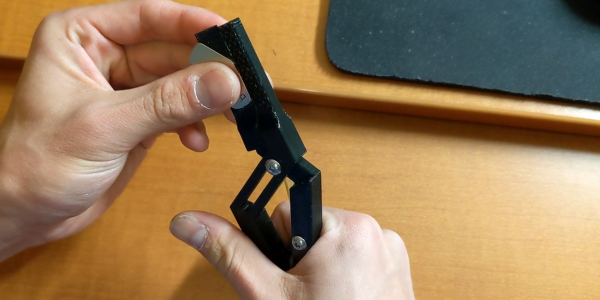
The cutter was missing its original handle and looked for all the world like it had been cast from a solid piece of iron oxide. [my mechanics] was able to get the main pivot bolts free with a combination of leverage, liberal application of penetrating oil, drilling, and the gentle persuasion of a hydraulic press.

These efforts proved destructive to both bolts, so new ones were made on the lathe, as were a number of other parts beyond saving. New cutters were fabricated from tool steel and a new handle was built; before anyone comments on anyone’s welding skills, please read [Jenny]’s recent article on the subject.

The finished product is strikingly dissimilar to the starting lump of oxidized junk, so there’s going to to be some debate in calling this a “restoration” in the classical sense. The end result of a [my mechanics] video is invariably a tool or piece of gear that looks far better than it did the day it was made, and any one of them would get a place of honor on our shelf. That said, he’d probably be swiftly shown the door if he worked at the Smithsonian.

Whatever you want to call these sort of videos, there are tons of them out there. We’ve featured a few examples of the genre, from the loving rehabilitation of classic Matchbox cars to rebuilding an antique saw set. They’re enough to make us start trolling garage sales. Or scrap yards.

Continue reading “Restoring A Rusty Rebar Cutter”

Set Your Nuts (and Bolts) Free With This Induction Heater

[Amon] built an induction heater to break stuck bolts loose. If you work on cars, machines, or anything big and metal, sooner or later you’re going to run into stuck nuts and bolts. Getting them unstuck usually involves penetrating oil, heat from a torch, and cheater bars. Heat usually works well, as heating the bolt makes the metal expand, helping it to break free. Torches aren’t exactly precision instruments though, and things can get interesting using one in tight spaces.

Fire isn’t the only way to heat a bolt through. Electricity can do the job as well. But why use a heating coil when you can grab an induction heater. Mechanics have had induction heaters in their toolboxes now for a few years, under names such as Bolt Buster or Mini Ductor. These devices cost several hundred dollars. However, you can purchase a 1000 watt induction heater from the usual sources for around $30. These are open frame Zero Voltage Switching (ZVS) power supplies, with uninsulated copper coils.

[Amon] bought one of these induction heaters, along with a beefy 24V, 40 amp switch mode supply to power it. He built the two into a plastic enclosure. A relay energizes the induction heater, so it isn’t always running. The key to this build is the handle. Rather than mount the induction coil directly on the supply, [Amon] ran two extension wires to a 3d printed gun style handle. This keeps the bulky part of the heater away from the work. The copper tube coil was re-shaped to better work with the gun. Some fiberglass sleeve keeps everything insulated, even at extreme temperatures.

The result is a very useful heater, ready to bust loose some bolts. We’ve seen homebuilt ZVS supplies powering induction coils before. It will be interesting to see how well these commercial units hold up.

Continue reading “Set Your Nuts (and Bolts) Free With This Induction Heater”

Hexagons – The Crazy New Breadboard

A breadboard is a great prototyping tool for verifying the sanity of a circuit design before taking the painstaking effort of soldering it all together permanently. After all, a mistake in this stage can cost a lot of time and possibly material, so it’s important to get it right. [daverowntree] wasn’t fully satisfied with the standard breadboard layout though, with fixed rows and columns. While this might work for most applications, he tried out a new type of prototyping board based on hexagons instead.

The design philosophy here revolves around tessellations, a tiling method for connecting the various components on this unique breadboard rather than using simple rows. The hexagons are tessellated across the board, allowing for some unique combinations that might make it slightly more complicated, but can have some benefits for other types of circuits such as anything involving the use of a three-wire device like a transistor.

The post is definitely worth a read, as [daverowntree] goes through several examples of this method of prototyping where the advantages are shown, like a voltage follower circuit and some other circuits involving transistor biasing. If you’re OK with the general design of breadboards, though, and just wished you didn’t have to do anything after the prototyping stage, we’ve got some help for you there as well.