ThunderScope datapath

Why Buy A New Scope When You Can ‘Just’ Build One?

Hackaday Prize 2021 Finalist ThunderScope is doing exactly that. [Aleska] is building a modular open source PC-connected oscilloscope aiming at four channels and a cool 100 MHz bandwidth with a low budget. The detailed project logs, showing how he is learning about ‘scope technology on-the-fly is a fascinating look into the mind of an engineer as he navigates the ups and downs of a reasonably complicated build.

We like how [Aleska] has realised early on, that keeping the project private and only releasing it when “I’m done” actually impedes progress, when you could open source from the beginning, log progress and get great feedback right from the start. All those obvious mistakes and poor design choices get caught and fixed before committing to hardware. Just think of all the time saved. Now this is an attitude to cultivate!

Continue reading “Why Buy A New Scope When You Can ‘Just’ Build One?”

This Old Mouse: Building A USB Adapter For A Vintage Depraz Mouse

When [John Floren] obtained a vintage Depraz mouse, he started out being content to just have such a great piece of history in his possession. But if you’re like him, you know it’s not enough to just have something. What would it be like to use it?

To find out, [John] embarked on a mission to build a USB adapter for his not so new peripheral.
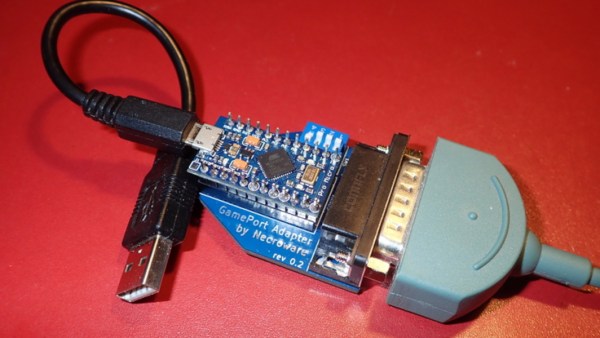
Originally used in very early terminals with a Unix GUI, the Depraz mouse utilizes an unusual male DE9 connector rather than the more familiar female DB9 used in RS232 serial mice. Further deviating from the norm, he found that the quadrature encoders were connected directly to the DE9 connector.

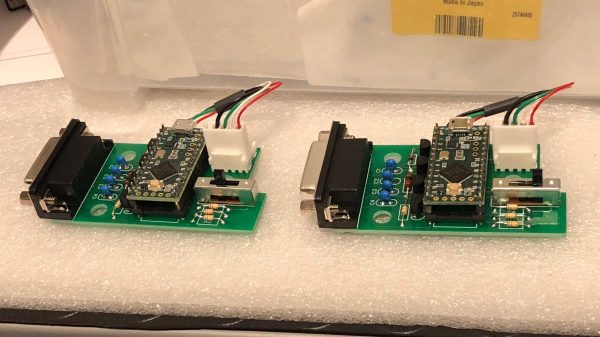
Armed with an Arduino Pro Mini Micro and some buggy sample code, he got to work. The aforementioned buggy code was scrapped and a fresh sketch for the Arduino Pro Mini Micro gave the Depraz mouse the USB interface it lacked. [John] also found that he wasn’t the first hardware hacker to have modified the mouse for their use. Be sure to read to the end the article to find out about the vintage surprise lurking in the mouse shell itself! A demonstration of the mouse in action can be seen in the video below the break.

Looking for a fun mouse hack? Perhaps you’d like to use your more modern USB mouse on a retro computer, or try your hand at recreating an early Apple mouse for use in modern computers.

Continue reading “This Old Mouse: Building A USB Adapter For A Vintage Depraz Mouse”

Clever PCB Brings Micro USB To The Arduino Uno

Even with more and more devices making the leap to USB-C, the Arduino Uno still proudly sports a comparatively ancient Type-B port. It wouldn’t be a stretch to say that many Hackaday readers only keep one of these cables around because they’ve still got an Uno or two they need to plug in occasionally.

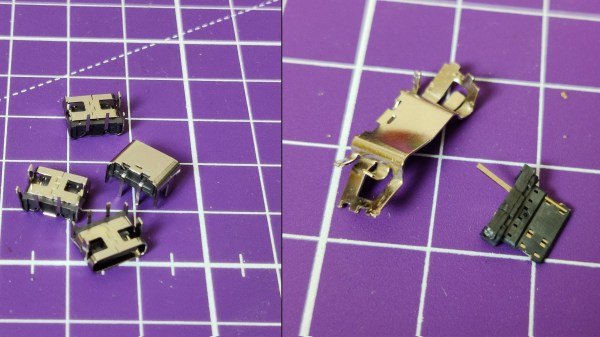
Looking to at least move things in the right direction, [sjm4306] recently set out to create a simple board that would let him mount a micro USB connector in place of the Uno’s original Type-B. Naturally there are no components on the PCB, it simply adapts the original through-hole footprint to the tight grouping of surface mount pads necessary to mount a female micro USB port.

Making castellated holes on the cheap.

The design is straightforward, but as [sjm4306] explains in the video below, there’s actually more going on here than you might think. Looking to avoid the premium he’d pay to have the board house do castellated holes, he cheated the system a bit by having the board outline go right through the center of the standard pads.

Under a microscope, you can see the downside of this approach. Some of the holes got pretty tore up as the bit routed out the edges of the board, with a few of them so bad [sjm4306] mentions there might not be enough of the pad left to actually use. But while they may not be terribly attractive, most of them were serviceable. To be safe, he says anyone looking to use his trick with their own designs should order more boards than they think they’ll actually need.

Of course you could go all the way and retrofit the Uno with a USB-C port, as we’ve seen done with devices in the past. But the latest-and-greatest USB interface can be a bit fiddly, especially with DIY gadgets, so we can’t blame him for going with the more reliable approach.

Continue reading “Clever PCB Brings Micro USB To The Arduino Uno”

Arduino Cable Tracer Helps Diagnose Broken USB Cables

We’ve all found ourselves swimming amongst too many similar-looking USB cables over the years. Some have all the conductors and functionality, some are weird power-only oddballs, and some charge our phones quickly while others don’t. It’s a huge headache and one that [TechKiwiGadgets] hopes to solve with the Arduino Cable Tracer.

The tracer works with USB-A, Mini-USB, Micro-USB, and USB-C cables to determine whether connections are broken or not and also to identify wiring configurations. It’s built around the Arduino Mega 2560, which is ideal for providing a huge amount of GPIO pins that are perfect for such a purpose. Probing results are displayed upon the 2.8″ TFT LCD display that makes it easy to figure out which cables do what.

It’s a tidy build, and one that we could imagine would be very useful for getting a quick go/no-go status on any cables dug out of a junk box somewhere. Just remember to WIDLARIZE any bad cables you find so they never trouble you again. Video after the break.

Continue reading “Arduino Cable Tracer Helps Diagnose Broken USB Cables”

Understanding Custom Signal Protocols With Old Nintendos

For retro gaming, there’s really no substitute for original hardware. As it ages, though, a lot of us need to find something passable since antique hardware won’t last forever. If a console isn’t working properly an emulator can get us some of the way there, but using an original controller is still preferred even when using emulators. To that end, [All Parts Combined] shows us how to build custom interfaces between original Nintendo controllers and a PC.

The build starts by mapping out the controller behavior. Buttons on a SNES controller don’t correspond directly to pins, rather a clock latches all of the button presses at a particular moment all at once during each timing event and sends that information to the console. To implement this protocol an Adafruit Trinket is used, and a thorough explanation of the code is given in the video linked below. From there it was a simple matter of building the device itself, for which [All Parts Combined] scavenged controller ports from broken Super Nintendos and housed everything into a tidy box where it can be attached via USB to his PC.

While it might seem like a lot of work to get a custom Nintendo controller interface running just because he had lost his Mega Man cartridge, this build goes a long way to understanding a custom controller protocol. Plus, there’s a lot more utility here than just playing Mega Man; a method like this could easily be used to interface other controllers as well. We’ve even seen the reverse process where USB devices were made to work on a Nintendo 64.

Continue reading “Understanding Custom Signal Protocols With Old Nintendos”

Breaking Down The USB Keyboard Interface With Old-Fashioned Pen And Paper

What is better for gaming, old PS/2 style keyboards, or modern USB devices? [Ben Eater] sets out to answer this question, but along the way he ends up breaking down the entire USB keyboard interface.

It turns out that PS/2 and USB are very, very different. A PS/2 keyboard sends your keystroke every time you press a key, as long as it has power. A USB keyboard is more polite, it won’t send your keystrokes to the PC until it asks for them.

To help us make sense of USB’s more complicated transactions, [Ben] prints out the oscilloscope trace of a USB exchange between a PC and keyboard and deciphers it using just a pen and the USB specification. We were surprised to see that USB D+ and D- lines are not just a differential pair but also have more complicated signaling behavior. To investigate how USB handles multi-key rollover, [Ben] even borrowed a fancy oscilloscope that automatically decodes the USB data packets.

It turns out that newer isn’t always better—the cheap low-speed USB keyboard [Ben] tested is much slower than his trusty PS/2 model, and even a much nicer keyboard that uses the faster full-speed USB protocol is still only just about as fast as PS/2.

If you’d like to delve deeper into keyboard protocols, check out [Ben]’s guide to the PS/2 keyboard interface, complete with a breadboarded hardware decoder. If these keyboards have too many keys for your taste, you might consider this USB Morse code keyboard. Thanks to Peter Martin for the Tip!

Custom Firmware Teaches USB Relay Board New Tricks

If you’re looking for a quick and easy way to control a few devices from your computer, a cheap USB relay board might be the ideal solution. These are fairly simple gadgets, consisting of little more than a microcontroller and a handful of relays. But that doesn’t mean there isn’t room for improvement, and as [Michał Słomkowski] recently demonstrated, flashing these boards with a custom firmware allows the user to modify their default functionality.

In his case, [Michał] wanted to build a power strip that would cut the power to any devices plugged into it once his computer went to sleep. Unfortunately, he couldn’t just check to see if there was 5 V on the line as his motherboard kept the USB ports powered up all the time. But with some modifications to the relay board’s firmware, he reasoned he should be able to detect if there was any USB activity by watching for the start-of-frame packet that goes out every millisecond when the bus is active.

Wiring up the ATtiny45 for flashing.

Now [Michał] isn’t claiming to be the first person to come up with a custom firmware for one of these boards, in fact, he credits an existing open source firmware project as an inspiration for his work. But he did create an entirely new GPLv3 firmware for these ATtiny45 powered devices, which includes among other improvements the latest version of V-USB. As it so happens, V-USB includes start-of-frame packet detection out of the box, which made it much easier to implement his activity detection code.

With the new firmware flashed to the relay board’s chip, [Michał] put it in an enclosure and wired up the outlets. But there was still one missing piece of the puzzle. It seems that Linux won’t actually send out the start-of-frame packets unless its actively communicating with a USB device, as part of the so-called “selective suspend” power saving feature. Luckily there is support for disabling this feature for specific devices based on their Vendor/Product ID pair, so after a little udev fiddling, everything was working as expected.

We love custom firmware projects here at Hackaday. Not only do they keep proprietary software out of our devices, but they often unlock new and expanded capabilities which otherwise would be hidden behind artificial paywalls.