DIY Laser For Ablating Metal

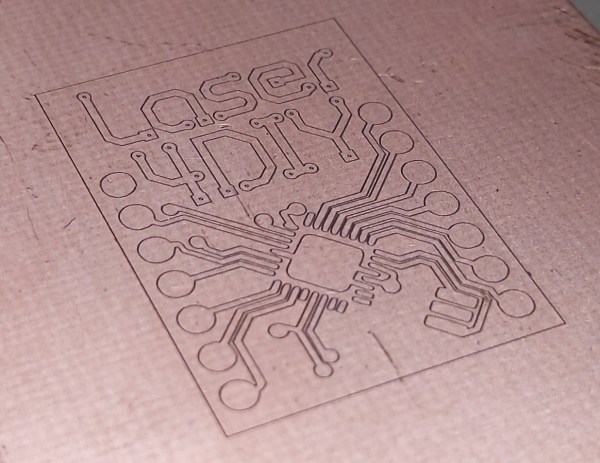
For those who wish to go beyond through-hole construction on perfboard for their circuit boards, a printed circuit board is usually the next step up. Allowing for things like surface-mount components, multi-layer boards, and a wider array of parts, they are much more versatile but do have a slight downside in that they are a little bit harder to make. There are lots of methods for producing them at home or makerspace, though, and although we’ve seen plenty of methods for their production like toner transfer, photoresist, and CNC milling, it’s also possible to make them using laser ablation, although you do need a special laser to get this job done.

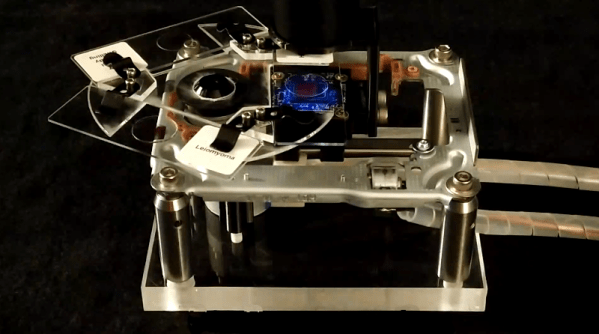
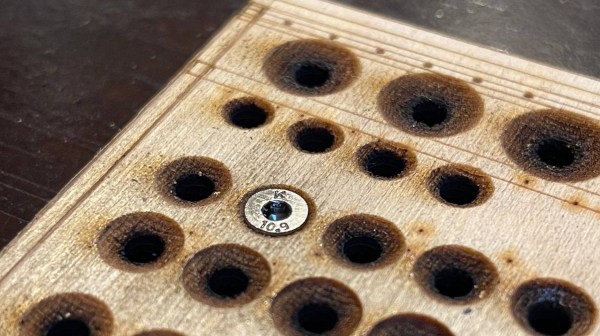
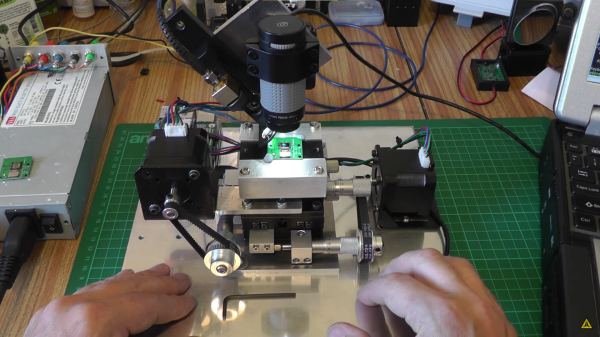
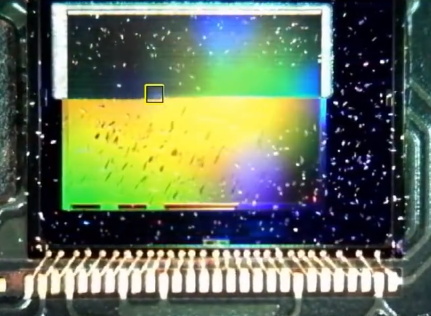
The problem with cutting copper is that it reflects infra-red, so a higher-wavelength blue green laser is used instead. And because you want to ablate the copper, but not melt the surrounding areas or cut straight through the board, extremely short, high-power pulses are the way to go. Here, the [Munich Fab Lab] is using 9 kW pulses of around 30 microseconds each.  With these specifications the copper is ablated from the surface of the board allowing for fine details in the range of about 20 µm, which is fine enough for just about any circuit board. The design of the laser head itself is worth a look.

Aside from the laser, the rest is standard CNC machine fodder, but with an emphasis on safety that’s appropriate for a tool in a shared workspace, and the whole project is published under an open license and offers an affordable solution for larger-scale PCB production with extremely fine resolution and without the need for any amounts of chemicals for the more common PCB production methods. There is a lot more information available on the project’s webpage and its GitHub page as well.

Of course, there are other methods of producing PCBs by laser if you happen to have a 20 W fiber laser just kicking around.

Spray-On Keyboard Is As Light As It Gets

We’ve all seen those ‘nothing’ keyboards, where the keys themselves are not much more than projected lasers, and users are asked to ritually beat their poor fingertips into the table — which has little give and even less clack. Well, a team at the Korea Advanced Institute of Science and Technology have come up with a way to eschew the keyboard altogether.

Essentially, the user wears a thin, breathable mesh of silver nanowires coated in gold, which is then embedded in a polyurethane coating. The mesh is sprayed onto their forearms and hands on the spot, and the mesh terminates in a small enclosure that is also worn on the skin. This contains a small Bluetooth unit that beams data back to a computer, a machine, or potentially another user wearing the same type of unit.

As the skin stretches and contorts, the mesh senses small electrical changes within. These changes become meaningful with applied AI, which maps the changes to specific gestures and manual tasks. To do this, the team started with teaching it to distinguish between patterns from tasks like typing on a phone, typing on a regular keyboard, and then holding and interacting with six differently-shaped simple objects.

The team isn’t stopping there — they plan to try capturing a larger range of motion by using the nanomesh on multiple fingers. In addition to facilitating communication between humans and machines, this could leave a huge fingerprint on gaming and VR.

Blu-ray player with 3 slides on a disk

Blu-ray Microscope Uses Blood Cells As Lenses

When you think of high-throughput ptychographic cytometry (wait, you do think about high throughput ptychographic cytometry, right?) does it bring to mind something you can hack together from an old Blu-ray player, an Arduino, and, er, some blood? Apparently so for [Shaowei Jiang] and some of his buddies in this ACS Sensors Article.

For those of you who haven’t had a paper accepted by the American Chemical Society, we should probably clarify things a bit. Ptychography is a computational method of microscopic imaging, and cytometry has to do with measuring the characteristics of cells. Obviously.

This is definitely what science looks like.

Anyway, if you shoot a laser through a sample, it diffracts. If you then move the sample slightly, the diffraction pattern shifts. If you capture the diffraction pattern in each position with a CCD sensor, you can reconstruct the shape of the sample using breathtaking amounts of math.

One hitch – the CCD sensor needs a bunch of tiny lenses, and by tiny we mean six to eight microns. Red blood cells are just that size, and they’re lens shaped. So the researcher puts a drop of their own blood on the surface of the CCD and covers it with a bit of polyvinyl film, leaving a bit of CCD bloodless for reference. There’s an absolutely wild video of it in action here.

Don’t have a Blu-ray player handy? We’ve recently covered a promising attempt at building a homebrew scanning electron microscope which might be more your speed. It doesn’t even require any bodily fluids.

[Thanks jhart99]

Quick Hacks: Countersinking Screw Heads With 3D Laser Engraving

Here’s a fun quick hack from [Timo Birnschein] about using the 3D laser engraving (or ‘stamp’ engraving) mode of certain laser cutter toolchains to create a handy countersink shape in a laser-cut and engraved workpiece. Since [Timo] uses a small laser cutter to cut out and mark project boards for their electronics builds, having an extra messy, manual countersinking operation with subsequent clean-up seemed like a waste of time and effort, if the cutter could be persuaded to do it for them.

Designs are prepared in Inkscape, with an additional ‘3D engraving’ layer holding the extra processing step. [Timo] used the Inkscape feathering tools to create a circular grayscale gradient, leading up to the central cut hole (cuts are in a separate layer) which was then fed into Visicut in order to drive the GRBL-based machine, However, you could do it with practically any toolchain that supports laser power control during a rastering operation. The results look perfectly fine for regions of the workpiece not on show, at least, but if you’re only interested in the idea from a functional point of view, then we reckon this is another great trick for the big bag of laser hacks.

There have been a great number of laser cutting hacks here over the years, since these tools are so darn useful. The snapmaker machine can be a 3D printer, a CNC cutter and a laser cutter all in one, albeit not too perfect at any of those tasks, but the idea is nice. If you own a perfectly fine 3D printer, but fancy a spot of laser engraving (and you have good eye protection!), then you could just strap a 5W blue diode laser to it and get your fix.

Hackaday Podcast 161: Laser Lithography, Centurion Hard Drive, And Mad BGA Soldering

Join Hackaday Editor-in-Chief Elliot Williams and Staff Writer Dan Maloney for an audio tour of the week’s top stories and best hacks. We’ll look at squeezing the most out of a coin cell, taking the first steps towards DIY MEMS fabrication, and seeing if there’s any chance that an 80’s-vintage minicomputer might ride again. How small is too small when it comes to chip packages? We’ll find out, and discover the new spectator sport of microsoldering while we’re at it. Find out what’s involved in getting a real dead-tree book published, and watch a hacker take revenge on a proprietary memory format — and a continuous glucose monitor, too.

Or Direct Download, like you’ve got something to prove!

Take a look at the links below if you want to follow along, and as always, tell us what you think about this episode in the comments!

Continue reading “Hackaday Podcast 161: Laser Lithography, Centurion Hard Drive, And Mad BGA Soldering”

Using A Laser To Blast Away A Bayer Array

A Bayer array, or Bayer filter, is what lets a digital camera take color photos. It’s an array of tiny color filters that sit on top of a camera’s CCD. The filter makes it so that each sub-pixel in the image sensor only sees red, green, or blue light. The Bayer filter is an elegant tool that gives us color digital photos, but what would you do if you wanted to remove one?

[Les Wright] has devised a way to remove the Bayer filter from the Raspberry Pi Camera. Along with filtering red, green, and blue light for their respective sensors, Bayer filters also greatly reduce the amount of UV and IR light that make it to the CCD sensor. [Les] uses the Raspberry Pi camera in his Pi-based Spectrometer, and he wants to remove the Bayer filter to improve and expand its sensitivity.

Of course, [Les] isn’t the first one to want to do this. Some have succeeded in physically scratching the filter off of the CCD, but because the Pi Camera has vital circuitry around the outside of the sensor, scratching the filter off would likely destroy the circuitry. Others have stripped it off using chemical means, so [Les] gave this a go and destroyed no small number of cameras in his attempt to strip the filter off with solvents like DMSO, brake fluid, and industrial paint stripper.

A look at the CCD, halfway through the process.

Inspired by techniques used in industry, [Les] eventually tried to use a several-kW nitrogen laser to burn off the filter (which seems appropriate given his experience with lasers). He built a rig that raster scans the laser across the sensor using stepper motors to drive micrometer bases. A USB microscope was included to allow progress to be monitored, and you can see a change in the sensor’s appearance as the filter is removed.

After blasting off the Bayer filter, [Les] plugged his improved camera into his home-built spectrometer and pointed it outside. The new camera gives the spectrometer much more uniform sensitivity and allows [Les] to see further into the IR and UV bands. The spectrometer can even detect the Fraunhofer lines—subtle dips in the sun’s spectrum from absorption by molecules in the atmosphere.

This is incredible for a DIY setup and instrument, and we can’t wait to see what [Les] does next to improve his measurements. If your spectrometry needs are more mass than visual, take a look at this home-built mass spectrometer. Home spectrometers aren’t just for examining light spectra—they can also be used to judge the ripeness of fruit!

Continue reading “Using A Laser To Blast Away A Bayer Array”

Cocktail Of Chemicals Makes This Blueprint Camera Unique

When you’re looking at blueprints today, chances are pretty good that what you’re seeing is anything but blue. Most building plans, diagrams of civil engineering projects, and even design documents for consumer products never even make it to paper, let alone get rendered in old-fashioned blue-and-white like large-format prints used to produced. And we think that’s a bit of a shame.

Luckily, [Brian Haidet] longs for those days as well, so much so that he built this large-format cyanotype camera to create photographs the old-fashioned way. Naturally, this is one of those projects where expectations must be properly scaled before starting; after all, there’s a reason we don’t go around taking pictures with paper soaked in a brew of toxic chemicals. Undaunted by the chemistry, [Brian] began his journey with simple contact prints, with Sharpie-marked transparency film masking the photosensitive paper, made from potassium ferricyanide, ammonium dichromate, and ammonium iron (III) oxalate, from the UV rays of the sun. The reaction creates the deep, rich pigment Prussian Blue, contrasting nicely with the white paper once the unexposed solution is washed away.

[Brian] wanted to go beyond simple contact prints, though, and the ridiculously large camera seen in the video below is the result. It’s just a more-or-less-lightproof box with a lens on one end and a sheet of sensitized paper at the other. The effective ISO of the “film” is incredibly slow, leading to problematically long exposure times. Coupled with the distortion caused by the lens, the images are — well, let’s just say unique. They’ve got a ghostly quality for sure, and there’s a lot to be said for that Prussian Blue color.

We’ve seen cyanotype chemistry used with UV lasers before, and large-format cameras using the collodion process. And we wonder if [Brian]’s long-exposure process might be better suited to solargraphy.

Continue reading “Cocktail Of Chemicals Makes This Blueprint Camera Unique”