An Adapter To Solve Your ESP-01 Breadboard Woes

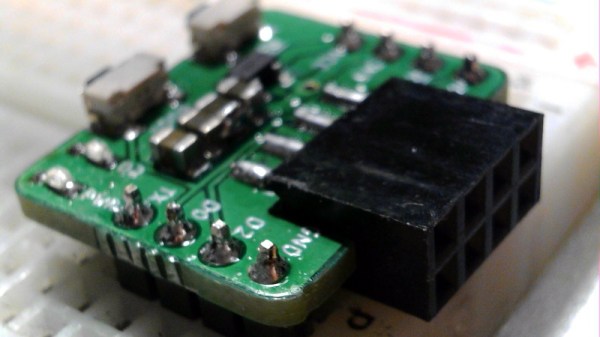
The ESP-01 launched the ESP8266 revolution back in 2014, and while today you’re far more likely to see somebody use a later version of the chip in a Wemos or NodeMCU development board, there are still tasks the original chip is well suited for. Unfortunately, they can be tricky to use while prototyping because they aren’t very breadboard friendly, but this adapter developed by [Miguel Reis] can help.

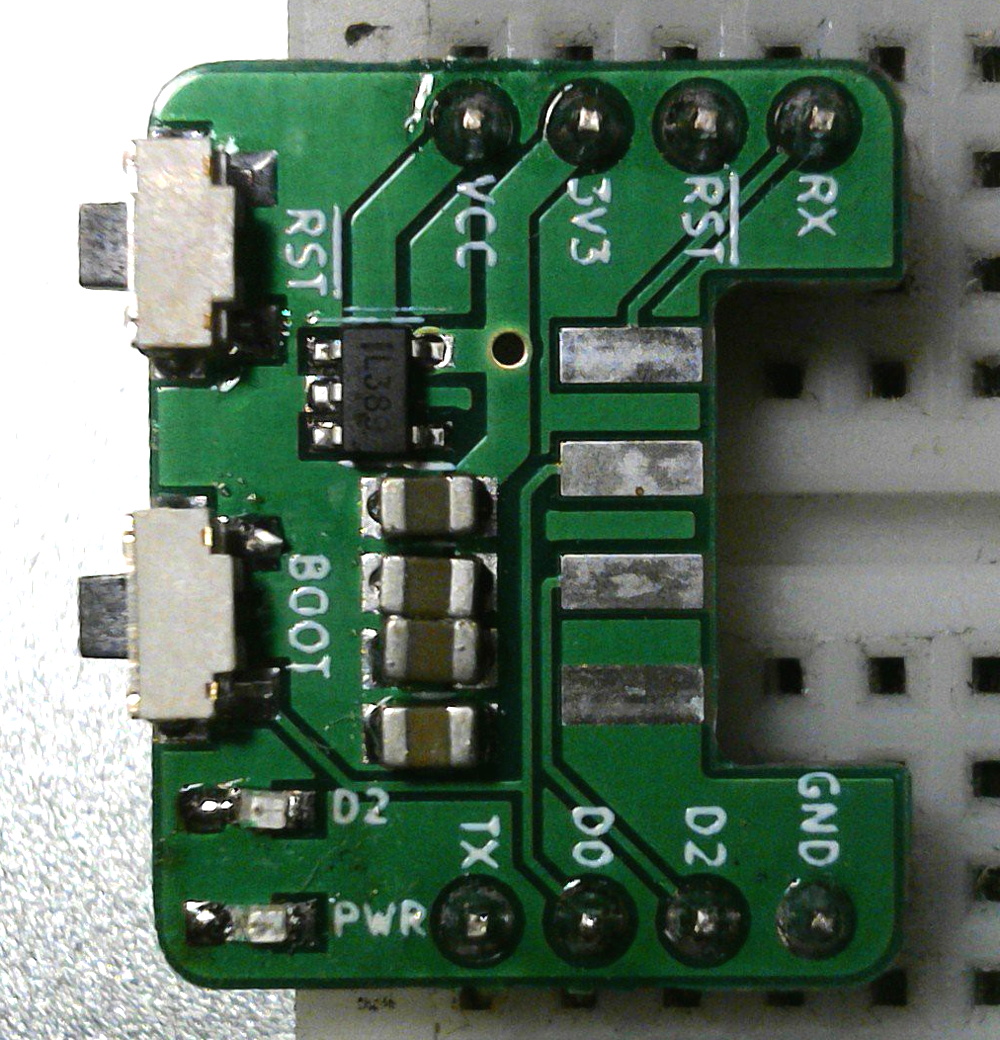
Of course, the main issue is the somewhat unusual pinout of the ESP-01. Since it was designed as a daughter board to plug into another device, the header is too tight to fit into a breadboard. The adapter that [Miguel] has come up with widens that up to the point you can put it down the centerline of your breadboard and have plenty of real estate around it.

The second issue is that the ESP-01 is a 3.3 V device, which can be annoying if everything else in the circuit is running on 5 V. To get around this, the adapter includes an SPX3819 regulator and enough capacitors that the somewhat temperamental chip gets the steady low-voltage supply it needs to be happy.

[Miguel] has released the schematics and board files so you can spin up your own copy of the adapter, but they’re also available for around $3 USD from his Tindie store.

Designing Printed Adapters For Power Tool Batteries

Unless you’re particularly fond of having multiple types of batteries and chargers, you’d do well to make sure all your portable power tools are made by the same company. But what do you do if there’s a tool you really need, but your brand of choice doesn’t offer their own version of it? Rather than having to buy into a whole new tool ecosystem, you might be able to design your own battery adapter.

Note the locking tab that’s been printed separately.

As [Chris Chimienti] explains in the video after the break, the first thing you’ve got to do (beyond making sure the voltages match) is take some careful measurements of the connectors on your batteries and tools. His goal was to adapt a Milwaukee M12 battery to Makita CXT tool, so if you happen to have that same combination of hardware you can just use his STLs. Otherwise, you’ll be spending some quality time with a pair of calipers and a notepad.

Once the interfaces have been designed and printed, they are wired together and mounted to opposite ends of the center support column. In theory you’d be done at this point, but as [Chris] points out, there’s a bit more to it than just wiring up the positive and negative terminals. Many tools use thermistors in the batteries for thermal protection purposes, and when the tool doesn’t get a reading from the sensor, it will likely refuse to work.

His solution to the problem is to “hotwire” the thermistor lead on the battery connector with a standard resistor of the appropriate value. This will get the tool spinning, but obviously there’s no more thermal protection. For most homeowner DIY projects this probably won’t cause a problem, but if you’re a pro who’s really pushing their tools to the limit, this project might not be for you.

Of course, this isn’t the first time we’ve seen somebody adapt batteries from different brands to work on their tools. It’s a common enough problem once you start building up a workshop, although you could always avoid it by building all your own tools.

Continue reading “Designing Printed Adapters For Power Tool Batteries”

Faking Your Way To USB-C Support On Laptops Without It

Is there no end to the dongle problem? We thought the issue was with all of those non-USB-C devices that want to play nicely with the new Macbooks that only have USB-C ports. But what about all those USB-C devices that want to work with legacy equipment?

Now some would say just grab yourself a USB-C to USB-A cable and be done with it. But that defeats the purpose of USB-C which is One-Cable-To-Rule-Them-All[1]. [Marcel Varallo] decided to keep his 2011 Macbook free of dongles and adapter cables by soldering a USB-C port onto a USB 2.0 footprint on the motherboard.

How is that even possible? The trick is to start with a USB-C to USB 3 adapter. This vintage of Macbook doesn’t have USB 3, but the spec for that protocol maintains backwards compatibility with USB 2. [Marcel] walks through the process of freeing the adapter from its case, slicing off the all-important C portion of it, and locating the proper signals to route to the existing USB port on his motherboard.

[1] Oh my what a statement! As we’ve seen with the Raspberry Pi USB-C debacle, there are actually several different types of USB-C cables which all look pretty much the same on the outside, apart from the cryptic icons molded into the cases of the connectors. But on the bright side, you can plug either end in either orientation so it has that going for it.

Classic Macintosh Gets An IPad Infusion

We know the classic Mac fans in the audience won’t be happy about this one, but the final results are simply too clean to ignore. With a laser-cut adapter and a little custom wiring, [Travis DeRose] has come up with a repeatable way to modernize a Compact Macintosh (Plus, SE, etc) by swapping out all of its internals for an iPad mini.

He goes over the whole process in the video after the break, while being kind enough to spare our sensitive eyes from having to see the Mac’s enclosure stripped of its original electronics. We’ll just pretend hope that the computer was so damaged that repair simply wasn’t an option.

Anyway, with a hollow Mac in your possession, you can install the adapter that allows the iPad to get bolted in place of the original CRT monitor. You won’t be able to hit the Home button anymore, but otherwise it’s a very nice fit.

Those with some first hand iPad experience might be wondering how you wake the tablet up once the Mac is all buttoned back up. That’s an excellent question, and one that [Travis] wrestled with for awhile. In the end he came up with a very clever solution: he cuts into a charging cable and splices in a normally-closed momentary push button. Pushing the button essentially “unplugs” the iPad for a second, which just so happens to wake it up. It’s an elegant solution that keeps you from having to make any modifications to that expensive piece of Apple hardware.

If there’s one thing we’re not thrilled with, it’s the empty holes left behind where the ports, switches, and floppy drive were removed. As we’ve seen in the past, you can simply cut the ports off of a motherboard and glue them in place to make one of these conversions look a little more convincing. If you’re going to do it, might as well go all the way.

Continue reading “Classic Macintosh Gets An IPad Infusion”

Use Your Earbud’s Media Controls On Your Laptop With This Useful Dongle

[David] sends in his very nicely designed “Thumpware Media Controller” that lets your mobile phone headphones control the media playback on your PC.

We realize that some PCs have support for the extra pins on cellphone earbuds, but at least some of us have experienced the frustration (however small) of habitually reaching up to touch the media controls on our earbuds only to hear the forlorn click of an inactive-button. This solves that, assuming you’re still holding on to those 3.5mm headphones, at least.

The media controls are intercepted by a PIC16 and a small board splits and interprets the signals into a male 3.5mm and a USB port. What really impressed us is the professional-looking design and enclosure. A lot of care was taken to plan out the wiring, assembly, and strain relief. Overall it’s a pleasure to look at.

All the files are available, so with a bit of soldering, hacking, and careful sanding someone could put together a professional looking dongle for their own set-up.

You Need A Cyberdeck, This Board Will Help

In 1984, William Gibson’s novel Neuromancer helped kick off the cyberpunk genre that many hackers have been delighting in ever since. Years before Tim Berners-Lee created the World Wide Web, Gibson was imagining worldwide computer networks and omnipresent artificial intelligence. One of his most famous fictional creations is the cyberdeck, a powerful mobile computer that allowed its users to navigate the global net; though today we might just call them smartphones.

While we might have the functional equivalent in our pockets, hackers like [Tillo] have been working on building cyberdecks that look a bit more in line with what fans of Neuromancer imagined the hardware would be like. His project is hardly the first, but what’s particularly notable here is that he’s trying to make it easier for others to follow in his footsteps.

There’s a trend to base DIY cyberdecks on 1980s vintage computer hardware, with the logic being that it would be closer to what Gibson had in mind at the time. Equally important, the brutalist angular designs of some of those early computers not only look a lot cooler than anything we’ve got today, but offer cavernous internal volume ripe for a modern hardware transfusion. Often powered by the Raspberry Pi, featuring a relatively small LCD, and packed full of rechargeable batteries, these cyberdecks make mobile what was once anchored to a desk and television.

[Tillo] based his cyberdeck on what’s left of a Commodore C64c, reusing the original keyboard for that vintage feel. That meant he needed to adapt the keyboard to something the Raspberry Pi could understand, for which some commercially available options existed already. But why not take the idea farther for those looking to create their own C64c cyberdecks?

He’s currently working on a new PCB specifically designed for retrofitting one of these classic machines with a Raspberry Pi. The board includes niceties like a USB hub, and should fill out some of those gaping holes left in the case once you remove the original electronics. [Tillo] has already sent the first version of his open source board out for fabrication, so hopefully we’ll get an update soon.

In the meantime, you might want to check out some of the other fantastic cyberdeck builds we’ve covered over the last couple of years.

Micro-Sized Flex For Commercial Quality Bodging

We love watching the creativity unleashed by the democratization of once-exotic technologies. The casualness by which one can order a cheap, small run of PCBs has unlocked a flood of fine pitch components and projects which look commercial quality even with a total build volume of one. Now the once mythical flex PCB has been falling from it’s stratospheric pricing and with OSHPark’s offering it feels like we’re at the inflection point. [qwertymodo] leveraged this by creating a beautifully twisted flex to add link port support to the Super Game Boy

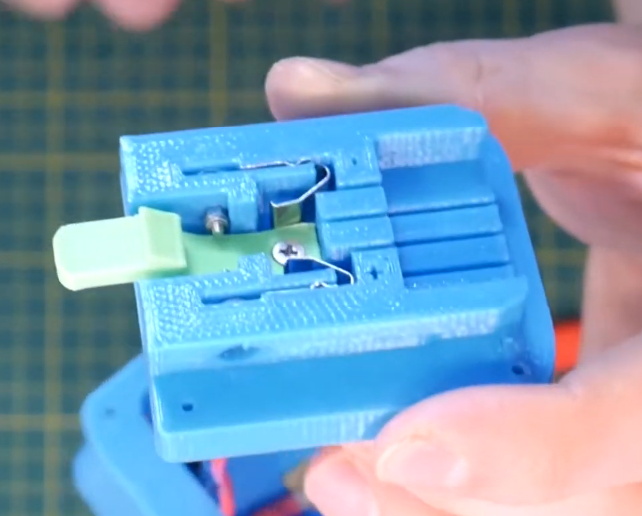
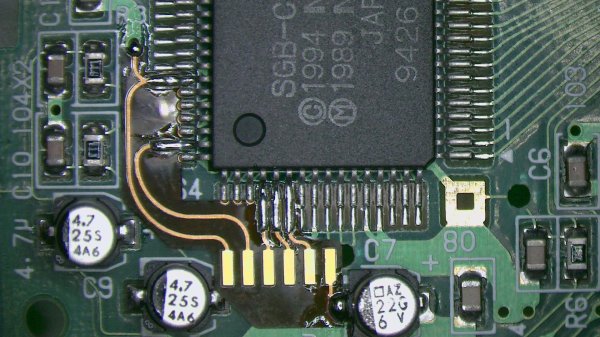
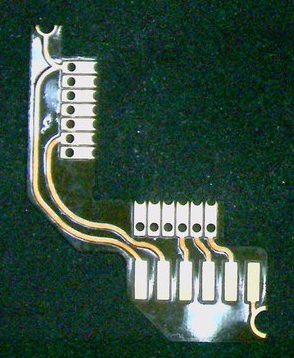
In the mid-90’s Nintendo released the Super Game Boy, a cartridge for the SNES which allowed you to play Game Boy games on the big screen. Each cartridge was in fact an entire Game Boy with the appropriate hardware to present it in a way the host console could interface with, but missing some of the hardware a standalone Game Boy would include like a link port to connect it to another system. This mod fixes this limitation by bridging the correct pins out from the CPU to a breakout board which includes the link port connector. For general background on what’s going on here, check out [Brian]’s article from April describing a different mod [qwertymodo] executed to the same system.

What’s fascinating is how elegant the mod is. Using a a flex here to create a completely custom, strangely shaped, one-of-a-kind adapter for this random IC, in low volume is an awesome example of the use of advanced manufacturing techniques to take our hacks to the next level. It reminds us a little of the method [Scotty] used to add the headphone jack to his iPhone 7 back in 2017. At the time that seemed like a technology only available to hackers who could speak a little Mandarin and lived in Shenzhen.

Detailed information on this hack is a little spread out. There is slightly more info in these tweets, and if you have a Super Game Boy crying out for a link port the adapter flexes are sometimes available here. Look beyond the break to see what the mod originally looked like sans-flex.

Continue reading “Micro-Sized Flex For Commercial Quality Bodging”