Rebuilding A $700k Refrigerator

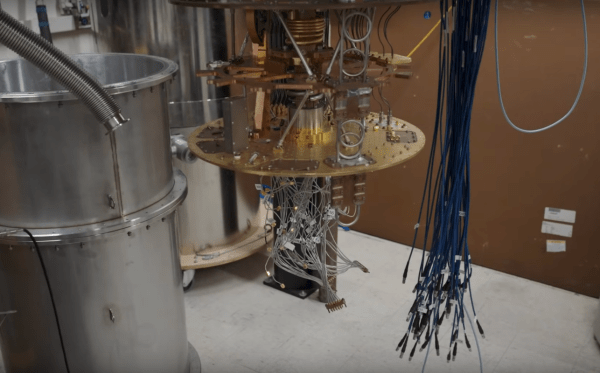
When cleaning out basements, garages, or storage units we often come across things long forgotten. Old clothes, toys, maybe a piece of exercise equipment, or even an old piece of furniture. [Ben] and [Hugh] were in a similar situation cleaning out an unused lab at the University of California Santa Barbara and happened upon an old refrigerator. This wasn’t just a mini fridge left over from a college dorm, though. This is a dilution refrigerator which is capable of cooling things down to near absolute zero, and these scientists are trying to get it to its former working state.

The pair are hoping to restore the equipment to perform dark matter experiments, but the refrigerator hasn’t been in use since about 2016 (and doesn’t have an instruction manual), which is a long time for a piece of specialty scientific equipment to be collecting dust. The first step is to remove wiring and clean it of all the grime it’s accumulated in the last decade. After that, the pair work to reassemble the layers of insulation around the main cooling plate and then hook up a vacuum pump to the device which also needed some repair work.

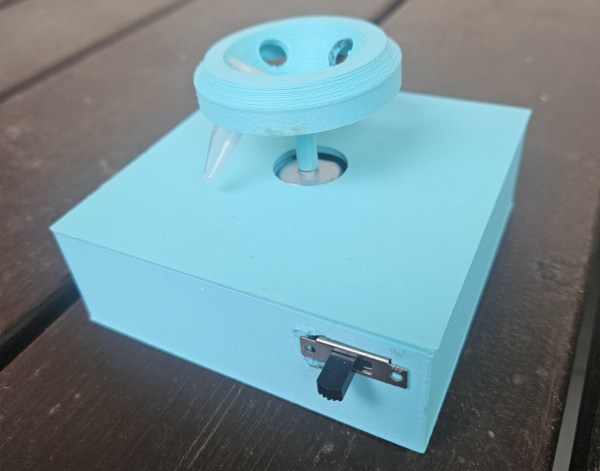
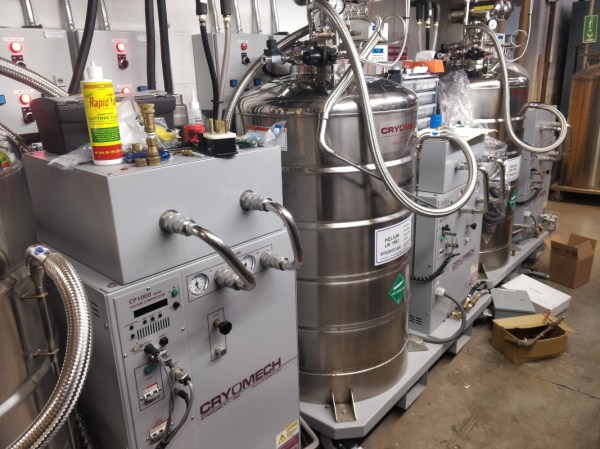
The critical step at this point is to evacuate the refrigerant lines so they can be filled with expensive Helium-3 and Helium-4. The problem is that there’s still some of this valuable gas in the lines that needs to be recovered, but the risk is that if any air gets into the cold section of the refrigerator it will freeze and clog the whole system. After chasing some other electrical and vacuum gremlins and discovering a manual from a similar refrigerator, they eventually get it up and running and ready for new scientific experiments. While most of us won’t discover a fridge like this cleaning out our attics, this refrigerator powered by rubber bands is a little more accessible to the rest of us.

Continue reading “Rebuilding A $700k Refrigerator”

High School Student Builds Inexpensive Centrifuge

Having a chemistry lab fully stocked with all necessary equipment is the dream of students, teachers, and professors alike, but a lot of that equipment can be prohibitively expensive. Even in universities, labs are often left using old or worn-out equipment due to cost. So one could imagine that in high schools this is even a more pronounced problem. High school student [Aidan Miller] has solved this problem with at least one piece of lab equipment, bringing the cost for a centrifuge down to around $10 USD.

Part of the savings is due to the fact that [Aidan] has put together a smaller sized centrifuge, known as a micro-centrifuge. The function is still the same though, spinning samples to separate them out the constituents by weight. The 3D printed base of the centrifuge houses a switch and 9 V battery and also holds a small motor which spins the rotor. The rotor itself is also 3D printed, and needed to be a very specific shape to ensure that it could hold the samples properly at high RPM and maintain reasonable balance while spinning.

As a project it’s fairly simple and straightforward to build, but the more impressive thing here is how much it brings down the cost of lab equipment especially for high school labs that might otherwise struggle for funding. Of course it requires the use of a 3D printer but the costs of those have been coming down significantly as well, especially for things like this portable 3D printer which was also built by a high school student.

Continue reading “High School Student Builds Inexpensive Centrifuge”

Helium Recovery System Saves Costs

Helium is the most common element in the universe besides hydrogen, but despite this universal abundance it is surprisingly difficult to come across on Earth. Part of the problem is that it is non-renewable, so unless it is specifically captured during mining its low density means that it simply escapes the atmosphere. For that reason [Meow] maintains a helium recovery system for a lab which is detailed in this build.

The purpose of the system is to supply a refrigerant to other projects in the lab. Liquid helium is around 4 Kelvin and is useful across a wide variety of lab tests, but it is extremely expensive to come across. [Meow]’s recovery system is given gaseous helium recovered from these tests, and the equipment turns it back into extremely cold liquid helium in a closed-cycle process. The post outlines the system as a whole plus goes over some troubleshooting that they recently had to do, and shows off a lot of the specialized tools needed as well.

Low-weight gasses like these can be particularly difficult to deal with as well because their small atomic size means they can escape fittings, plumbing, and equipment quite easily compared to other gasses. As a result, this equipment is very specialized and worth a look. For a less lab-based helium project, though, head on over to this helium-filled guitar instead.

Upgrading A Classic Function Generator

If you need an oscilloscope, function generator, or other piece of kit for your electronics workbench, there are plenty of modern options. Dropping $4,000 for a modern oscilloscope is nice if you have the money, but if you’d rather put it to better use there are great options that don’t cost a fortune. There are some addons that can turn a smartphone into an oscilloscope but one of the best values out there are older pieces of equipment from the 80s that still work great. You can even upgrade them with some more modern features too, like [NFM] did with this vintage function generator.

This function generator is an HP3325A and it is several decades old, so some work was needed just to restore it to original working condition. The cooling fan and capacitors all needed to be replaced, as well as a few other odds and ends. From there [NFM] set about adding one of the two optional upgrades available for this device, the high voltage output. This allows the function generator to output 40 volts peak-to-peak at 40 milliamps. While he did have an original version from HP, he actually had a self-made design produced that matches the function of the original.

Even if you don’t have this specific function generator, this guide goes into great details about the functioning of older equipment like this. Most of the parts are replaceable and upgrades aren’t completely out of the question like some modern equipment, and with the right care and maintenance these pieces of equipment could last for decades longer.

Continue reading “Upgrading A Classic Function Generator”

A Guide To Shop Equipment Nobody Thinks About: Clean, Organized, And Efficient

When planning out a workspace at home, the job, or at a makerspace, we all tend to focus on the fun parts. Where the equipment will go, how you’ll power it, what kind of lights you’ll get, etc, etc. It’s easy to devote all your attention to these high-level concepts, which often means the little details end up getting addressed on the fly. If they get addressed at all.

But whether we want to admit it or not, an organized workspace tends to be more efficient. That’s why [Eric Weinhoffer] has put together a blog post that details all those mundane details that we tend to forget about. It’s not exactly exciting stuff, and contains precisely as much discussion about whiteboards as you probably expect. That said, it’s thorough and clearly comes from folks who’ve had more than a little experience with setting up an efficient shop.

So what’s the first thing most shops don’t have enough of? Labels. [Eric] says you should put labels on everything, parts bins, tools, machines, if it’s something you need to keep track of, then stick a label on it. This does mean you’ll likely have to buy a label maker, but hey, at least that means a new gadget to play with.

Of course, those self-stick labels don’t work on everything. That’s why [Eric] always has a few rolls of masking tape (such as the blue 3M tape you might be using on your 3D printer bed) and some quality markers on hand to make arbitrary labels. Apparently there’s even such a thing as dry erase tape, which lets you throw an impromptu writing surface anywhere you want.

[Eric] also suggests investing in some collapsible cardboard bins which can be broken down and stored flat when not in use. If you’ve got the kind of situation where you’ll always have more or less the same amount of stuff then plastic is probably your best bet, but in a more dynamic environment, being able to collapse the bins when they aren’t in use is a capability we never even realized we needed until now.

As you might imagine, the post also touches on the issues of keeping sufficient safety gear available. We’ve talked about this in the past, but it’s one of those things that really can’t be said too many times. Having a wall of meticulously labeled storage bins is great, but it’s going to be the last thing on your mind if you manage to get an eye full of superglue.

Spectrometer Is Inexpensive And Capable

We know the effect of passing white light through a prism and seeing the color spectrum that comes out of the other side. It will not be noticeable to the naked eye, but that rainbow does not fully span the range of [Roy G. Biv]. There are narrowly absent colors which blur together, and those missing portions are a fingerprint of the matter the white light is passing through or bouncing off. Those with a keen eye will recognize that we are talking about spectrophotometry which is identifying those fingerprints and determining what is being observed and how much is under observation. The device which does this is called a spectrometer and [Justin Atkin] invites us along for his build. Video can also be seen below.

Along with the build, we learn how spectrophotometry works, starting with how photons are generated and why gaps appear in the color spectrum. It is all about electrons, which some of our seasoned spectrometer users already know. The build uses a wooden NanoDrop style case cut on a laser engraver. It needs some improvements which are mentioned and shown in the video so you will want to have some aluminum tape on hand. The rest of the bill of materials is covered including “Black 2.0” which claims to be the “mattest, flattest, black acrylic paint.” Maybe that will come in handy for other optical projects. It might be wise to buy first surface mirrors cut to size, but you can always make bespoke mirrors with carefully chosen tools.

Continue reading “Spectrometer Is Inexpensive And Capable”

Network Analysers: The Electrical Kind

Instrumentation has progressed by leaps and bounds in the last few years, however, the fundamental analysis techniques that are the foundation of modern-day equipment remain the same. A network analyzer is an instrument that allows us to characterize RF networks such as filters, mixers, antennas and even new materials for microwave electronics such as ceramic capacitors and resonators in the gigahertz range. In this write-up, I discuss network analyzers in brief and how the DIY movement has helped bring down the cost of such devices. I will also share some existing projects that may help you build your own along with some use cases where a network analyzer may be employed. Let’s dive right in.

Network Analysis Fundamentals

As a conceptual model, think of light hitting a lens and most of it going through but part of it getting reflected back.

The same applies to an electrical/RF network where the RF energy that is launched into the device may be attenuated a bit, transmitted to an extent and some of it reflected back. This analysis gives us an attenuation coefficient and a reflection coefficient which explains the behavior of the device under test (DUT).

Of course, this may not be enough and we may also require information about the phase relationship between the signals. Such instruments are termed Vector Network Analysers and are helpful in measuring the scattering parameters or S-Parameters of a DUT.

The scattering matrix links the incident waves a1, a2 to the outgoing waves b1, b2 according to the following linear equation: \begin{bmatrix} b_1 \\ b_2 \end{bmatrix} = \begin{bmatrix} S_{11} & S_{12} \\ S_{21} & S_{22} \end{bmatrix} * \begin{bmatrix} a_1 \\ a_2 \end{bmatrix} .

The equation shows that the S-parameters are expressed as the matrix S, where and denote the output and input port numbers of the DUT.

This completely characterizes a network for attenuation, reflection as well as insertion loss. S-Parameters are explained more in details in Electromagnetic Field Theory and Transmission Line Theory but suffice to say that these measurements will be used to deduce the properties of the DUT and generate a mathematical model for the same.

General Architecture

As mentioned previously, a simple network analyzer would be a signal generator connected and a spectrum analyzer combined to work together. The signal generator would be configured to output a signal of a known frequency and the spectrum analyzer would be used to detect the signal at the other end. Then the frequency would be changed to another and the process repeats such that the system sweeps a range of frequencies and the output can be tabulated or plotted on a graph. In order to get reflected power, a microwave component such as a magic-T or directional couplers, however, all of this is usually inbuilt into modern-day VNAs.
Continue reading “Network Analysers: The Electrical Kind”