Useful Build Tips For Making LED Panel Frames

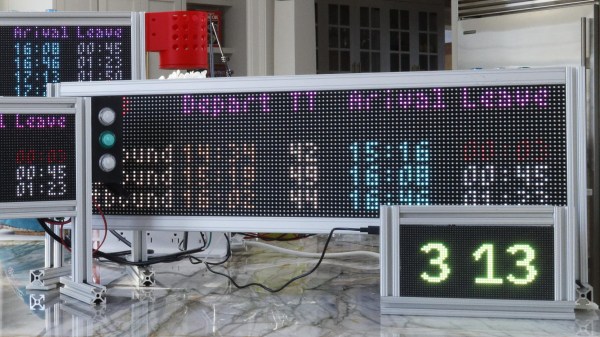
[NotLikeALeafOnTheWind] has created many LED-based display projects, and shares his method for making attractive LED panel frames and mounts. At first glance it may look as though slapping a rectangle of aluminum extrusion around a display is all it takes, there is also the mounting and management of wiring, power supply, and possibly a Raspberry Pi to deal with. The process of building an attractive frame also has a few hidden gotchas that can be avoided with a bit of careful planning.
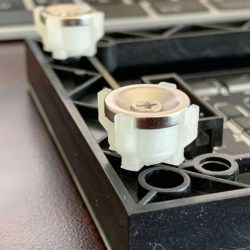
Magnetic feet on the LED panels makes mounting much easier and more flexible.

Here is one tip that will resonate with some readers: don’t rely on specified dimensions of parts; measure the actual parts yourself. There can be small differences between what a data sheet says to expect, and the dimensions of the actual part in one’s hands. It may not be much, but it can be the difference between an ideal fit, and something that looks like a bit of a hack job.

[NotLikeALeafOnTheWind] provides some basic frame layouts, and suggests using two- or three-channel extrusions to provide a flat bezel around the display edge if desired. Mounting the LED panel itself is done with magnetic feet and providing a length of steel bar to which the display can attach. This can provide a flush mount while avoiding the whole issue of screw-mounting the display panels themselves, or sliding them into channels. For mounting all the other hardware, a piece of DIN rail and some 3D-printed parts takes care of that.

The result looks slick and sturdy, and some of the tips are sure to be useful even if the whole process isn’t applied. We like the way the basic design scales and is flexible about the thickness and size of the LED panels themselves, making it a promising way to accommodate perfectly functional oddball panels that end up in the trash.

E-Paper Display Shows Movies Very, Very Slowly

How much would you enjoy a movie that took months to finish? We suppose it would very much depend on the film; the current batch of films from the Star Wars franchise are quite long enough as they are, thanks very much. But a film like Casablanca or 2001: A Space Odyssey might be a very different experience when played on this ultra-slow-motion e-paper movie player.

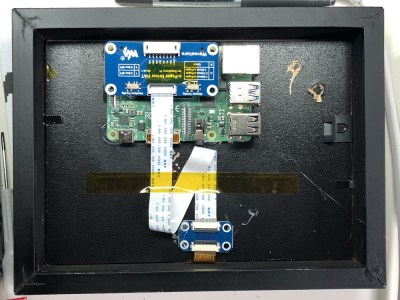
The idea of displaying a single frame of a movie up for hours rather than milliseconds has captivated [Tom Whitwell] since he saw [Bryan Boyer]’s take on the concept. The hardware [Tom] used is similar: a Raspberry Pi, an SD card hat with a 64 GB card for the movies, and a Waveshare e-paper display, all of which fits nicely in an IKEA picture frame.

[Tom]’s software is a bit different, though; a Python program uses FFmpeg to fetch and dither frames from a movie at a configurable rate, to customize the viewing experience a little more than the original. Showing one frame every two minutes and then skipping four frames, it has taken him more than two months to watch Psycho. He reports that the shower scene was over in a day and a half — almost as much time as it took to film — while the scene showing [Marion Crane] driving through the desert took weeks to finish. We always wondered why [Hitch] spent so much time on that scene.

With the proper films loaded, we can see this being an interesting way to really study the structure and flow of a good film. It’s also a good way to cut your teeth on e-paper displays, which we’ve seen pop up in everything from weather stations to Linux terminals.

Wrecked Civic Rides Again As Cozy Camp Trailer

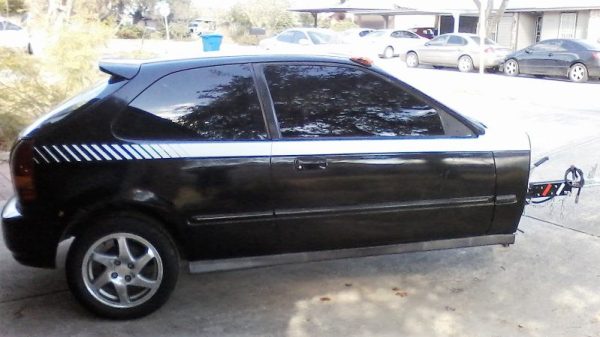
It may not be the typical fare that we like to feature, but you can’t say this one isn’t a hack. It’s a camp trailer fashioned from the back half of a wrecked Honda Civic, and it’s a pretty unique project.

We don’t know about other parts of the world, but a common “rural American engineering” project is to turn the bed and rear axle of an old pickup truck into a trailer. [monickingbird]’s hacked Civic is similar to these builds, but with much more refinement. Taking advantage of the intact and already appointed passenger compartment of a 1997 Civic that had a really bad day, [monickingbird] started by lopping off as much of the front end as possible. Front fenders, the engine, transmission, and the remains of the front suspension and axle all fell victim to grinder, drill, and air chisel. Once everything in front of the firewall was amputated, the problem of making the trailer safely towable was tackled. Unlike the aforementioned pickup trailers, the Civic lacks a separate frame, so [monickingbird] had to devise a way to persuade the original unibody frame members to accept his custom trailer tongue assembly. Once roadworthy, the aesthetics were tackled — replacing the original interior with a sleeping area, installing electrics and sound, and a nice paint job. Other drivers may think the towing vehicle is being seriously tailgated, but it seems like a comfy and classy way to camp.

Now that the trailer is on the road, what to do with all those spare Civic parts? Sure, there’s eBay, but how about a nice PC case featuring a dashboard gauge cluster?

Cryptocurrency Mining Post-Bitcoin

While the age of using your own computer to mine Bitcoin during spare CPU cycles has long passed, average folks aren’t entirely shut out of the cryptocurrency game yet. Luckily, Bitcoin isn’t the only game in town anymore, and with GPUs coming down in price it’s possible to build a mining rig for other currencies like Etherium.

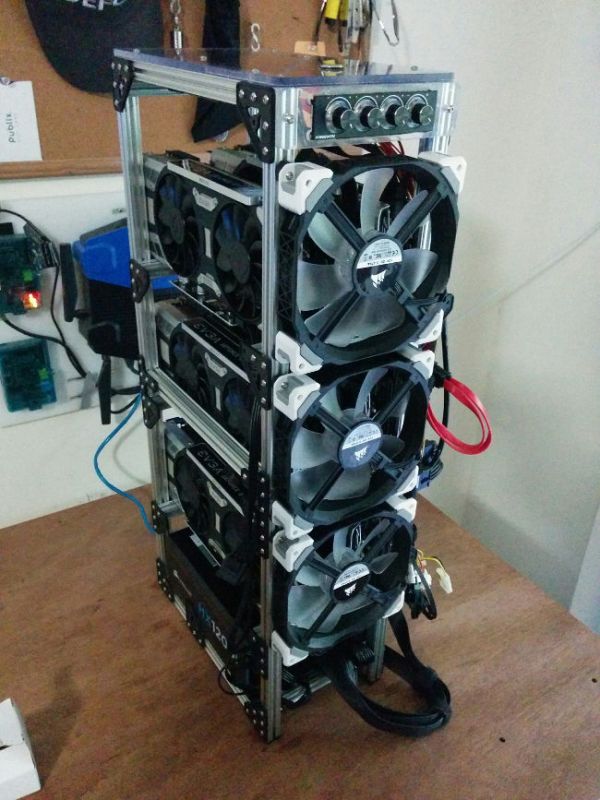
[Chris]’s build starts with some extruded aluminum and a handful of GPUs. He wanted to build something that didn’t take up too much space in the small apartment. Once the main computer was installed, each GPU was installed upwards in the rack, with each set having its own dedicated fan. After installing a fan controller and some plexiglass the rig was up and running, although [Chris] did have to finagle the software a little bit to get all of the GPUs to work properly.

While this build did use some tools that might only be available at a makerspace, like a mill and a 3D printer, the hardware is still within reason with someone with a little cash burning a hole in their pockets. And, if Etherium keeps going up in value like it has been since the summer, it might pay for itself eventually, providing that your electric utility doesn’t charge too much for power.

And if you missed it, we just ran a feature on Etherium.  Check it out.

Daily Prophet Is A Magic Newspaper! (Kinda)

A few gadgets around the house make for excellent display and conversation pieces, but when an artifact from the wizarding world finds its way into a muggle household? Well, you frame it.

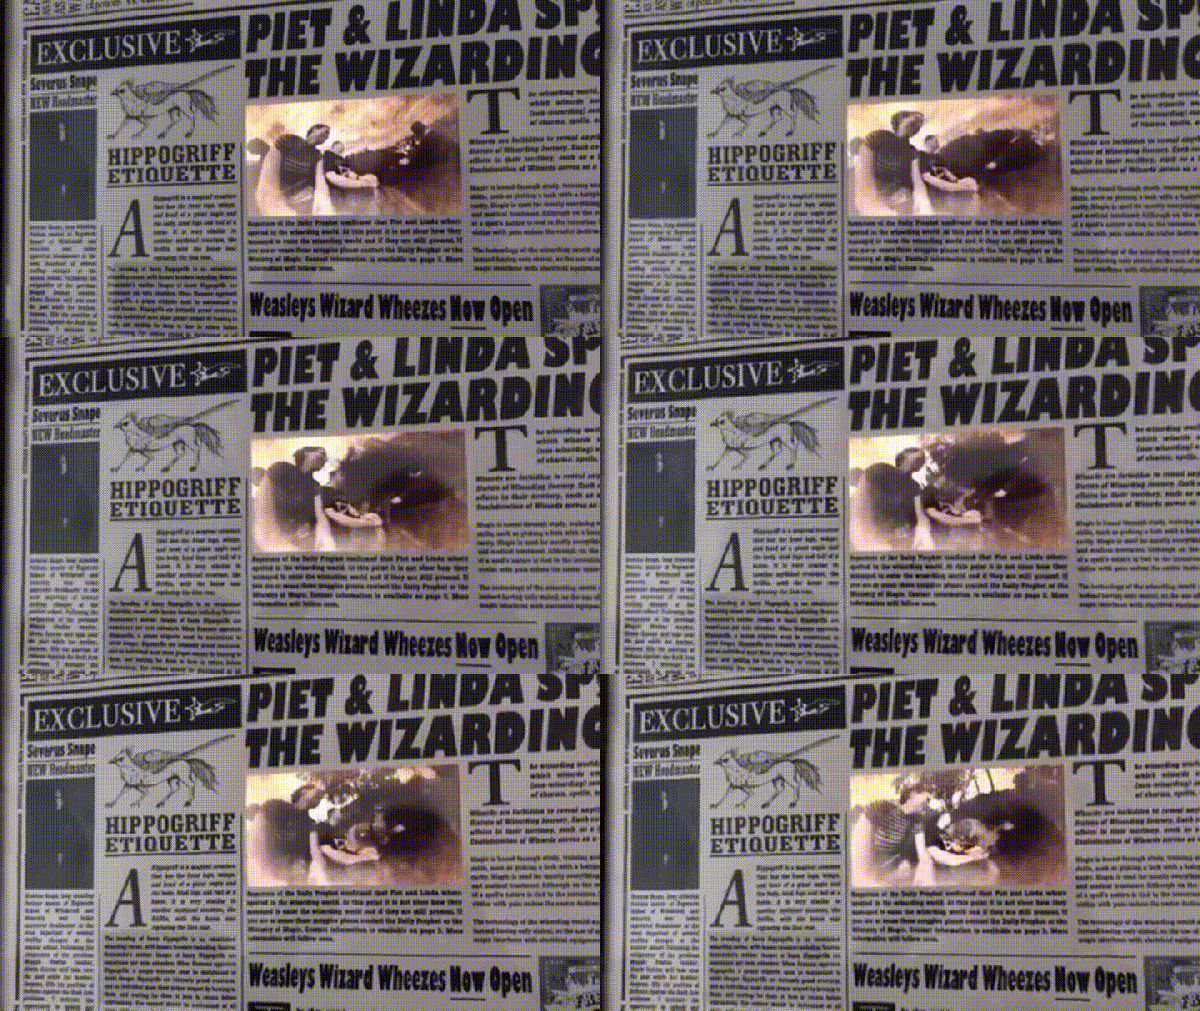
Okay so in reality this is really an animated picture frame with a Harry Potter theme — specifically the fabulous newspaper, The Daily Prophet, from the series of novels and movies. Conceived by [Piet Rullins Jr.] after a trip to ‘The Wizarding World of Harry Potter’ attraction at Orlando Studios, he wanted an inventive way to showcase the videos of his vacation.

The seven inch display is secured inside a poster frame, surrounded by a customized front page of the wizard paper — weaving the tale of his trip — and controlled by a Raspberry Pi 3. When someone approaches, an Adafruit infrared sensor detects the movement and activates the display, shutting it off after five minutes in order to preserve the screen and save power. A USB power cable hidden inside the cabinet it’s mounted on adds to the effect of a magical periodical. What, did you think it was powered by magic too?

Continue reading “Daily Prophet Is A Magic Newspaper! (Kinda)”

See The Weather At A Glance With This WiFi Wall Mounted Display

Whether you’re lodged in an apartment with a poor view of the sky like [Becky Stern] or are looking for an at-a-glance report of the current weather, you might consider this minimalist weather display instead of checking your computer or your phone every time you’re headed out the door.

The first order of business was to set up her Feather Huzzah ESP8266 module. [Becky] started with a blink test to ensure it was working properly. Once that was out of the way, she moved on to installing a few libraries. Temperature data fetched by an IFTTT feed is displayed on a seven-segment display, while additional feeds separately retrieve information for each basic weather type: sunny, overcast, rain, snow.

All it took to create the sleek display effect was a few pieces of cardboard inside a shadow box frame, a sheet of paper as a diffuser, and twelve Neopixel RGB LEDs hidden inside. Trimming and securing everything in place as well as notching out the back of the frame for the power cable finished the assembly. Check out the build video after the break.

Continue reading “See The Weather At A Glance With This WiFi Wall Mounted Display”

Light Rider: A Lightweight 3D Printed Electric Motorcycle!

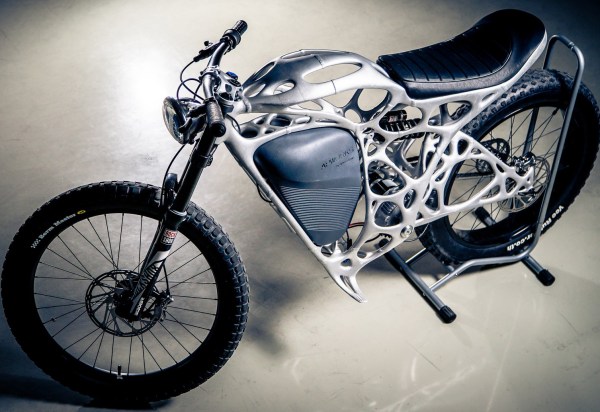
It sounds like the name of a vehicle in some sci-fi tale, but that fiction is only a short leap from reality. Light Rider is, in fact, an electric motorcycle with a 3D printed frame that resembles an organic structure more than a machine.

Designed by the Airbus subsidiary [APWorks], the largely hollow frame was devised to minimize weight while maintaining its integrity and facilitating the integration of cables within the structure. The frame is printed by melting a sea aluminium alloy particles together into thousands of layers 30 microns thick. Overall, Light Rider’s frame weighs 30% less than similar bikes; its net weight — including motor — barely tips the scales at 35 kg. Its 6 kW motor is capable of propelling its rider to 45 km/h in three seconds with a top speed of 80 km/h, and a range of approximately 60 km — not too shabby for a prototype!

Continue reading “Light Rider: A Lightweight 3D Printed Electric Motorcycle!”