Pressure Gauge Built In A Vacuum

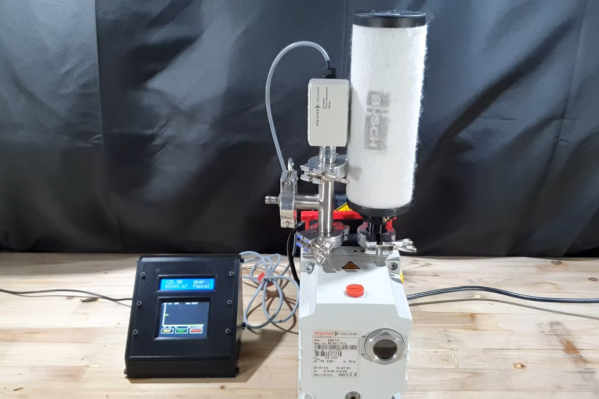
Necessity might be the mother of all invention, but we often find that inventions around here are just as often driven by expensive off-the-shelf parts and a lack of willingness to spend top dollar for them. More often than not, we find people building their own tools or parts as if these high prices are a challenge instead of simply shrugging and ordering them from a supplier. The latest in those accepting the challenge of building their own parts is [Advanced Tinkering] who needed a specialty pressure gauge for a vacuum chamber.

In this specific case, the sensor itself is not too highly priced but the controller for it was the deal-breaker, so with a trusty Arduino in hand a custom gauge was fashioned once the sensor was acquired. This one uses an external analog-to-digital converter to interface with the sensor with 16-bit resolution, along with some circuitry to bring the ~8 V output of the sensor down to the 5 V required by the microcontroller. [Advanced Tinkering] wanted a custom live readout as well, so a 3D printed enclosure was built that includes both an LCD readout of the pressure and a screen with a graph of the pressure over time.

For anyone else making sensitive pressure measurements in a vacuum chamber, [Advanced Tinkering] made the project code available on a GitHub page. It’s a great solution to an otherwise overpriced part provided you have the time to build something custom. If you’re looking for something a little less delicate, though, take a look at this no-battery pressure sensor meant to ride along on a bicycle wheel.

Continue reading “Pressure Gauge Built In A Vacuum”

Run UNIX On Microcontrollers With PDP-11 Emulator

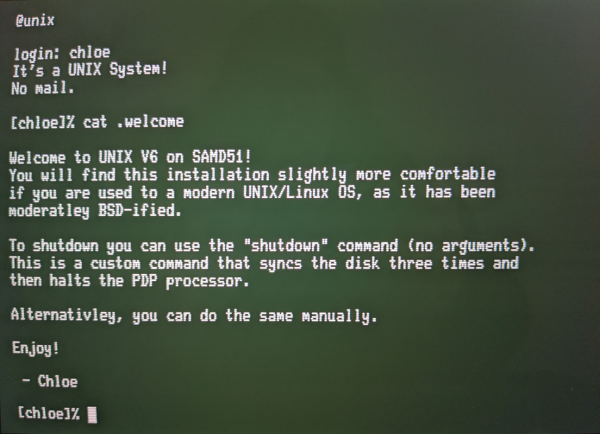
C and C++ are powerful tools, but not everyone has the patience (or enough semicolons) to use them all the time. For a lot of us, the preference is for something a little higher level than C. While Python is arguably more straightforward, sometimes the best choice is to work within a full-fledged operating system, even if it’s on a microcontroller. For that [Chloe Lunn] decided to port Unix to several popular microcontrollers.

This is an implementation of the PDP-11 minicomputer running a Unix-based operating system as  an emulator. The PDP-11 was a popular minicomputer platform from the ’70s until the early 90s, which influenced a lot of computer and operating system designs in its time. [Chloe]’s emulator runs on the SAMD51, SAMD21, Teensy 4.1, and any Arduino Mega and is also easily portable to any other microcontrollers. Right now it is able to boot and run Unix but is currently missing support for some interfaces and other hardware.

[Chloe] reports that performance on some of the less-capable microcontrollers is not great, but that it does run perfectly on the Teensy and the SAMD51. This isn’t the first time that someone has felt the need to port Unix to something small; we featured a build before which uses the same PDP-11 implementation on a 32-bit STM32 microcontroller.

Tiny Operating System For Tiny Computer

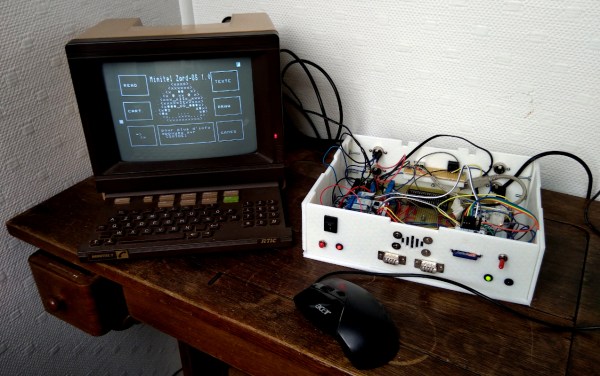
Before the World Wide Web became ubiquitous as the de facto way to access electronic information, there were many other ways of retrieving information online. One of the most successful of these was Minitel, a French videotex service that lasted from 1980 all the way until 2012. But just because the service has been deactivated doesn’t mean its hardware can’t be used for modern builds like this Arduino-based operating system. (Google Translate from French)

Called ZARDOS, the operating system is built to run on an Arduino MEGA although a smaller version is available for the Uno. The Arduino is connected by a serial cable to the Minitel terminal. It can take input from a keyboard and PS/2 mouse and displays video on the terminal screen with the same cable. There is functionality built-in for accessing data on a cartridge system based on SD cards which greatly expands the limited capabilities of the Atmel chip as well, and there is also support for a speaker and a Videotex printer.

Even though the build uses a modern microcontroller, it gives us flashbacks to pre-WWW days with its retro terminal. All of the code is available on the project site for anyone looking to build an Arduino-based operating system, although it will take a little bit of hardware hacking to build a Minitel terminal like this. Either way, it’s a great way to revive some antique French hardware similar to a build we’ve seen which converts one into a Linux terminal.

Thanks to [troisieme_type] for the tip!

Arduino Reduces Heating Costs

While almost everyone has a heater of some sort in their home, it’s fairly unlikely that the heat provided by a central heating system such as a furnace is distributed in an efficient way. There’s little reason to heat bedrooms during the day, or a kitchen during the night, but heating systems tend to heat whole living space regardless of the time of day or the amount of use. You can solve this problem, like most problems, with an Arduino.

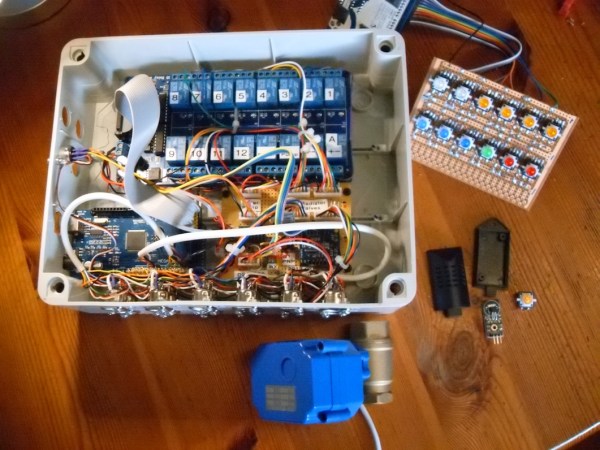
[Karl]’s build uses a series of radiator valves to control when each room gets heat from a boiler. The valves, with a temperature monitor at each valve, are tied into a central Arduino Mega using alarm wiring. By knowing the time of day and the desired temperature in each room, the Arduino can control when heat is applied to each room and when it is shut off, presumably making the entire system much more efficient. It also has control over the circulating pump and some of the other boiler equipment.

Presumably this type of system could be adapted to a system which uses a furnace and an air handler as well, although it is not quite as straightforward to close vents off using a central unit like this as it is to work with a boiler like [Karl] has. With careful design, though, it could be done. Besides replacing thermostats, we can’t say we’ve ever seen this done before.

Thanks to [SMS] for the tip!

Arduino And Pi Share Boardspace

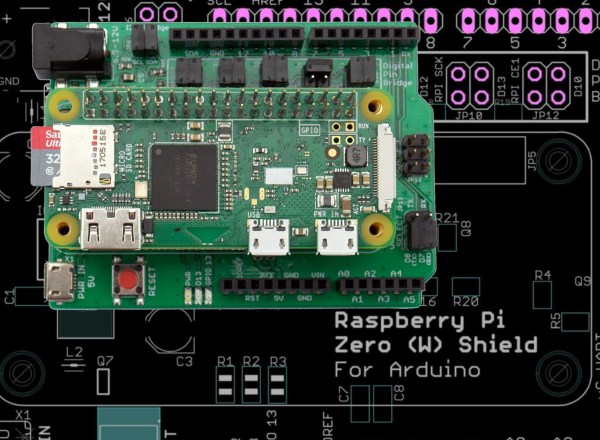
A Raspberry Pi Zero (W) and Arduino are very different animals, the prior has processing power and connectivity while the latter has some analog to digital converters (ADCs) and nearly real-time reactions. You can connect them to one another with a USB cable and for many projects that will happily wed the two. Beyond that, we can interface this odd couple entirely through serial, SPI, I2C, and logic-level signaling. How? Through a device by [cburgess] that is being called an Arduino shield that supports a Pi0 (W). Maybe it is a cape which interfaces with Arduino. The distinction may be moot since each board has a familiar footprint and both of them are found here.

Depending on how they are set up and programmed, one can take control over the other, or they could happily do their own thing and just exchange a little information. This board is like a marriage counselor between a Raspberry Pi and an Arduino. It provides the level-shifting so they don’t blow each other up and libraries so they can speak nicely to one another. If you want to dig a bit deeper into this one, design files and code examples are on available.

Perhaps we’ll report on this board at the heart of a pinball machine retrofit, a vintage vending machine restoration, or maybe a working prop replica from the retro bar in Back to the Future II.

Don’t Forget Your Mints When Using This Synthesizer

While synthesizers in the music world are incredibly common, they’re not all keyboard-based instruments as you might be imagining. Especially if you’re trying to get a specific feel or sound from a synthesizer in order to mimic a real instrument, there might be a better style synth that you can use. One of these types is the breath controller, a synthesizer specifically built to mimic the sound of wind instruments using the actual breath from a physical person. Available breath controllers can be pricey, though, so [Andrey] built his own.

To build the synthesizer, [Andrey] used a melodica hose and mouthpiece connected to a pressure sensor. He then built a condenser circuit on a custom Arduino shield and plugged it all into an Arduino Mega (although he notes that this is a bit of overkill). From there, the Arduino needed to be programmed to act as a MIDI device and to interact with the pressure sensor, and he was well on his way to a wind instrument synthesizer.

The beauty of synthesizers is not just in their ability to match the look and sound of existing instruments but to do things beyond the realm of traditional instruments as well, sometimes for a greatly reduced price point.

Continue reading “Don’t Forget Your Mints When Using This Synthesizer”

Stomping On Microcontrollers: Arduino Mega Guitar Effects Pedal

Effects pedals: for some an object of overwhelming addiction, but for many, an opportunity to hack. Anyone who plays guitar (or buys presents for someone who does) knows of the infinite choice of pedals available. There are so many pedals because nailing the tone you hear in your head is an addictive quest, an itch that must be scratched. Rising to meet this challenge are a generation of programmable pedals that can tweak effects in clever ways.

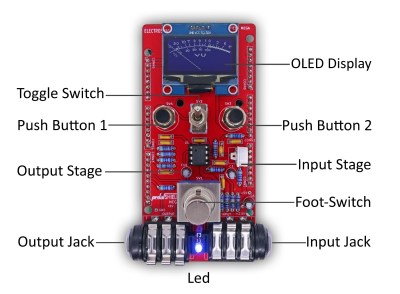
With this in mind, [ElectroSmash] are back at it with another open source offering: the pedalSHIELD MEGA. Aimed at musicians and hackers who want to learn more about audio, DSP and programming, this is an open-hardware/open-software shield for the Arduino MEGA which transforms it into an effects pedal.

The hardware consists of an analog input stage which amplifies and filters the incoming signal before passing it to the Arduino, as well as an output stage which does the DAC-ing from the Arduino’s PWM outputs, and some more filtering/amplifying. Two 8-bit PWM outputs are used simultaneously to make pseudo 16-bit resolution — a technique you can read more about in their handy forum guide.

The list of effects currently implemented covers all the basics you’d expect, and provides a good starting point for writing custom effects. Perhaps a library for some of the commonly used config/operations would be useful? Naturally, there are some computational constraints when using an Arduino for DSP, though it’s up to you whether this is a frustrating fact, or an opportunity to write some nicely optimised code.

[ElectroSmash] don’t just do pedals either: here’s their open source guitar amp.

Continue reading “Stomping On Microcontrollers: Arduino Mega Guitar Effects Pedal”