LED Matrix Hack Chat

Join us on Wednesday, June 9 at noon Pacific for the LED Matrix Hack Chat with Garrett Mace!

It’s pretty amazing how quickly light-emitting diodes went from physics lab curiosity to a mainstream commodity product made in the millions, if not billions. Everything about LEDs has gotten better, smaller, and cheaper over the years, going from an “any color you want as long as it’s red” phase to all the colors of the rainbow and beyond in a relatively short time. LEDs have worked their way into applications that just didn’t seem likely not that long ago, like architectural lighting, automotive applications, and even immense displays covering billboards, buildings, and sporting venues with multicolor, high-resolution displays.

It’s that latter application that seems to have provided a boon to electronics hobbyists, in the form of cheap and plentiful LED matrix modules. These are easily sourced at the usual places, and with their tightly packed pinpoints that can show any color at any intensity, they have a ton of fun and useful applications for the hacker. But how exactly do you put them to use? Usually the electronics end is pretty straightforward, but some of the math involved in figuring out how to address all these LEDs can be a little mind-bending.

To help us sort all this out, Garrett Mace will drop by the Hack Chat. You’ve probably seen Garrett’s cool LED matrix shades, which have gone through a ton of revisions and are a much-copied fashion accessory among the cool hackers. They look simple, but there are tricks to making them work right, and Garrett will share his secrets. Come with your questions on putting LED matrix modules to work, especially those odd-size modules and strange arrangements that defy simple Cartesian coordinates.

join-hack-chatOur Hack Chats are live community events in the Hackaday.io Hack Chat group messaging. This week we’ll be sitting down on Wednesday, June 9 at 12:00 PM Pacific time. If time zones have you tied up, we have a handy time zone converter.

Click that speech bubble to the right, and you’ll be taken directly to the Hack Chat group on Hackaday.io. You don’t have to wait until Wednesday; join whenever you want and you can see what the community is talking about.

8-Bit Computer Addresses LEDs

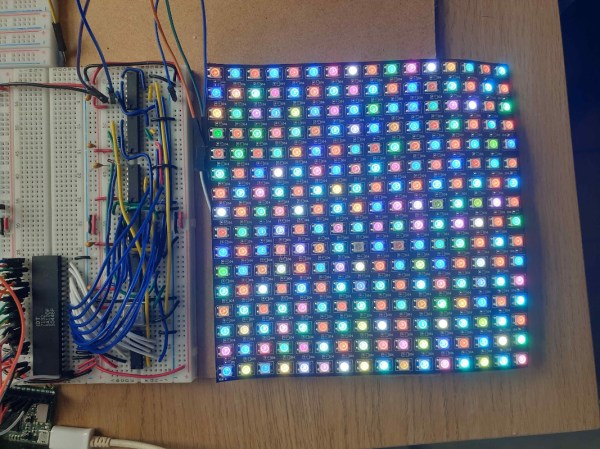
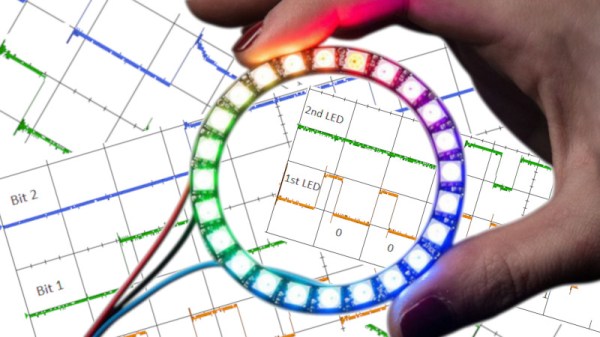
Homebrew 8-bit computers tend to have fairly limited displays, often one or more seven-segment displays and an array of LEDs to show the values of RAM or perhaps some other states of the computer. [Duncan] is in the process of building just such an computer, but wondered if there was a way to create a more visually appealing display while still keeping the computer true to its 8-bit roots. With some interesting TTL logic he was able to create this addressable RGB LED display to some remarkable results.

The array works by controlling the WS2812B LED strips with a specific timing cycle which was pioneered by [Tim] for a different project. [Tim] was able to perform this timing cycle with some simple Assembly code, which means that [Duncan] could convert that code into TTL gate logic relatively easily. Using 74LS02 NOR chips gets the job done as far as timing goes, and the pulses are then fed into a shift register and support logic which then creates the signal for the LED strips.

When everything is said and done, [Duncan] has a fully addressable 16×16 RGB LED array as a display for his 8-bit computer without violating any of his design principles and keeping everything to discrete TTL logic chips and a stick of RAM. It’s a unique method of display that might go along really well with any other homebrew computer like this one that’s also built with 74LS chips.

Clock-of-Clocks Adds Light-Pipe Hands For Beauty And Function

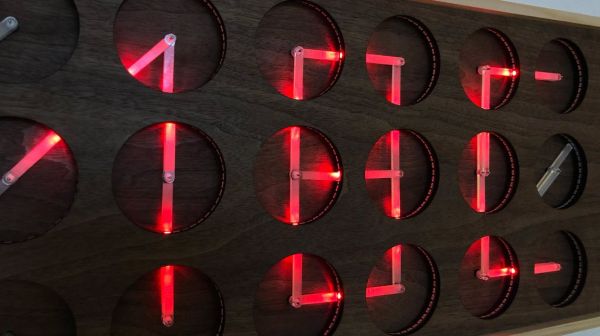
We’ve gotten used to seeing “meta clocks,” clocks that use an array of analog clock faces and piece together characters using the hands of the clocks. They’re very clever, and we always like to see them, especially when they come with detailed build instructions like this one does.

What’s also nice about [Erich Styger]’s “MetaClockClock” display is the twist on the original concept. Where most clock-of-clocks depend on the contrast between the hands and the faces of the analog movements, [Erich] added light to the mix. Hidden inside the bezel of each clock is a strip of RGB LEDs; coupled with the clear acrylic hands of the clock, which act as light pipes, each clock can contribute different shapes of different colors to the display. Each clock is built around a dual-shaft stepper motor of the kind used in car dashboard gauges; the motors each live on a custom PCB, while the LEDs are mounted on a ring-shaped PCB of their own. Twenty-four of the clocks are mounted in a very nice walnut panel, which works really well with the light-pipe hands. The video below shows just some of the display possibilities.

[Erich] has documented his build process in extreme detail, and has all the design files up on GitHub. We won’t say that recreating his build will be easy — there are a lot of skills needed here, from electronics to woodworking — but at least all the information is there. We think this is a beautiful upgrade to [Erich]’s earlier version, and we’d love to see more of these built.

Continue reading “Clock-of-Clocks Adds Light-Pipe Hands For Beauty And Function”

Inputs Of Interest: Marsback M1 Is A Portable Party Peripheral

Again, let’s just get this out of the way up front: I got this lovely little 75% keyboard for free from a gaming accessories company called Marsback. It’s a functioning prototype of a keyboard that they have up on Kickstarter as of March 2nd. It comes in three color schemes: dark, white and sakura pink, which is white and pink with cherry blossoms.

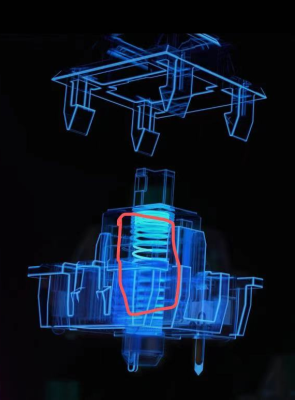
This illustration of the lube points is from my email string with Marsback.

Marsback found me through my personal website and contacted me directly to gauge my interest in this keyboard. I’ll admit that I wasn’t too excited about it until I scrolled further in the email and saw that they are producing their own switches in-house.

I think that’s a really interesting choice given that Cherry MX and other switches exist, and there so many Cherry MX clones out there already. Naturally, I had to investigate, so following a short review, I’ll take it apart.

Continue reading “Inputs Of Interest: Marsback M1 Is A Portable Party Peripheral”

Dynamic Map Of Italy On A PCB

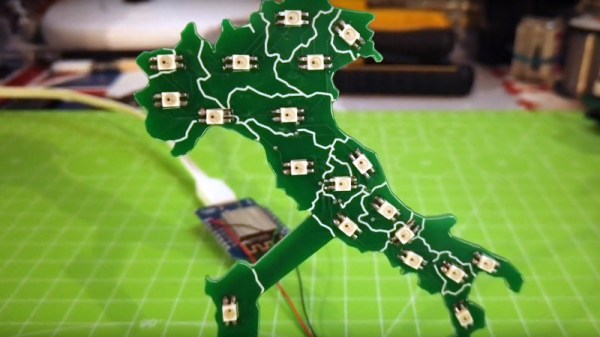
While most PCBs stick to tried-and-true methods of passing electrons through their layers of carefully-etched copper, modern construction methods allow for a large degree of customization of most aspects of these boards. From solder mask to number of layers, and even the shape of the board itself, everything is open for artistic license and experimentation now. [Luca] shows off some of these features with his PCB which acts as a live map of Italy.

The PCB is cut out in the shape of the famous boot, with an LED strategically placed in each of 20 regions in the country. This turns the PCB into a map with the RGB LEDs having the ability to be programmed to show any data that one might want. It’s powered by a Wemos D1 Mini (based on an ESP8266) which makes programming it straightforward. [Luca] has some sample programs which fetch live data from various sources, with it currently gathering daily COVID infection rates reported for each of the 20 regions.

The ability to turn a seemingly boring way to easily attach electronic parts together into a work of art without needing too much specialized equipment is a fantastic development in PCBs. We’ve seen them turned into full-color art installations with all the mask colors available, too, so the possibilities for interesting-looking (as well as interesting-behaving) circuits are really opening up.

Continue reading “Dynamic Map Of Italy On A PCB”

Running Way More LED Strips On A Raspberry Pi With DMA

The Raspberry Pi is a powerful computer in a compact form factor, making it highly useful for all manner of projects. However, it lacks some of the IO capabilities you might find on a common microcontroller. This is most apparent when it comes to running addressable LED strings. Normally, this is done using the Pi’s PWM or audio output, and is limited to just a couple of short strings. However, [Jeremy P Bentham] has found a way to leverage the Pi’s hardware to overcome these limitations.

The trick is using the Raspberry Pi’s little-documented Secondary Memory Interface. The SMI hardware allows the Pi to shift out data to 8 or 16 I/O pins in parallel using direct memory access (DMA), with fast and accurate timing. This makes it perfect for generating signals such as those used by WS2812B LEDs, also known as NeoPixels.

With [Jeremy]’s code and the right supporting hardware, it’s possible to run up to 16 LED strips of arbitrary length from the Raspberry Pi. [Jeremy] does a great job outlining how it all works, covering everything from the data format used by WS2812B LEDs to the way cache needs to be handled to avoid garbled data. The hack works on all Pis, from the humble Pi Zero to the powerful Pi 4. Thanks to using DMA, the technique doesn’t overload the CPU, so performance should be good across the board.

Of course, there are other ways to drive a ton of LEDs; we’ve seen 20,000 running on an ESP32, for example.

[Thanks to Petiepooo for the tip!]

The Most Expensive D20 You’ll See Today

Roll your negotiation skill, because this d20 is a hefty one. The Tweet is also below. We are charmed by [Greg Davill]’s twenty-sided LED contraption, but what do we call it? Is it a device? A sculpture? A die? Even though “d20” is right on his custom controller PCB, we don’t think this will grace the table at the next elf campaign since it is rather like taking a Rolls Royce to the grocery store. Our builder estimates the price tag at $350 USD and that includes twenty custom PCB light panels with their components, a controller board, one battery pack, and the 3D printed chassis that has to friction-fit the light faces.

Power and communication for all the panels rely on twenty ribbon cables daisy-chained throughout the printed scaffolding, which you can see in the picture above. [Greg] made a six-sided LED cube last year, and there are more details for it, but we suspect he learned his lesson about soldering thousands of lights by hand. There are one-hundred-twenty LEDs per panel, times twenty, that is over two-thousand blinkenlights. We don’t yet have specs on the controller, but last time he used a SAMD51 processor to support over three-thousand lights. We don’t know where he’ll go next, but we’re game if he wants to make a chandelier for Hackaday’s secret underground lair.

(Editor’s Note: If you were at Supercon last year, and you got to play with this thing in the flesh, it’s worth it!)

Continue reading “The Most Expensive D20 You’ll See Today”