Absolute 3D Tracking With EM Fields

[Chris Gunawardena] is still holding his breath on Valve and Facebook surprising everyone by open sourcing their top secret VR prototypes. They have some really clever ways to track the exact location and orientation of the big black box they want people to strap to their faces. Until then, though, he decided to take his own stab at the 3D tracking problems they had to solve. 

While they used light to perform the localization, he wanted to experiment with using electromagnetic fields to perform the same function. Every phone these days has a magnetometer built in. It’s used to figure out which way is up, but it can also measure the local strength of magnetic fields.

Unfortunately to get really good range on a magnetic field there’s a pesky problem involving inverse square laws. Some 9V batteries in series solved the high current DC voltage source problem and left him with magnetic field powerful enough to be detected almost ten centimeters away by his iPhone’s magnetometer.

As small as this range seems, it ended up being enough for his purposes. Using the existing math and a small iOS app he was able to perform rudimentary localization using EM fields. Pretty cool. He’s not done yet and hopes that a more sensitive magnetometer and a higher voltage power supply with let him achieve greater distances and accuracy in a future iteration.

An ESP8266 In Every Light Switch And Outlet

[Hristo Borisov] shows us his clever home automation project, a nicely packaged WiFi switchable wall socket. The ESP8266 has continuously proven itself to be a home automation panacea. Since the ESP8266 is practically a given at this point, the bragging rights have switched over to the skill with which the solution is implemented. By that metric, [Hristo]’s solution is pretty dang nice.

esp8266-smart-lightswitch
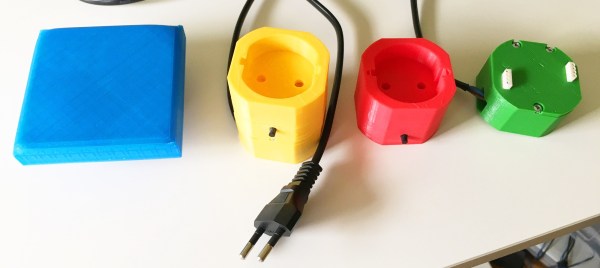
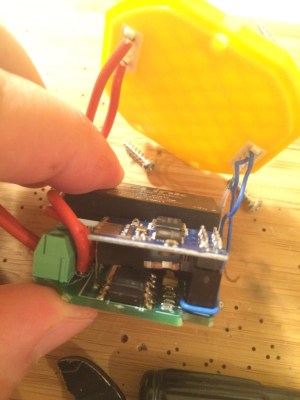
It’s all based around a simple board. An encapsulated power supply converts the 220V offered by the Bulgarian power authorities into two rails of 3.3V and 5V respectively. The 3.3V is used for an ESP8266 whose primary concern is the control of a triac and an RGB LED. The 5V is optional if the user decides to add a shield that needs it. That’s right, your light switches will now have their own shields that decide the complexity of the device.

The core module seen to the right contains the actual board. All it needs is AC on one side and something to switch or control on the other The enclosure is not shown (only the lid with the shield connectors is seen) but can be printed in a form factor that includes a cord to plug into an outlet, or with a metal flange to attach to an electrical box in the wall. The modules that mate with the core are also nicely packaged in a 3D printed shield. For example, to convert a lamp to wireless control, you use a shield with a power socket on it. To convert a light switch, use the control module that has a box flange and then any number of custom switch and display shields can be hot swapped on it.

It’s all controllable from command line, webpage, and even an iOS app; all of it is available on his GitHub. We’d love to hear your take on safety, modularity, and overall system design. We think [Hristo] has built a better light switch!

Hackaday Prize Entry: Mouse Controlled Microscope

You might imagine that all one should need to operate a microscope would be a good set of eyes. Unfortunately if you are an amputee that may not be the case. Veterinary lab work for example requires control of focus, as well as the ability to move the sample in both X and Y directions, and these are not tasks that can easily be performed simultaneously with only a single hand.

[ksk]’s solution to this problem is to use geared stepper motors and an Arduino Mega to allow the manual functions of the microscope to be controlled from a computer mouse or trackball. The motors are mounted on the microscope controls with a custom 3D-printed housing. A rotary selector on the control box containing the Arduino allows the user to select a slow or fast mode for fine or coarse adjustment.

It’s fair to say that this project is still a work in progress, we’re featuring it in our series of posts looking at Hackaday Prize entries. However judging by the progress reported so far it’s clear that this is a project with significant potential, and we can see the finished product could be of use to anyone operating the microscope.

We’ve featured one or two mouse controlled projects over the years, though not controlling microscopes. Here’s one mouse controlled robot arm, and we’ve covered another arm with a 3D mouse.

The Cicada: A Parasite Art Piece With Commitment Issues

How often do you think deeply about the products around you? How about those you owned five years ago? Ten? The Cicada — brainchild of [Daniel Kerris] — is an art piece that aims to have the observer reflect on consumer culture, buyer’s remorse, and wanting what we cannot have.

The Cicada consists of an ultrasonic sensor feeding data to a Raspberry pi which — calculating the distance of an approaching human — either speeds up or slows down a servo motor connected to a General Electric Walkman’s cassette speed potentiometer. Upon detecting someone approaching, The Cicada begins to loop the chorus of Celine Dion’s “I Will Always Love You”. As you move closer, the tape speed slows, and there is a transition from love at first sight to nightmarish drawl as the music slows.

Continue reading “The Cicada: A Parasite Art Piece With Commitment Issues”

Thermoelectric Dry Ice Generator Does Not Work (Yet)

[Pabr] is trying to make dry ice the hard way by building a thermoelectric dry ice generator. The project is a well planned round trip through thermodynamics and cryogenics with a hard landing on the icy grounds of trial and error.

[Pabr’s] four stage Peltier element on a heatsink.
While dry ice can be obtained with simpler methods, for example by venting gaseous CO2 from fire extinguishers and collecting the forming CO2 flakes, [pabr’s] method is indeed attractive as a more compact solid-state solution. The setup employs a four stage Peltier element, which uses four Peltier stages to achieve a high temperature differential.

With sufficient cooling on the high-temperature side of the element, it should be well capable of achieving temperatures below -78.5 °C, the sublimation temperature of CO2. So far, [pabr] has built three different setups to expose small amounts of CO2 to the cold of the Peltier element, hoping to observe the formation of little dry ice flakes.

Continue reading “Thermoelectric Dry Ice Generator Does Not Work (Yet)”

“Smilemachine” Helmet Is A Delightful Mixture Of Tech

smilemachine-square-anim
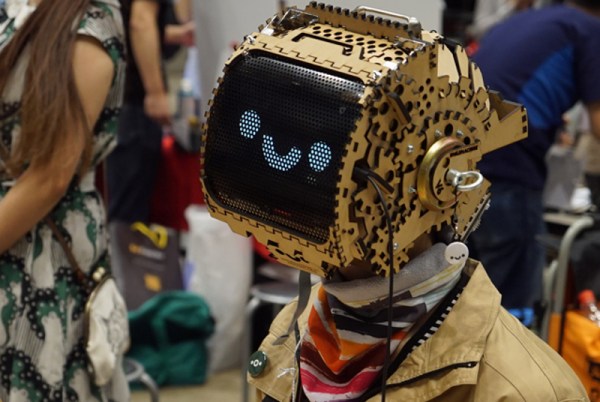
Part performance art and part social experiment, [mocymo]’s Smilemachine V6 helmet is as delightful as it is expressive. The helmet is made primarily from laser-cut MDF assembled around parts from a safety helmet. The display is an Android tablet with fine operation controlled by a Bluetooth mini keyboard, and the helmet cleverly makes use of the tablet’s ability to adjust the display to compensate for head tilt angle. It recently made an appearance at Maker Faire Tokyo, where the creator says the reception (especially by children) exceeded expectations.

There are several interesting things done with this device. One is the handheld controller, which is essentially a mini Bluetooth keyboard. To help allow fine control without needing to look down at the controller, the keyboard sits in a frame with some nuts and bolts used as highly tactile button extensions. By allowing the user to change the physical button layout (and setting up keyboard shortcuts on the device to match) the arrangement can be made more intuitive for the user. Some photos of this assembly are in the gallery after the break.

smilemachine-periscope
Geared mirrors to allow seeing out the front of the helmet.

Another interesting bit is that despite a tablet being right in front of your eyes, it is possible to see out the front of the helmet while wearing it. The solution is completely low-tech: two mirrors form a periscope whose angle can be adjusted by turning a knob on the side of the helmet.

Version 1 of the helmet was started back in 2012; this is version 6 and [mocymo] is already filling out a to-do list for refinements. The nose area is uncomfortable, the angle of periscope is slightly off and the gearing needs to be reworked, among other things. We can’t wait to see Version 7. Video and gallery are embedded below.

Continue reading ““Smilemachine” Helmet Is A Delightful Mixture Of Tech”

Amateur Radio Parity Act Passes US House

Most new houses are part of homeowners associations, covenants, or have other restrictions on the deed that dictate what color you can paint your house, the front door, or what type of mailbox is acceptable. For amateur radio operators, that means neighbors have the legal means to remove radio antennas, whether they’re unobtrusive 2 meter whips or gigantic moon bounce arrays. Antennas are ugly, HOAs claim, and drive down property values. Thousands of amateur radio operators have been silenced on the airwaves, simply because neighbors don’t like ugly antennas.

Now, this is about to change. The US House recently passed the Amateur Radio Parity Act (H.R. 1301) to amend the FCC’s Part 97 rules of amateur stations and private land-use restrictions.

The proposed amendment provides, ““Community associations should fairly administer private land-use regulations in the interest of their communities, while nevertheless permitting the installation and maintenance of effective outdoor Amateur Radio antennas.” This does not guarantee all antennas are allowed in communities governed by an HOA; the bill simply provides that antennas, ‘consistent with the aesthetic and physical characteristics of land and structures in community associations’ may be accommodated. While very few communities would allow a gigantic towers, C-band dishes, or 160 meters of coax strung up between trees, this bill will provide for small dipoles and inconspicuous antennae.

The full text of H.R. 1301 can be viewed on the ARRL site. The next step towards making this bill law is passage through the senate, and as always, visiting, calling, mailing, faxing, and emailing your senators (in that order) is the most effective way to make views heard.