Big Mouth Billy Bass Channels Miley Cyrus

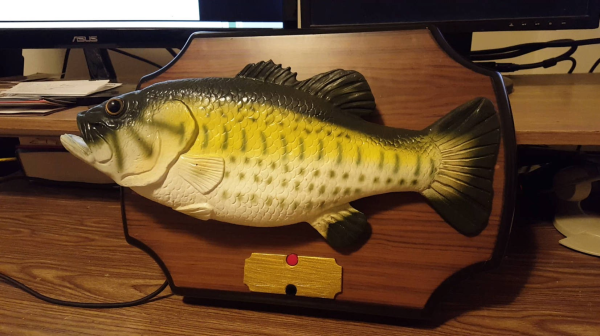
Here’s a Big Mouth Billy Bass with extra lip thanks to Alexa. If you’re not already familiar, Big Mouth Billy Bass is the shockingly popular singing animatronic fish designed to look like a trophy fish mounted to hang on your wall. In its stock condition, Billy uses a motion sensor to break into song whenever someone walks by. It’s limited to a few songs, unless you like to hack things — in which case it’s a bunch of usable parts wrapped in a humorous fish! Hackaday’s own [Bob Baddeley] combined the fish with an Amazon Echo Dot, connecting the two with an ATtiny84, and having Billy speak for Alexa.

[Bob] had a few problems to solve, including making Billy’s mouth move when there was audio playing, detecting when the Echo was on, moving the motors and playing the audio. After a bit of research and a lot of tweaking, a Fast Fourier Transform algorithm designed for the ATtiny was used was used to get the mouth moving. The mouth didn’t move a lot because of the design of the fish, and [Bob] modified it a bit, but there was only so much he could do.

It’s all well and good for the fish to lie there and sing, but [Bob] wanted Billy to move when Alexa was listening, and in order the detect this, the best bet was to watch for the Dot’s light to turn on. He tried a couple of things but decided that the simplest method was probably the best and ended up just taping a photo-resistor over the LED. Now Billy turns to look at you when you ask Alexa a question.

With a few modifications to the Dot’s enclosure, everything now fits inside the original mounting plaque and, after some holes were drilled so the Dot could hear, working. Billy has gone from just a few songs to an enormous entire library of songs to sing!

We’ve seen Alexa combined with Big Mouth Billy Bass before, but just demos and never an excellent guide like [Bob’s].  The nice thing about this guide is that once you’ve hacked the hardware, it’s a breeze to add new functionality using Alexa skills.

Continue reading “Big Mouth Billy Bass Channels Miley Cyrus”

Neon lamp ion motor

Neon Lamps Light Up Dim Ion Motor

Small pinwheel type ion motors fall into the category of a fun science experiment or something neat to do with high voltage, but Hackaday’s own [Manuel Rodriguez-Achach] added a neat twist that incorporates neon lamps.

Normally you’d take a straight wire and make 90 degree bends at either end but pointing in opposite directions, balance it on a pole, and apply a high voltage with a moderate amount of current. The wire starts spinning around at the top of the pole, provided the ends of the wire are sharp enough or the wire has a small enough diameter. If your power supply has ample current available then in the dark you’ll even see a purplish glow, called a corona, at the tips of the wire.

[Manuel] made just such an ion motor but his power supply didn’t have the necessary current to produce a strong enough corona to be visible to his camera. So he very cleverly soldered neon lamps on the two ends of the wires. One leg of each lamp goes to the wire and the other end of the lamp acts as the sharp point left out in the air for emitting the ions.

The voltage needed across each lamp in order to ignite it is that between the high voltage power supply’s output and the potential of the surrounding air. That air may be initially at ground potential but he also bends the other output terminal of the power supply such that its tip is also up in the air. This way it sprays ions of the opposite polarity into the surrounding air.

Either way, the neon lamps light up and the wire spins around on the pole. Now, even without a visible corona, his ion motor makes an awesome display. Check it out in the video below.

For more about these ion motors, sometimes called electric whirls, check our article about all sorts of interesting non-electromagnetic motors.

Continue reading “Neon Lamps Light Up Dim Ion Motor”

Mc Lighting Takes The Pain Out Of Blinking

If you want to blink a ton of WS2812-alike LED pixels over WiFi, the hardware side of things is easy enough: an LED strip, and ESP8266 unit, and a beefy enough power supply to feed them. But the software side — that’s where it can be a bit of a pain.

Enter Mc Lighting. It makes the software side of things idiot-proof. Flash the firmware onto the ESP8266, and you’ve got your choice of REST, WebSockets, or MQTT to get the data in. This means that it’ll work with Homekit, NodeRed, or an ESP-hosted web interface that you can pull up from any smartphone.

The web interface is particularly swell, and has a bunch of animations built in. (Check out the video below.) This means that you can solder some wires, flash an ESP, and your least computer-savvy relatives can be controlling the system in no time. And speaking of videos, Mc Lighting’s author [Tobias] has compiled a playlist of projects that use the library, also just below. The docs on GitHub are great, and also check out the wiki.

So what are you waiting for? Do you or your loved ones need some blink in your life? And while you’re ordering LED strips, get two. You’re going to want to build TWANG! as well.

Continue reading “Mc Lighting Takes The Pain Out Of Blinking”

When Stirling Engines Meet 3D Printers

Let’s face it, everybody wants to build a Stirling engine. They’re refined, and generally awesome. They’re also a rather involved fabrication project which is why you don’t see a lot of them around.

This doesn’t remove all of the complexity, but by following this example 3D printing a Sterling engine is just about half possible. This one uses 3D printing for the frame, mounting brackets, and flywheel. That wheel gets most of its mass from a set of metal nuts placed around the wheel. This simple proof-of-concept using a candle is shown off in the video after the break, where it also gets an upgrade to an integrated butane flame.

Stirling engines operate on heat, making printed plastic parts a no-go for some aspects of the build. But the non-printed parts in this design are some of the simplest we’ve seen, comprising a glass syringe, a glass cylinder, and silicone tubing to connect them both. The push-pull of the cylinder and syringe are alternating movements caused by heat of air from a candle flame, and natural cooling of the air as it moves away via the tubing.

We’d say this one falls just above mid-way on the excellence scale of these engines (and that’s great considering how approachable it is). On the elite side of things, here’s a 16-cylinder work of art. The other end of the scale may not look as beautiful, but there’s nothing that puts a bigger smile on our faces than clever builds using nothing but junk.

Continue reading “When Stirling Engines Meet 3D Printers”

Visualizing Blocked Ads With The Pi Sense Hat

Pi-hole is an open source project to turn that Raspberry Pi collecting dust in your drawer into a whole-network ad blocking appliance. Not only does it stop ads from showing up on all your computers and mobile devices, it also keeps track of how many ads have been blocked and where they came from. Just in case you wanted to know how many thousands of ads you missed out on for a given time period.

While the graphs generated in the web interface of Pi-hole are slick and all, what if you just wanted a quick way of visualizing how effective your ad blocking system is? You’re not so much worried about the exact figures, you just want something to blink away on your desk and let you know all those ads are going to /dev/null. Enter the aptly named pi-hole-visualizer by [simianAstronaut].

With the addition of a Sense HAT to the Pi running the ad blocking, this Python script will generate an animated visualization that can be easily interpreted even from a distance. The primary display is a bar graph of DNS traffic, where the height and color of each column indicate relative activity within a specific time interval. A second screen shows a spiral graph which gives you an idea of what percentage of ads were blocked before they hit your devices.

An array of options can be given to the script from the command line; controlling both physical aspects of the display like orientation and LED brightness, as well the configurable parameters for the different available visualizations. As an added bonus, there’s also support for using the Sense HAT joystick to switch between modes interactively.

Turning the Raspberry Pi into an ad blocking appliance goes back to the olden days of the original Raspberry Pi, but it’s interesting to see how advanced the concept has become. Just remember, not all ads are bad.

The Raspberry Pi 3B+ As An SDR – Without The SDR!

We’ve become used to software-defined radio as the future of radio experimentation, and many of us will have some form of SDR hardware. From the $10 RTL USB sticks through to all-singing, all-dancing models at eye-watering prices, there is an SDR for everyone.

What about the idea of an SDR without any external hardware? Instead of plugging something into your Raspberry Pi, how about using the Pi itself, unmodified? That’s just what the Nexmon SDR project has achieved, and this has been made possible through clever use of the on-board Broadcom 802.11ac WiFi chip. The result is a TX-capable SDR, albeit one only capable of operating within the 2.4 GHz and 5 GHz spectrum used by WiFi.

The team had previously worked extensively with the chipset in the Nexus 5 phone, and the SDR extension was first available on that platform. Then along came the Raspberry Pi 3 B+ with a similar-enough WiFi chipset that the same hack was portable to that platform, et voilá: WiFi SDR on a Pi 3 B+.

If you’ve not looked at the Pi 3 B+ we’d like to direct you to our review. If you don’t have a Nexus 5 kicking around, and you’d like to do some WiFi-band SDR work, it’s looking like an amazing deal.

Via rtl-sdr.com.