The Raspberry Pi Cluster From Outer Space

We see a lot of weird and esoteric stuff here at Hackaday, but even by our standards, Bell Lab’s Plan 9 operating system is an oddball. Named after the science fiction film Plan 9 from Outer Space, it was designed to extend the UNIX “everything is a file” mentality to the network. It envisioned a future where utilizing the resources of another computer would be as easy as copying a file. But as desktop computers got more powerful the idea seemed less appealing, and ultimately traditional operating systems won out. Of course, that doesn’t mean you still can’t play around with it.

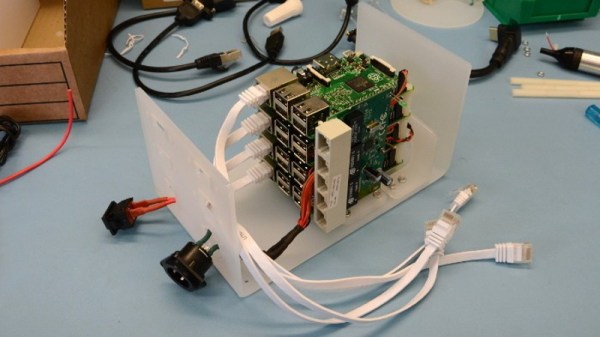
Logically to make use of a distributed operating system you really need something to distribute it on, but as [Andrew Back] shows, today that’s not nearly the challenge it would have been back then. Using the Raspberry Pi, he builds a four-node Plan 9 cluster that’s not only an excellent way to explore this experimental operating system, but looks cool sitting on your desk. Even if you’re not interested in drinking the Bell Lab’s Kool-Aid circa 1992, his slick desktop cluster design would work just as well for getting your feet wet with modern-day distributed software stacks.

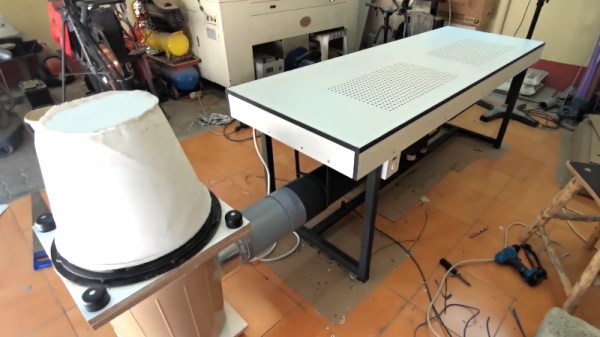
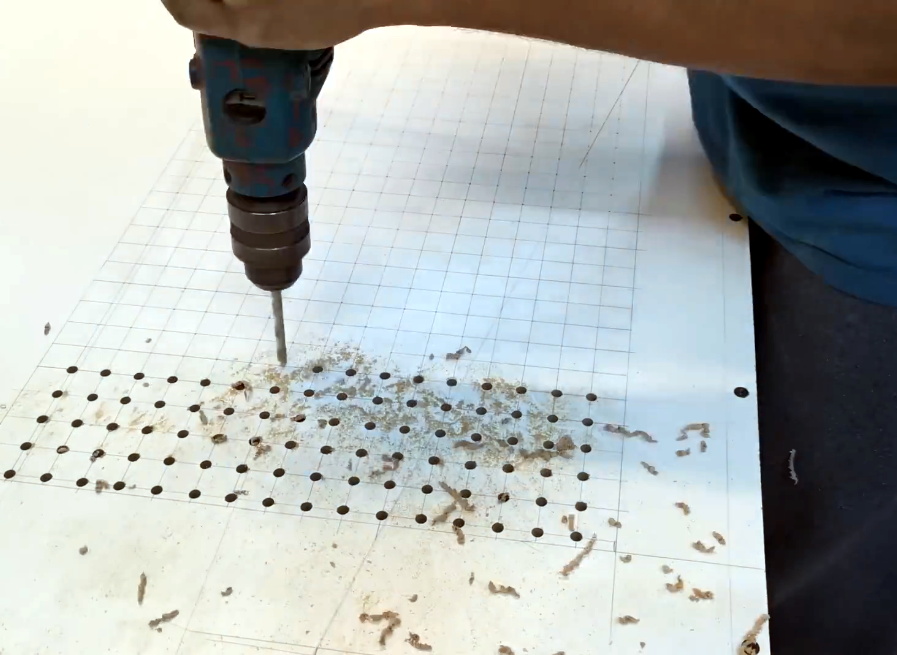
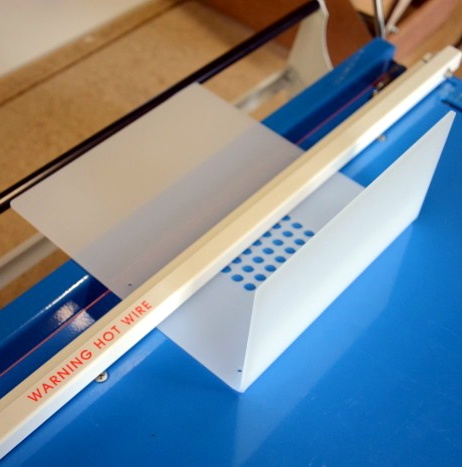
The enclosure for the cluster is built from laser cut acrylic panels which are then folded into shape with a hot wire bending machine. That might seem like a tall order for the home hacker, but we’ve covered DIY acrylic benders in the past, and the process is surprisingly simple. Granted you’ll still need to get access to a beefy laser cutter, but that’s not too hard anymore if you’ve got a hackerspace nearby.

[Andrew] uses short extension cables and female panel mount connectors to keep everything tidy, and with the addition of some internal LED lighting the final product really does look like a desktop computer from a far more fashionable future. Combined with the minimalist keyboard, the whole setup wouldn’t look out of place on the set of a science fiction movie. Perhaps that’s fitting, giving Bell Lab’s futuristic goals for Plan 9.

Its been the better part of a decade since we first brought you word that Plan 9 was available for the Raspberry Pi, and yet in all that time we’ve never really seen it put to use. Hopefully builds like this will inspire others to play around with this fascinating piece of computing history.

[Thanks to Dave for the tip.]

A Game Boy Supercomputer For AI Research

Reinforcement learning has been a hot-button area of research into artificial intelligence. This is a method where software agents make decisions and refine these over time based on analyzing resulting outcomes. [Kamil Rocki] had been exploring this field, but needed some more powerful tools. As it turned out, a cluster of emulated Game Boys running at a billion FPS was just the ticket.

The trick to efficient development of reinforcement learning systems is to be able to run things quickly. If it takes an AI one thousand attempts to clear level 1 of Super Mario Bros., you’d better hope you’re not running that in real time. [Kamil] started by coding a Game Boy emulator in C. By then implementing it in Verilog, [Kamil] was able to create a cluster of emulated Game Boys that enabled games to be run at breakneck speed, greatly speeding the training and development process.

[Kamil] goes into detail about how the work came to revolve around the Game Boy platform. After initial work with the Atari 2600, which is somewhat of a defacto standard in RL circles, [Kamil] began to explore further. It was desired to have an environment with a well-documented CPU,  a simple display to cut down on the preprocessing required, and a wide selection of games.

The goal of the project is to allow [Kamil] to explore the transfer of knowledge from one game to another in RL systems. The aim is to determine whether for an AI, skills at Metroid can help in Prince of Persia, for example. This is arguably true for human players, but it remains to be seen if this can be carried over for RL systems.

It’s rather advanced work, on both a hardware emulation level and in terms of AI research. Similar work has been done, training a computer to play Super Mario through monitoring score and world values. We can’t wait to see where this research leads in years to come.

This Vibrating Continuity Tester Is Quietly Useful

Continuity testing is one of the most valuable functions on the modern multimeter. It will help you investigate wiring problems in your car, tell you if you’re holding a nullmodem serial cable or the regular kind, and even reveal when you’ve accidentally shorted the data lines right to the power supply. However, all that beeping can get annoying, so [bitelxux] built a vibrating version instead.

The build was borne out of necessity; [bitelxux]’s meter lacked a buzzer, and it grew frustrating to always look at the display. In order to allow late night hacking sessions to go on undisturbed, an unobtrusive vibrating tester was desired, as opposed to the usual audible type. Two whiteboard markers donated their shells to the hack, fitted with small nails to act as probes. Inside, a pager vibration motor is connected, vibrating when continuity is found. The circuit runs from a 1.5V AA battery which neatly fits inside the marker shell.

It’s a basic build, but gets the job done with a minimum of fuss using parts that most makers probably have lying around. Of course, you can always go a slightly more complicated route and throw an Attiny at the problem.

Hackaday Meetup: Shenzhen

Hackaday and Seeed Studio are hosting a meetup in Shenzhen on Friday, March 22nd and you are invited!

This meetup is happening at X.factory, a maker hub run by Seeed Studios. Sophi Kravitz and Mike Szczys will be in town for the meetup and will both speak, along with a project talks from members of the Hackaday Community. Snacks and beverages will be served, and as always, if you have a project you’re working on bring it along! Having a piece of hardware is a great way to start a conversation, and this is the perfect place to draw inspiration, seek advice from your peers, and find team members to join in your projects!

Come and celebrate a love for design, electronics, learning new things, and meeting new people. We hope to see you at X.factory next week!

Learn Digital Logic By Alien Abduction

Some of the best educational material we’ve seen tells a story. There’s something more fun about reading a story than just absorbing a bunch of dry facts. That’s the idea behind Adventures in Logic Land. In the first episode, you are abducted by aliens trying to decide if humans are intelligent. To prove that, you have to work a series of logic puzzles.

The approach is a little unorthodox. You are shown a live logic simulation (spoiler: it is a NOR gate) and you have to fill in a truth table. The gates use alien symbols which contributes to the storyline but perhaps isn’t the best choice from an educational perspective. Besides, they already use red for zero and green for one which seems a little culturally-specific. The next test shows you how to build your own little simulations and run tests to see if they meet the alien’s criteria.

Continue reading “Learn Digital Logic By Alien Abduction”

An HDMI Input For A Laptop Screen, Minus Laptop

The lack of HDMI inputs on almost all laptops is a huge drawback for anyone who wants to easily play a video game on the road, for example. As to why no manufacturers offer this piece of convenience when we all have easy access to a working screen of this size, perhaps no one can say. On the other hand, if you want to ditch the rest of the computer, you can make use of the laptop screen for whatever you want.

This project from [Avner] comes to us in a few parts. In the first section, the teardown of the laptop begins and a datasheet for the screen is discovered, which allows [Avner] to prepare an FPGA to drive the screen. The second part involves building an HDMI sink, which is a device which decodes the signal from an HDMI source into its constituent parts so it can be sent to the FPGA. The final section of the project involves actually sending a video to this impressive collection of hardware in order to get a video to appear on the old laptop screen.

This build is worth checking out if you’ve ever dealt with anything involving digital video. It goes into great depth on a lot of the technical details involving HDMI, video devices, and hardware timing issues. This is a great build and, even though we’ve seen similar projects, definitely worth diving into if you have some time on your hands and a spare laptop screen.

Downdraft Table Inhales Dust, Not Cash

We always look forward to the builds [MakerMan] sends in, and it’s not just because we dig his choices in royalty free music (though it helps). He always manages to put together his projects with a minimum of fuss, and perhaps more importantly, a minimum of funds. His builds use salvaged components, easily sourced materials, and common tools. Watching him work invariably makes us realize that we tend to overthink our own projects.

In his latest video, [MakerMan] was tasked with building a downdraft table for a local factory that makes jewelry boxes. By sucking air through a series of holes in the table’s surface, sawdust created while the workers are building the boxes will automatically be removed from the workspace. Even if you aren’t in the jewelry box making business, any task which produces fine particles (such as sanding) could benefit from such a setup. You probably won’t need a downdraft table quite as large as the one he builds, but the principles will be the same if you get inspired to build a somewhat smaller version.

The build starts with sheets of MDF, which get cut, glued, and screwed together to make the basic tabletop shape. To this, [MakerMan] attaches a welded steel frame which will give it the strength MDF itself lacks. With careful measurement, lines are plotted across the top of the MDF sheet and all the holes are drilled with a simple hand drill; no fancy CNC here.

With the table doing its best colander impression, [MakerMan] adds an air box to the bottom which is similarly made of thin MDF sheets. All of the joints are sealed up with caulk, because at this point you want things to be as air tight as possible. A large blower is attached to the bottom, which gets piped to a dust collection system that’s made of a garbage can and…you guessed it, more MDF.

Watching [MakerMan] turn what’s often literal trash into a functional build never gets old. We’ve seen him create everything from a gorgeous origami chandelier to a very impressive diode laser cutter using little more than scrap parts and hand tools, and we can’t wait to see what he comes up with next.

Continue reading “Downdraft Table Inhales Dust, Not Cash”