We’re all familiar with a typical configuration sequence for a new mass-market IoT device. Turn it on for the first time and it exposes a temporary Wi-Fi network, connect to that network and open a Web page for device configuration. Wouldn’t it be useful to be able to incorporate that functionality into your own projects without having to write it yourself! Happily now thanks to [Peter Walsh] you can, with his AppDaemon project for the Raspberry Pi.
At its heart is a set of Perl scripts that run whatever your software is, then monitor a GPIO. A button press toggling the GPIO stops the application and fires up the access point and web server. Handily the code can all be found in a GitHub repository, and there is a run-through of the features in a video that we’ve placed below the break. It’s not something that will appeal to everybody, but for anyone who has to pass their work onto people who can’t dive into a config file and break out the editor, it should be a particularly useful addition to the armoury.
It all started with an 88-ton Arburg RP300 injection molding machine in the basement, and a bit of inattention. Larry Berg wanted a couple custom plastic plugs for his Garmin GPS, so he milled out a mold and ran a few. But he got distracted, and came back an hour later to find that his machine had made 400. Instead of throwing them away, he mailed them away for free, but then he found that people started throwing money at him to make more. People all over the world.
This is how the Purple Open Project turned into an global network of GPS geeks, selling molded alternatives to the oddball Garmin plugs for pledges to pay an unspecified amount, and ended up producing over 350,000 plugs over 16 years before he passed away in 2012. This is the story of a hacker’s hacker, who wanted to be able to connect his GPS to his computer and use it the way he wanted, and accidentally created an international business.
Airplanes and spacecraft have a big problem. The more engine or fuel you have, the more engine and fuel you need. That’s why aircraft use techniques to have lightweight structural members and do everything they can to minimize weight. A lighter craft can go further and carry more payload or supercargo. Electric motors are very attractive for aircraft, but they suffer from having less efficiency per kilogram than competing technologies. H3X thinks they can change that with their HPDM-250 integrated motor and inverter.
Although the 15 kg motor is still in testing, the claimed specifications are impressive: a peak power of 250 kW for 30 seconds and continuous torque of 95 Nm and 200 kW sustained. The company claims 96.7% efficiency. The claims are for the motor running at 20,000 RPM, so you’d need to add the weight of a gearbox for practical applications, but the company says this adds a mere 3 kg to the overall weight.
While plenty of automotive enthusiasts are all about carving corners at the local track days, it’s a special breed that leaves tarmac behind for the dusty trail ahead. If your chosen ride is of the four-wheelin’ variety, here’s how you can modify it to dominate the dirt and mud.
Handling The Terrain
Building a good offroad rig requires a very different focus than building a car for street performance. A screaming high-performance engine is of no use when your tires are spinning in the air because you’re stuck in deep sand or on top of a pointy rock. Instead, four wheelers are concerned with a whole different set of parameters. Ground clearance is key to getting over obstacles without getting stuck, and good articulation is key to keeping your wheels on the ground and pushing you forward in deep ruts and on crazy angles. You’ll also want plenty of low-down torque, and tyres that can grip up in all conditions without snagging a puncture. It’s a whole different ballgame, so read on!
For anyone serious about mining cryptocurrency such as Bitcoin, we’re well past the point where a standard desktop computer is of much use. While an array of high-end GPUs is still viable for some currencies, the real heavy hitters are using custom mining hardware that makes use of application-specific integrated circuits (ASICs) to crunch the numbers. But eventually even the most powerful mining farm will start to show its age, and many end up selling on the second hand market for pennies on the dollar.
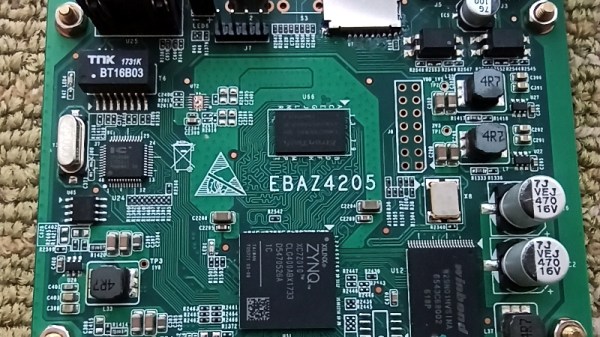
Naturally, hackers are hard at work trying to find alternate uses for these computational powerhouses. While it won’t teach an old ASIC a new trick, [xjtuecho] has documented some very interesting details on the FPGA control board of the Ebit E9+ Bitcoin miner. Known as the EBAZ4205, this board can be purchased for around $20 USD from online importers and even less if you can find one used. Since it’s just the controller it won’t help you build a budget super computer, but there’s always interest in cheap FPGA development boards.
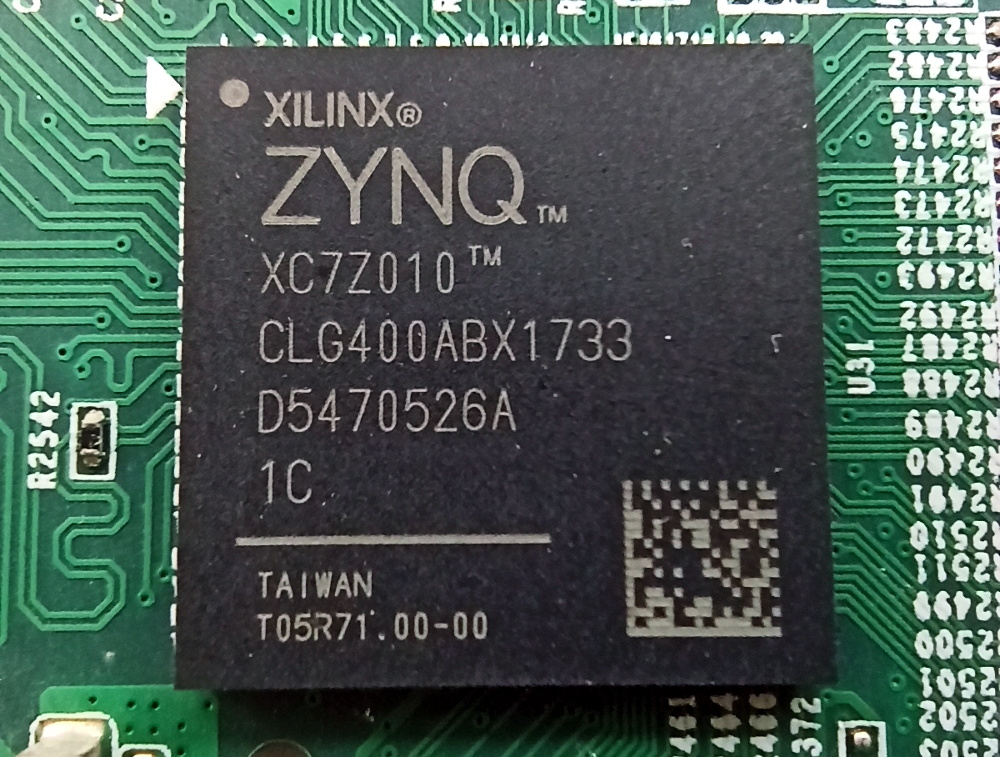
The Zynq SoC combines an FPGA and ARM CPU.
According to [xjtuecho], it takes a little bit of work to get the EBAZ4205 ready for experimentation. For one thing, you may have to solder on your own micro SD slot depending on where you got the board from. You’ll also need to add a couple diodes to configure which storage device to boot from and to select where the board pulls power from.
Once you’re done, you’ll have a dual core Cortex A9 Linux board with 256 MB DDR3 and a Artix-7 FPGA featuring 28K logic elements to play with. Where you go from there is up to you.
This isn’t the first time we’ve seen FPGA boards hit the surplus market at rock bottom prices. When IT departments started dumping their stock of Pano Logic thin clients back in 2013, a whole community of dedicated FPGA hackers sprouted up around it. We’re not sure the if the EBAZ4205 will enjoy the same kind of popularity in its second life, but the price is certainly right.
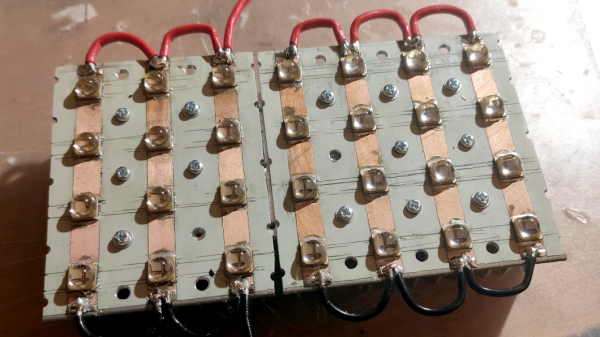
[Jan Mrázek] is no stranger at all to home-grown improvements with his Elegoo Mars SLA 3D printer, and there is a lot going on in his experimental multi-LED upgrade which even involved casting his own lens array. In the end it did speed up his prints by a factor of three to four, though he cooked an LCD to failure in the process. Still, it was a fun project done during a COVID-19 lockdown; as usual there is a lot to learn from [Jan]’s experiences but the mod is not something he necessarily recommends people do for themselves.
[Jan] started by wondering whether better print quality and performance could be obtained by improving the printer’s UV light source. The stock printer uses a single large UV LED nestled into a reflector, but [Jan] decided to try making a more precise source of UV, aiming to make the UV rays as parallel as possible.
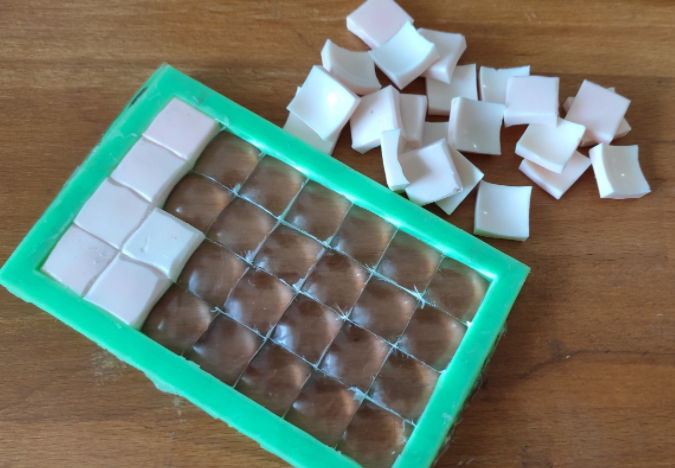
Custom LED array molded in clear epoxy.
To do this, he took a two-pronged approach. One was to replace the single large UV LED with a 4×7 array of emitters plus heat sink and fans. The other was to make a matching array of custom lenses to get the UV rays as parallel as possible.
Casting one’s own lens array out of clear epoxy was a lot of work and had mixed results, but again, it was a lockdown project and the usual “is-this-really-worth-it” rules were relaxed. In short, casting a single custom lens out of clear epoxy worked shockingly well, but when [Jan] scaled it up to casting a whole 4×7 array of them, results were mixed. Mold deformation and artifacts caused by the areas between individual lenses robbed the end result of much of its promise.
More success was had with the array of UV emitters, which enabled faster curing thanks to higher power, but the heat needs to be managed. The stock emitter of the printer is about 30 W, and [Jan] was running his new array at 240 W. This meant a blazing fast one second exposure time per layer, but the heat generated by the new lighting was higher than anticipated. After only ten hours the LCD failed, probably at least in part due to the heat. [Jan] halved the power of the array down to 120 W and added an extra fan, which appears to have done the trick. Exposure time is two to three seconds per layer, and it’s up to 150 hours of printing without problems.
Again, it’s not a process [Jan] necessarily recommends to others (and he definitely recommends buying lenses if at all possible instead of casting them) but as usual there is a lot to learn from his frank sharing of results, both good and bad. We’ve seen 3D-printed lenses as well as adding WiFi connectivity to one of these hobbyist printers, and it’s great to see the spirit of hacking alive and well when it comes to these devices.
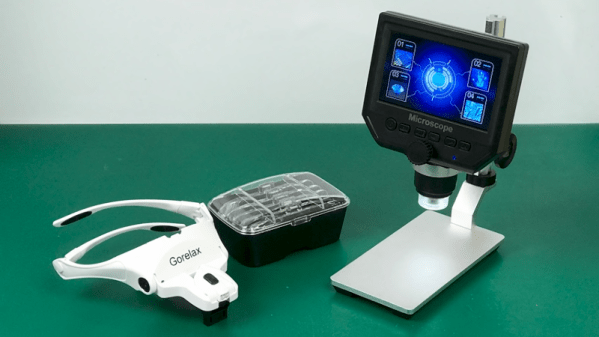
If there is one thing we’ve learned during several years of running the Hackaday SMD soldering challenge it is this: Most people need magnification to do good soldering at a tiny scale. The problem is, like most tools, you can buy something as cheap as a $5 binocular headset or you can spend $1,000 or more on a serious microscope. What’s in between? [Noel] looks at some affordable options in a recent video that you can see below.
[Noel] started out with a cheap “helping hand” that has a simple little magnifying glass attached to it. The major criterion was to find something that would have no delay so he could solder under magnification. While it is possible to work under a scope with a little lag in the display, it is frustrating and there are better options.