Remoticon 2021 // Rob Weinstein Builds An HP-35 From The Patent Up

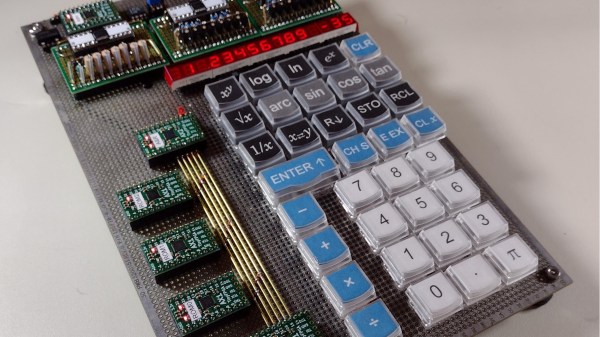
Fifty years ago, Hewlett-Packard introduced the first handheld scientific calculator, the HP-35. It was quite the engineering feat, since equivalent machines of the day were bulky desktop affairs, if not rack-mounted. [Rob Weinstein] has long been a fan of HP calculators, and used an HP-41C for many years until it wore out. Since then he gradually developed a curiosity about these old calculators and what made them tick. The more he read, the more engrossed he became. [Rob] eventually decided to embark on a three year long reverse-engineer journey that culminated a recreation of the original design on a protoboard that operates exactly like the original from 1972 (although not quite pocket-sized). In this presentation he walks us through the history of the calculator design and his efforts in understanding and eventually replicating it using modern FPGAs.

The HP patent ( US Patent 4,001,569 ) contains an extremely detailed explanation of the calculator in nearly every aspect. There are many novel concepts in the design, and [Rob] delves into two of them in his presentation. Early LED devices were a drain on batteries, and HP engineers came up with a clever solution. In a complex orchestra of multiplexed switches, they steered current through inductors and LED segments, storing energy temporarily and eliminating the need for inefficient dropping resistors. But even more complicated is the serial processor architecture of the calculator. The first microprocessors were not available when HP started this design, so the entire processor was done at the gate level. Everything operates on 56-bit registers which are constantly circulating around in circular shift registers. [Rob] has really done his homework here, carefully studying each section of the design in great depth, drawing upon old documents and books when available, and making his own material when not. For example, in the course of figuring everything out, [Rob] prepared 338 pages of timing charts in addition to those in the patent. Continue reading “Remoticon 2021 // Rob Weinstein Builds An HP-35 From The Patent Up”

Inside An 11 Ton Clock With 1,000 Pieces

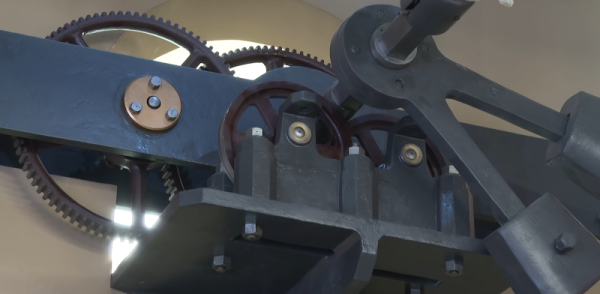
We aren’t ashamed to admit it, but we like clocks. We’ve built quite a few and clock projects show up regularly in the pages of Hackaday. But there is one clock that is among the most famous in the world: Britain’s Big Ben. It has been getting some repairs and the BBC was nice enough to make a video of the giant mechanism.

Actually, the clock is not called Big Ben. That’s the name of one of the five bells in the Elizabeth Tower since 2012. Before that it was the Clock Tower, but everyone always calls it Big Ben. The giant clock weighs over 11 tons and has more than 1,000 pieces. Hard to imagine what it took to build such a thing in 1859.

Big Ben itself — the bell — weighs even more than the clock at over 15 short tons. But, of course, we are mostly interested in the clock itself. The design was apparently from a lawyer and an astronomer, both of whom liked clocks. Construction, however, fell to a professional clockmaker and — after his death — his stepson. Dennison, the lawyer, developed a superior gravity escapement that quickly became the standard for future tower clocks and was hailed as one of the great horological inventions of the 19th century.

The clock now has an electric motor that it can use as a backup. However, it is normally hand-wound three times a week. Winding the clock takes about 90 minutes. Adjusting the clock is also an interesting event. On top of the pendulum is a stack of penny coins. Adding a penny makes the clock run a little faster, removing one slows it down. Each penny is worth about 0.2 seconds/day.

It is great to see such a recognizable piece of 19th century tech get its 15 minutes of fame. Not that the tower isn’t famous, but very few people know what’s inside. The old clock is full of odd stories. The original bell broke when Dennison wanted to test it with a bigger hammer. The new bell made from the old metal also has a crack in it, but still is operational.

You probably aren’t going to reproduce this clock, but you can make something that works on the same principle. Or, try something a bit more steam-punk.

Continue reading “Inside An 11 Ton Clock With 1,000 Pieces”

Just What On Earth Is A Therm?

With the news here in Europe full of the effect of the war in Ukraine on gas supplies and consequently, prices, there it was on the radio news: a unit of measurement so uniquely British that nobody uses it in the real world and nobody even has a clue what it really means. We’re speaking of the Therm, one of those words from our grandparents’ era of coal gas powered Belling cookers and Geyser water heaters hanging over the bath, which has somehow hung on in the popular imagination as a mysterious unit of domestic gas referred to only in the mass market news media. What on earth is a therm, and why are we still hearing it on the news in the UK?

You can’t Buy A Therm

Asking the internet what a therm is reveals the answer, it’s 100,000 BTU. What’s a BTU? A British Thermal Unit, another anachronistic measurement five decades after the UK went metric, it’s the amount of energy required to raise a pound of water by a degree Fahrenheit. Which in turn is about 1,054 joules, in today’s measurements. So a therm is thus a unit of energy, can we take a look at our gas meters and see how many of them we’ve used this winter? Not so fast, because gas isn’t sold by the therm. Older gas meters had cubic feet on them, and we’re guessing that now they’re calibrated in cubic meters. We can’t even buy a therm of gas, so why on earth are the British media still using it? Continue reading “Just What On Earth Is A Therm?”

Custom Macro Keyboard With Sweet Backlighting

From the smallest 60% keyboards for those with no desk space to keyboards with number pads for those doing data entry all day, there’s a keyboard size and shape for just about everyone. The only problem, even with the largest keyboards, is that they’re still fairly limited in what they can do. If you find yourself wishing for even more functionality, you might want to build something like this custom macro keyboard with built-in LED backlighting.

Rather than go with a standard mechanical keyboard switch like a Cherry MX, this build is based around TS26-2 pushbuttons with built-in LED lighting. [atkaper] only really needed one button for managing the mute button on MS Teams, but still built a total of eight switches into this keyboard which can all be individually programmed with different functions. The controller is an Arduino Leonardo and the enclosure was 3D printed.

Paired with the classic IBM Model M keyboard, this new macro keyboard adds plenty of functionality while also having control over LED backlighting. Macro keyboards are incredibly useful, especially with their ability to easily change function with control over the software that runs on them. The key to most builds is the 32U4 chip found in some Atmel microcontrollers which allows it to easily pass keyboard (and mouse) functionality to any computer its plugged in to.

A camera slider made from wood and recycled parts

Turning Old Plotter Parts Into A Smooth Camera Slider

Taking apart old stuff and re-using the parts to make something new is how many hackers first got started in the world of mechanical and electronic engineering. But even after years working in industry we still get that tinge of excitement whenever someone offers us an old device “for parts”, and immediately begin to imagine the things we could build with the components inside.

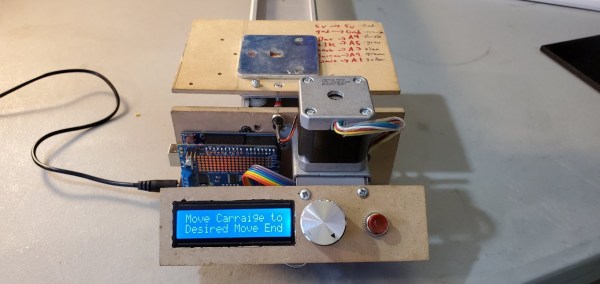
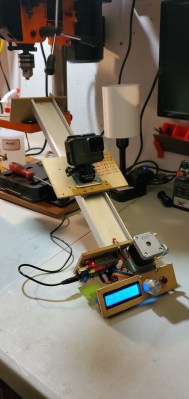
A GoPro mounted on a moving platform made from recycled partsSo when [Victor Frost] was offered an old Cricut cutting plotter, he realized he could use its parts to create the camera slider he’d been planning to build. The plotter’s X stage, controlled by a stepper motor, was ideal for moving a camera platform back and forth. [Victor] wanted to build the entire thing in a “freehand” way, without making a detailed design or purchasing any new parts. So he dived into his parts bin and dug up an Arduino, a 16×2 LCD, some wires and buttons, and a few pieces of MDF.

The camera mount is simply a piece of steel that a GoPro’s magnetic mount can latch onto, but [Victor] keeps open the possibility of mounting a proper tripod ball head. The Arduino drives the stepper motor through an Adafruit Motor Shield, with a simple user interface running on the LCD. The user can set the desired end points and speed, and then run the camera back and forth as often as needed. In this way, the software follows the same “keep it simple” philosophy as the hardware design.

If you’re planning to build your own camera slider, [Victor]’s design should be easy to copy, if you happen to have an old cutting plotter. If not, you can try this simple yet well-engineered model. Want even more? Then check out this fancy multi-axis camera motion control rig.

Continue reading “Turning Old Plotter Parts Into A Smooth Camera Slider”

Old Casio Calculator Learns New Tricks

[George Stagg] recently found himself stung by the burden of free time while in lockdown. Needing a project to keep him occupied, he decided to upgrade his 90s Casio CFX-9850G calculator to run custom machine code.

All [George] really wanted was for his vintage calculator to understand Reverse Polish Notation (RPN). The calculator in question can already run its own version of BASIC, however the bespoke Hitachi CPU struggles performance-wise with complex programs, and wouldn’t be a realistic way of using RPN on the calculator. An RPN interpreter written in assembly language would be much faster.

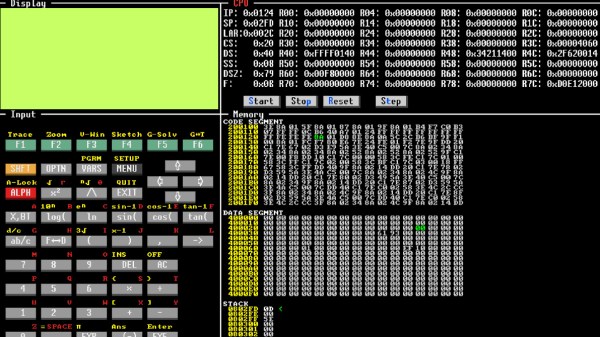
The first step in cracking this calculator wide open was a ROM dump, followed by writing a disassembler. Incredibly, the MAME framework already featured a ‘partial implementation’ of the calculator’s CPU, which was a much needed shot in the arm when it came time to write a full-featured emulator.

With the entire calculator emulated in software, the plan from here involved replacing one of the BASIC commands in ROM with new code that would jump to an address in RAM. With 32KB of RAM there ended up being plenty of room for experimentation, and uploading a program into RAM was simplified by using Casio’s original backup software to dump the RAM onto a PC. Here, the contents of RAM could be easily modified with custom code, then uploaded back into the calculator.

With RAM to burn, new routines were created to write custom characters to the screen, and a new font was created to squeeze more characters onto the display than normal. [George] ended up porting a Forth interpreter, which defaults to RPN style, to finally achieve his humble objective. He also managed to get a version of Conway’s Game Of Life running, check out the video after the break.

We can’t get enough of our calculator hacks here, so make sure to check out the CPU transplant on this vintage Soviet calculator.

Continue reading “Old Casio Calculator Learns New Tricks”

A Gaggle Of Boards Makes For An I2C Playground

It’s not much of a stretch to assume that the majority of Hackaday readers are at least familiar with I2C. In fact, there’s an excellent chance that anyone who’s ever done more with an Arduino than blink the onboard LED has at one time or another used the serial communication protocol to talk to a sensor, display, or other external gadget. Of course, just because most of us have used it in a few projects doesn’t mean we truly understand it.

If you’re looking to brush up on your I2C knowledge, you could do worse than to follow the guide [András Tevesz] recently wrote up. With a title like Hardware Hacking 101: E01 I2C Sniffing, How to Listen to Your Arduino’s I2C Bus, you know you’re in for a good time. While the document is arguably geared more towards security researchers than electronic hobbyists, the concepts presented can be useful even if you’re just trying to debug your own projects. Continue reading “A Gaggle Of Boards Makes For An I2C Playground”