Build Your Own Custom Elevator

There are a lot of things in our everyday life that are holdovers from an earlier time that we continue to use simply because of inertia even if they don’t make a lot of sense in modern times. Examples include a 60 Hz power grid, the spacing between railroad tracks, and of course the self-contained attic ladder which is made to fit in between standard spaced ceiling joists. It’s not wide enough to get big or heavy stuff into an attic, and building standards won’t change just for this one inconvenience, so if you want to turn that space into something more usable you’re going to need to build a custom elevator.

This attic elevator comes to us from [Brian] who recently moved into a home with about half the square footage as his previous home, but still needed to hold all of his stuff. That means clever ways of using the available space. For the elevator he constructed a platform out of 2x lumber held together with bolts and steel supports. The carriage runs up and down on a track made out 1 5/8″ super strut and is hoisted by a winch motor rated for 550 pounds, which is more than enough to hoist up most household items including a large toolbox.

The only thing that we would have liked to have seen in the video is how the opening was made. Presumably this would have involved cutting into a ceiling joist to make the opening wider than the standard attic ladder, and care would have needed to be taken to ensure the ceiling/floor wasn’t weakened. Either way, this is a great solution to a common problem, and could perhaps be made to work on more than two levels with a custom controller. Continue reading “Build Your Own Custom Elevator”

Retrocomputing With Modern Hardware, No Emulation Required

The x86 processor family is for the time being, the most ubiquitous type of processor in the PC world, and has been since the 1980s when the IBM PC came on the scene. Emulating these older devices is easy enough if you want to play an old LucasArts game or experience Windows 3.1 again, but the true experience is found on original hardware. And, thanks to industrial equipment compatibility needs, you can build a brand new 486 machine with new hardware that will run this retro software as though it was new itself.

[The Rasteri] masterminded this build which is reminiscent of the NES classic and other nostalgic console re-releases. It’s based on the PC/104 standard which was introduced in the early 90s, mostly for industrial controls applications. The platform is remarkably small, and the board chosen for this build hosts a 486 processor running at 300 MHz. It has on-board VGA-compatible graphics but no Sound Blaster card, so he designed and built his own ISA-compatible sound card that fits in the PC/104’s available expansion port.

After adding some more tiny peripherals to the build and installing it in a custom case, [The Rasteri] has a working DOS machine on new, bare-metal 486 hardware which can play DOOM as it was originally intended. It can also run early versions of  Windows to play games from the Microsoft Entertainment Pack if you feel like being eaten by a snow monster while skiing. [The Rasteri] is no stranger to intense retro computing like this either, as he was the one who got DOOM to run on original NES hardware.

Continue reading “Retrocomputing With Modern Hardware, No Emulation Required”

Squeezing Every Bit From An ATMega

While the ATMega328 is “mega” for a microcontroller, it’s still a fairly limited platform. It has plenty of I/O and working memory for most tasks, but this Battleship game that [thorlancaster328] has put together really stretches the capabilities of this tiny chip. Normally a Battleship game wouldn’t be that complicated, but this one has audio, an LED display, and can also play a fine rendition of Nyan Cat to boot, which really puts the Atmel chip through its paces.

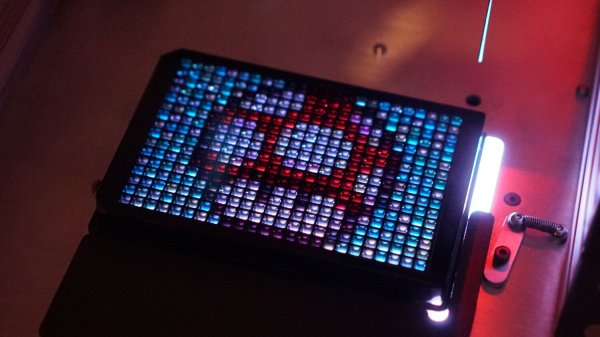
The audio is played through a 512-byte buffer and an interrupt triggers the microcontroller when to fill the buffer while it works on the other processes. The 12×12 LED display is also fed through a shift register triggered by the same interrupt as the audio, and since the build uses so many shift registers the microcontroller can actually output four separate displays (two players, each with a dispaly for shots and one for ships). It will also eventually support a player-vs-computer mode for the battleship game, and also has a mode where it plays Nyan cat just to demonstrate its own capabilities.

We’re pretty impressed with the amount of work this small microcontroller is doing, largely thanks to code optimization from its creator [thorlancaster328]. If there’s enough interest he also says he will provide the source code too. Until then, be sure to check out this other way of pushing a small microcontroller to its limits.

Thanks to [Thinkerer] for the tip!

Fox Hunting With Software-Defined Radio

Fox hunting, or direction finding, is a favorite pastime in the ham radio community where radio operators attempt to triangulate the position of a radio transmission. While it may have required a large amount of expensive equipment in the past, like most ham radio operations the advent of software-defined radio (SDR) has helped revolutionize this aspect of the hobby as well. [Aaron] shows us how to make use of SDR for direction finding using his custom SDR-based Linux distribution called DragonOS.

We have mentioned DragonOS before, but every iteration seems to add new features. This time it includes implementation of a software package called DF-Aggregator. The software (from [ckoval7]), along with the rest of DragonOS, is loaded onto a set of (typically at least three) networked Raspberry Pis. The networked computers can communicate information about the radio waves they receive, and make direction finding another capable feature found in this distribution.

[Aaron] has a few videos showing the process of setting this up and using it, and all of the software is available for attempting something like this on your own. While the future of ham radio as a hobby does remain in doubt, projects like this which bring classic ham activities to the SDR realm really go a long way to reviving it.

Continue reading “Fox Hunting With Software-Defined Radio”

Logitech Joystick Gets A Mechanical Sidekick

The mechanical keyboard rabbit hole is a deep one, and can swallow up as much money and time as you want to spend. If you’ve become spoiled on the touch and responsiveness of a Cherry MX or other mechanical switch, you might even start putting them on other user interfaces as well, such as this Logitech joystick that now sports a few very usable mechanical keys for the touch-conscious among us.

The Logitech Extreme 3D Pro that [ErkHal] and friend [HeKeKe] modified to accept the mechanical keys originally had a set of input buttons on the side, but these were unreliable and error-prone with a very long, inconsistent push. Soldering some mechanical switches directly on the existing board was a nice improvement, but the pair decided that they could do even better and rolled out an entire custom PCB to mount the keys more ergonomically. The switches are Kailh Choc V2 Browns and seem to have done a great job of improving the responsiveness of the joystick’s side buttons. If you want to spin up your own version, they’ve made the PCBs available on their GitHub page.

While [ErkHal] notes the switches aren’t the best and were only used since they were available, they certainly appear to work much better than what the joystick shipped with originally. In fact, we recently saw similar switches used to make a custom mechanical keyboard made for the PinePhone.

Machining Without Machines

It’s a luxury to be able to access a modern machine shop, complete with its array of lathes, mills, and presses. These tools are expensive though, and take up a lot of space, so if you want to be able to machine hard or thick metals without an incredible amount of overhead you’ll need a different solution. Luckily you can bypass the machines in some situations and use electricity to do the machining directly.

This project makes use of a process known as electrochemical machining and works on the principle that electricity passed through an electrolyte solution will erode the metal that it comes in contact with. With a well-designed setup, this can be used to precisely machine metal in various ways. For [bob]’s use this was pretty straightforward, since he needed to enlarge an existing hole in a piece of plate steel, so he forced electrolyte through this hole while applying around half an amp of current in order to make this precise “cut” in the metal, avoiding the use of an expensive drill press.

There are some downsides to the use of this process as [bob] notes in his build, namely that any piece of the working material that comes in contact with the electrolyte will be eroded to some extent. This can be mitigated with good design but can easily become impractical. It’s still a good way to avoid the expense of some expensive machining equipment, though, and similar processes can be used for other types of machine work as well.

3D Printing With VHS Tape Filament

If you have a pile of old VHS tapes collecting dust in your attic or basement that you know you’ll never watch again, either because all of those movies are available on DVD or a streaming service, or because you haven’t had a working VCR since 2003, there might be a way of putting them to good use in another way. With the miles of tape available in just a few cassettes, [brtv-z] shows us how to use that tape as filament for a 3D printer.

The first step of the build is to actually create the filament. He uses a purpose-built homemade press to spin several tapes into one filament similar to how cotton or flax is spun into yarn. From there the filament is simply fed into the 3D printer and put to work. The tape filament needs to be heated higher than a standard 3D printer filament so he prints at a much slower rate, but the resulting product is indistinguishable from a normal print except for the color. It has some other interesting properties as well, such as retaining its magnetism from the magnetic tape, and being a little more brittle than PET plastic although it seems to be a little stronger.

While the VHS filament might not be a replacement for all plastic 3D prints, it’s still a great use for something that would likely otherwise head straight to the landfill. There are some other uses for this magnetic tape as well, like if you wanted to build a DIY particle accelerator.

Continue reading “3D Printing With VHS Tape Filament”