If you’re looking for a controller for your computer or mobile device, you could certainly do worse than one of the latest iterations of the Xbox pad. They might not be perfect, but they’re fairly well-made, not particularly expensive, use standard USB and Bluetooth interfaces, and even have decent support in the open-source community. So if you’re gaming on Linux or working on any other kind of retro gaming rig it’ll likely be plug-and-play.
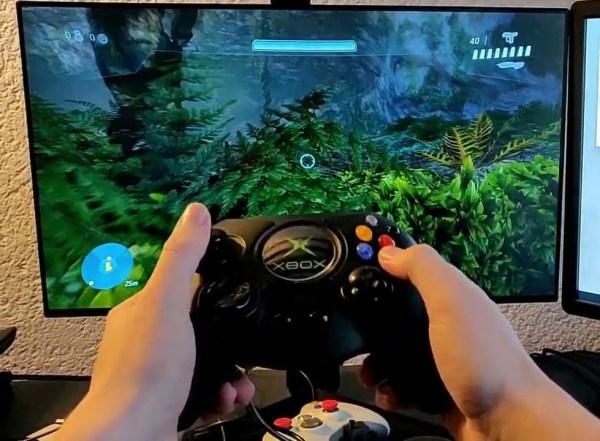
This wasn’t the case with the first generation Xbox controller, though, and although its proprietary connector was actually using USB, the controller scheme wasn’t as open. This is [Tom]’s effort of upcycling his original Xbox controller to work indistinguishably from a stock Xbox 360 controller.
 For those asking why anyone would want to do this, [Tom] is actually one of the few who enjoyed the original bulky Xbox “Duke” controller that released with the console in 2001. It wasn’t a popular choice in the larger gaming community and a year later Microsoft released a smaller version, but we all have our quirks. A Teensy 4.1 is attached to the end of the controller cable and acts as an intermediary to intercept the proprietary signalling coming from this controller and convert it into something usable. Since the controller doesn’t even show up as a standard USB HID device it took a little more sniffing of the protocol to decipher what was going on at all, but eventually some help was found within this other driver that gave [Tom] the clues he needed to get it working.
There were some other headaches to this project as well, especially since USB debugging USB connections while using USB isn’t exactly a streamlined process, but after a couple of breakthroughs the Teensy pass-through interface began working and [Tom] can use his controller of choice across multiple platforms now. If you’re looking to upgrade in other ways take a look at this build which seeks to recalibrate, rather than replace, an older Xbox controller experiencing drift on its analog control sticks.
Continue reading “Transform An Original Xbox Controller To A 360 Controller”