Automating Mini Blinds The Rental-Friendly Way

[Chris Mullins] wanted to automate opening and closing the slats of mini blinds in his apartment, and came up with a system to do it as a fun project. Manually opening and closing the slats means twisting a rod. Seems straightforward to automate that, but as usual when having to work around something that already exists, making no permanent alterations, complications arose.

The blinds are only 1 inch wide, leaving little room for mounting any sort of hardware. While there is a lot of prior art when it comes to automating blinds, nothing he found actually fit the situation [Chris] had, so he rolled his own.
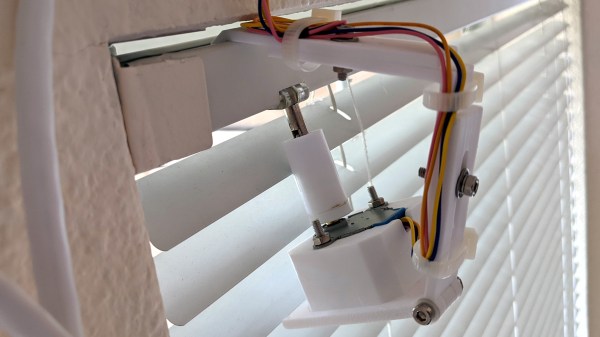
The rod that is normally twisted to control the blinds is removed, and the shaft of a stepper motor takes its place. [Chris]’ mounting solution is made to fit blinds with narrow 1 inch tracks (existing projects he found relied on 2 inch tracks) and the 3D printed mount is fully adjustable, so the 28BYJ stepper motor can be moved into exactly the right position. Speaking of the stepper motor, the 28BYJ motor is unipolar but the A4988 driver he wanted to use is for bipolar steppers only. Luckily, cutting a trace on the motor’s PCB is all it takes to turn a unipolar motor into bipolar.

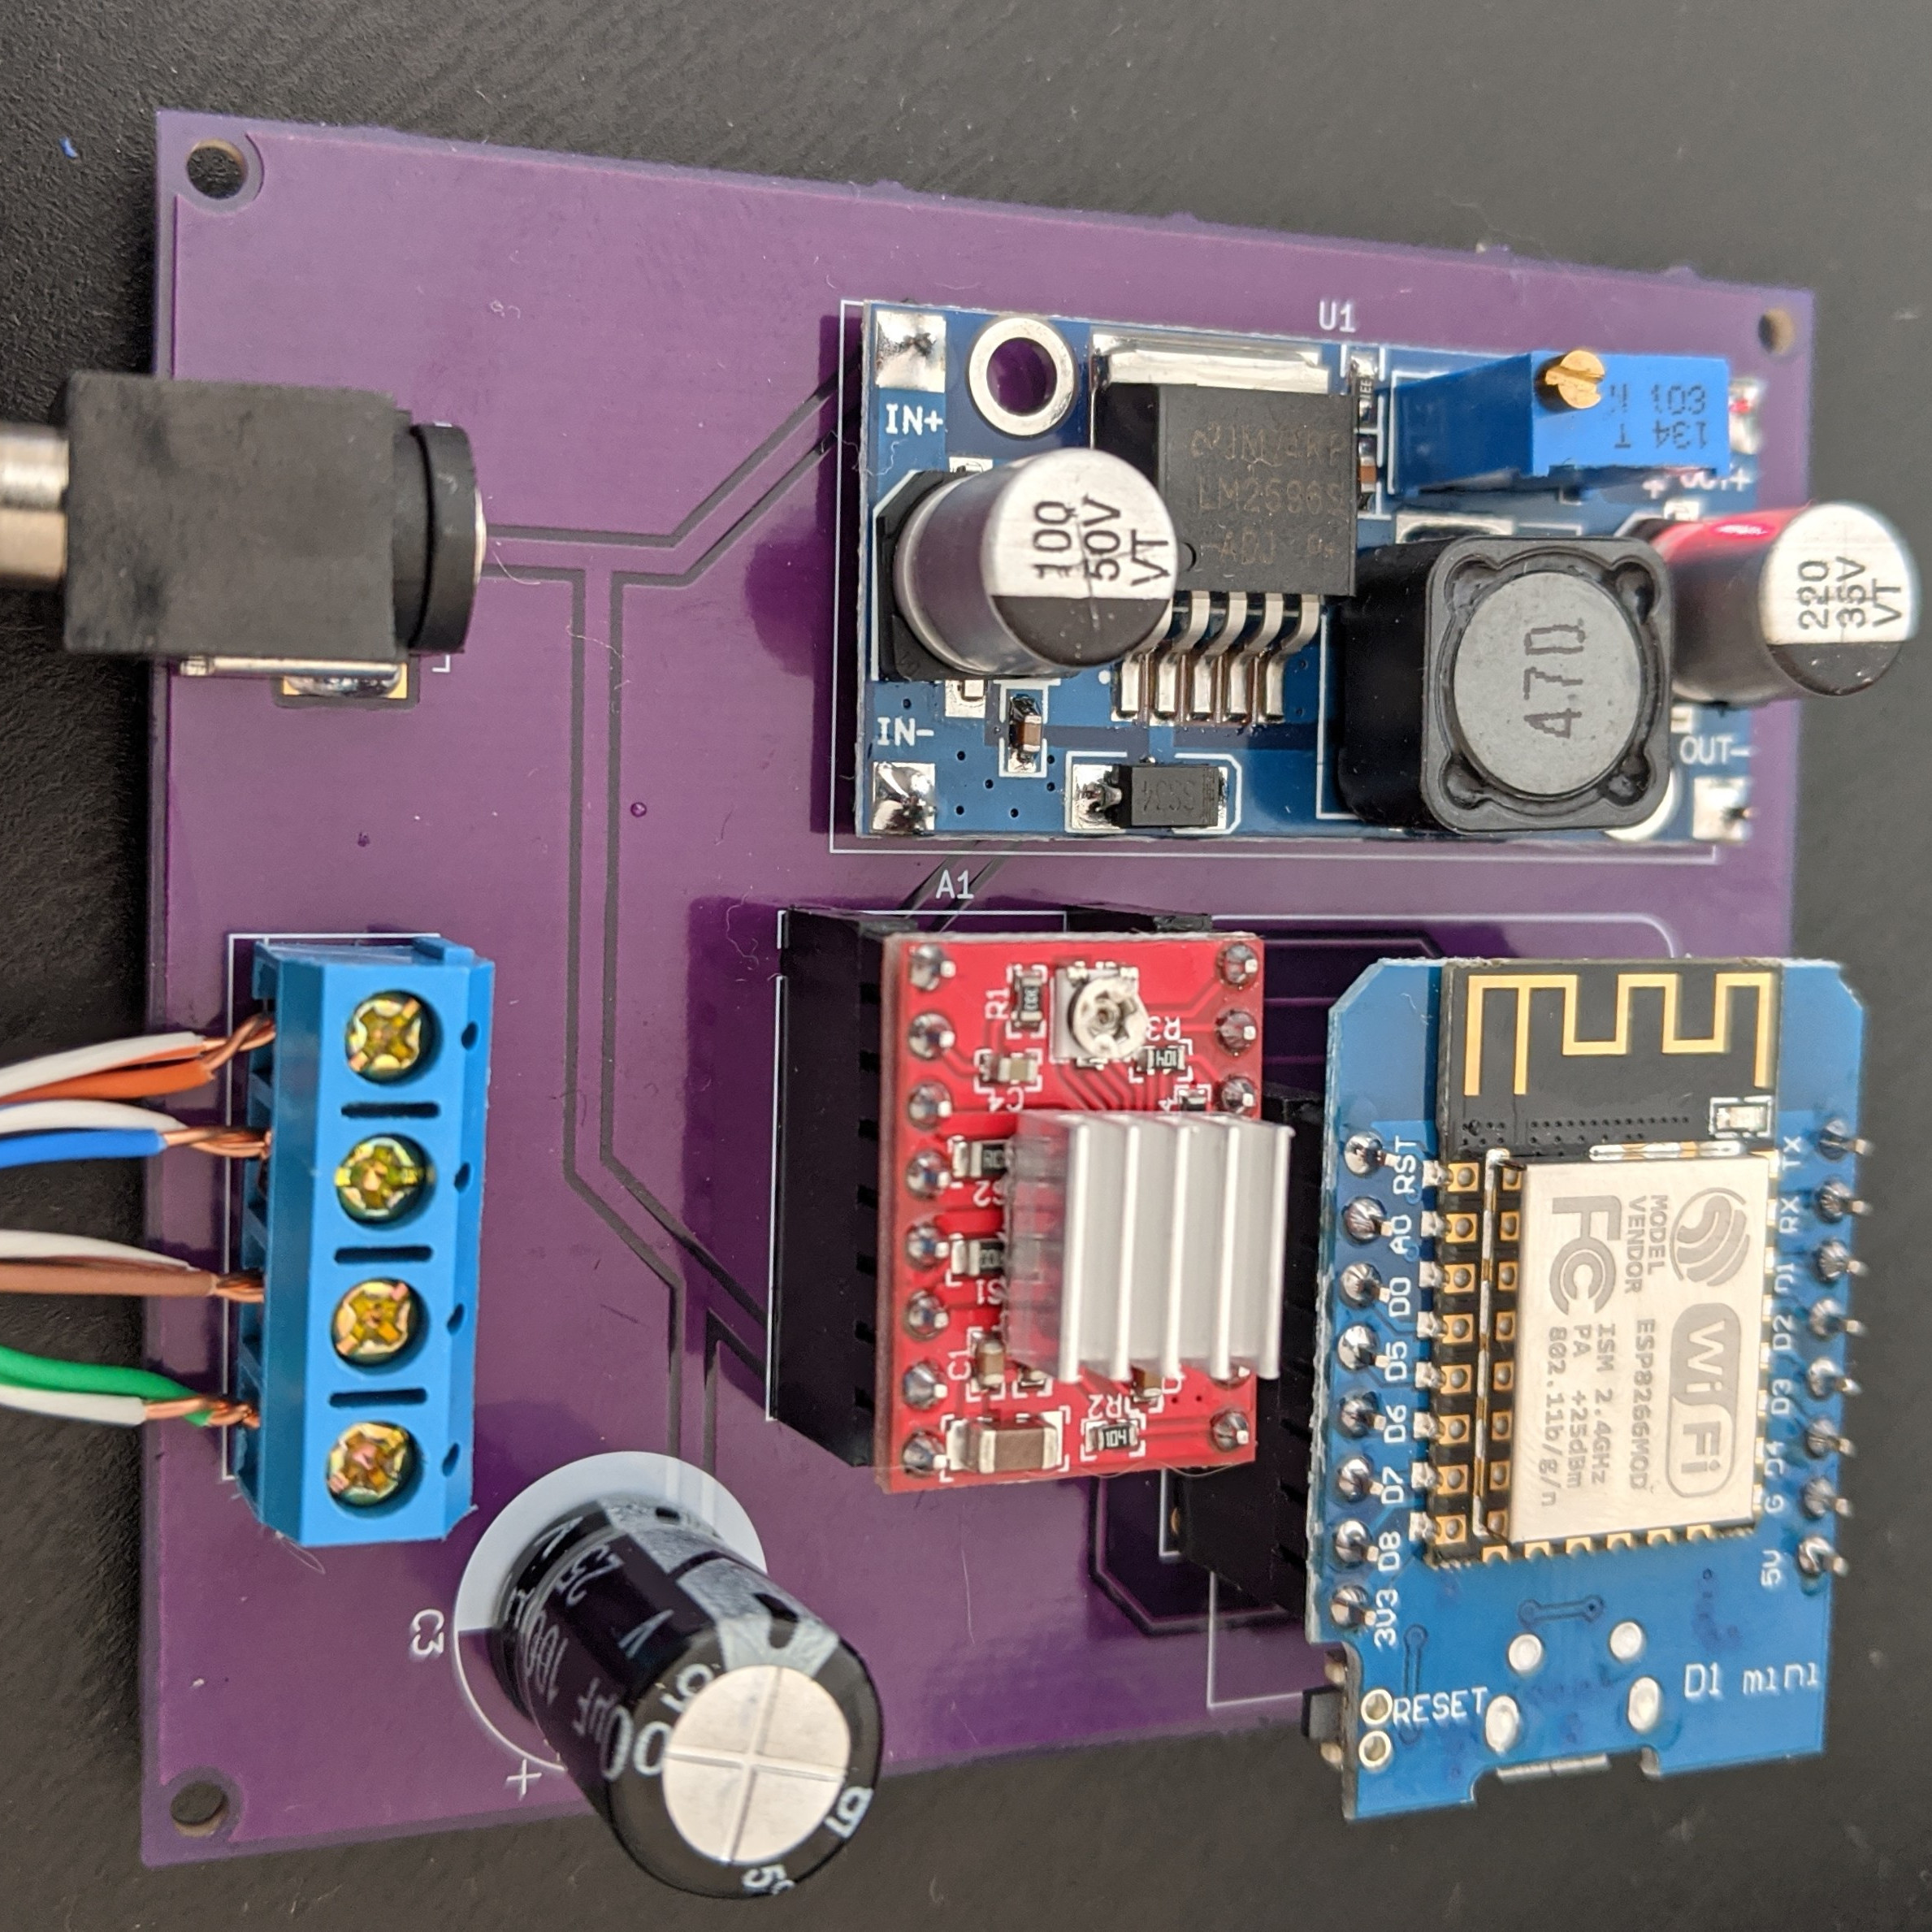
To drive the motor and provide wireless functionality, the whole thing works with a Wemos D1 ESP8266, an A4988 stepper driver, and a buck converter. While it worked fine as a one-off on a perfboard, [Chris] used the project as an opportunity to learn how to make a PCB using KiCad; the PCB project is here on GitHub and the ESP8266 runs the ESPHome firmware. Be sure to check out the project page on his blog for all the details; [Chris] links to all the resources there, and covers everything from a bill of materials to walking through configuration of ESPHome with integration into the open-source Home Assistant project.

Looking to control natural light but blinds aren’t your thing? Maybe consider automated curtains.
Vizy The AI Camera Aims To Ease Machine Vision

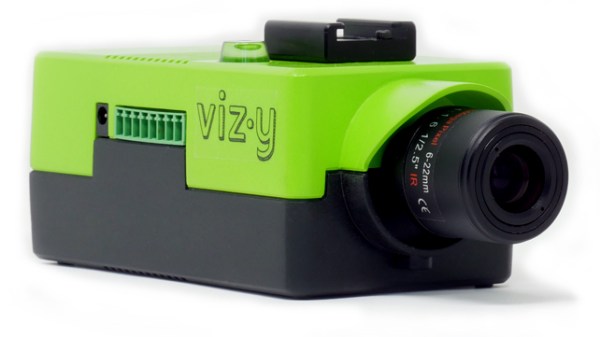
Cameras are getting smarter and more capable than ever, able to run embedded machine vision algorithms and pull off tricks far beyond what something like a serial camera and microcontroller board would be capable of, and the upcoming Vizy aims to be even smarter and easier to use yet. Vizy is the work of Charmed Labs, and this isn’t their first foray into accessible machine vision. Charmed Labs are the same folks behind the Pixy and Pixy 2 cameras. Vizy’s main goal is to make object detection and classification easy, with thoughtful hardware features and a browser-based interface.

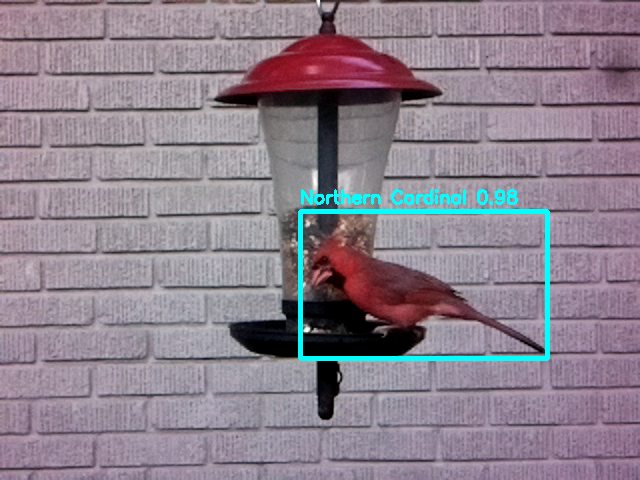
Vizy can identify common birds with “Birdfeeder”, one of the several built-in applications that uses local processing only.

The usual way to do machine vision is to get a USB camera and run something like OpenCV on a desktop machine to handle the processing. But Vizy leverages a Raspberry Pi 4 to provide a tightly-integrated unit in a small package with a variety of ready-to-run applications. For example, the “Birdfeeder” application comes ready to take snapshots of and identify common species of bird, while also identifying party-crashers like squirrels.

The demonstration video on their page shows off using the built-in high-current I/O header to control a sprinkler, repelling non-bird intruders with a splash of water while uploading pictures and video clips. The hardware design also looks well thought out; not only is there a safe shutdown and low-power mode for the Raspberry Pi-based hardware, but the lens can be swapped and the camera unit itself even contains an electrically-switched IR filter.

Vizy has a Kickstarter campaign planned, but like many others, Charmed Labs is still adjusting to the changes the COVID-19 pandemic has brought. You can sign up to be notified when Vizy launches; we know we’ll be keen for a closer look once it does. Easier machine vision is always a good thing, because it helps free people to focus on clever ideas like machine vision-based tool alignment.

Robotic Arm Sports Industrial Design, 3D-Printed Cycloidal Gears

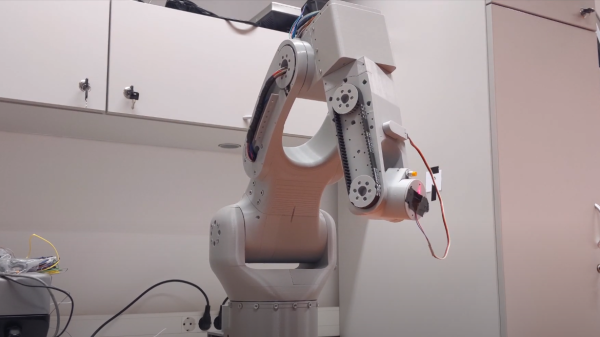
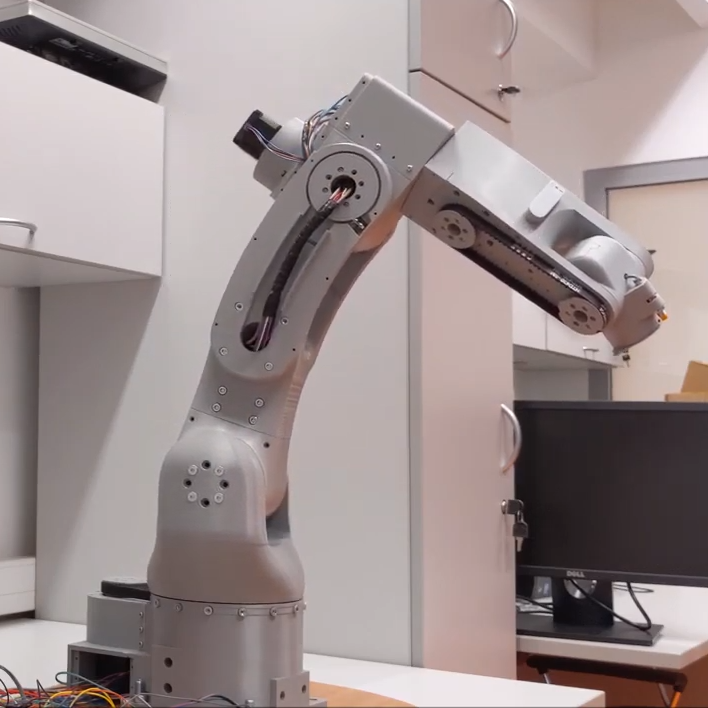
[Petar Crnjak]’s Faze4 is a open source robotic arm with 3D printable parts, inspired in part by the design of industrial robot arms. In particular, [Petar] aimed to hide wiring and cables inside the arm as much as possible, and the results look great! Just watch it move in the video below.

Cycloidal gearboxes have been showing up in robotic arm projects more and more, and Faze4 makes good use of them. Why cycloidal gears? They are readily 3D printed and offer low backlash, which makes them attractive for robotic applications. There’s no need to design cycloidal gears from scratch, either. [Petar] found this cycloidal gear generator in OnShape extremely useful when designing Faze4.

The project’s GitHub repository has all the design files, as well as some video demonstrations and a link to assembly documentation for anyone who would like to make their own. Watch Faze4 go through some test movements in the video embedded below.

Continue reading “Robotic Arm Sports Industrial Design, 3D-Printed Cycloidal Gears” →

Gaze Inside The Valve Index VR Headset In Detailed Teardown

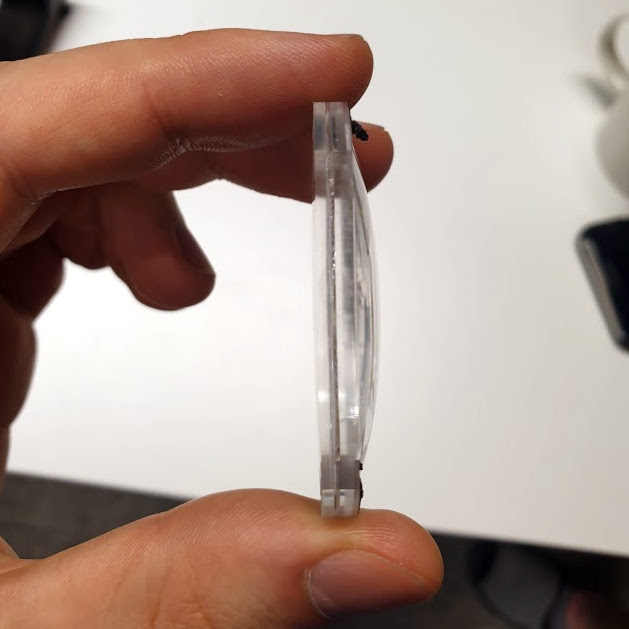
Valve’s unique multilayer lenses are far thinner than one might expect.

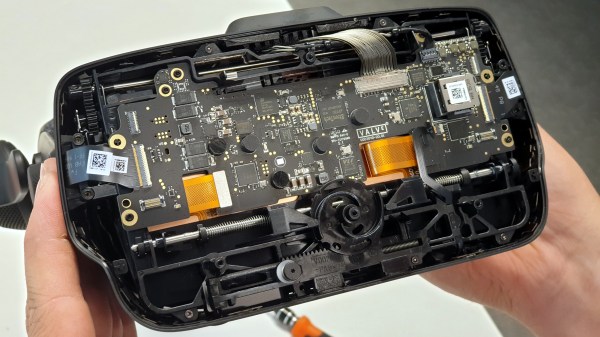
Want to see what exactly is inside the $500 (headset only price) Valve Index VR headset that was released last summer? Take a look at this teardown by [Ilja Zegars]. Not only does [Ilja] pull the device apart, but he identifies each IC and takes care to point out some of the more unique hardware aspects like the fancy diffuser on the displays, and the unique multilayered lenses (which are much thinner than one might expect.)

[Ilja] is no stranger to headset hardware design, and in addition to all the eye candy of high-res photographs, provides some insightful commentary to help make sense of them. The “tracking webs” pulled from the headset are an interesting bit, each is a long run of flexible PCB that connects four tracking sensors for each side of the head-mounted display back to the main PCB. These sensors are basically IR photodiodes, and detect the regular laser sweeps emitted by the base stations of Valve’s lighthouse tracking technology. [Ilja] also gives us a good look at the rod and spring mechanisms seen above that adjust distance between the two screens.

Want more? [Ilja] also has a gallery of high-resolution images available for those you who fancy a closer look. Also, if you missed it, we covered an examination of the Index’s optical design as part of everything you probably didn’t know about field of view in head-mounted displays.

[via Twitter]

Folding Raspberry Pi Enclosure Prints In One Piece, No Screws In Sight

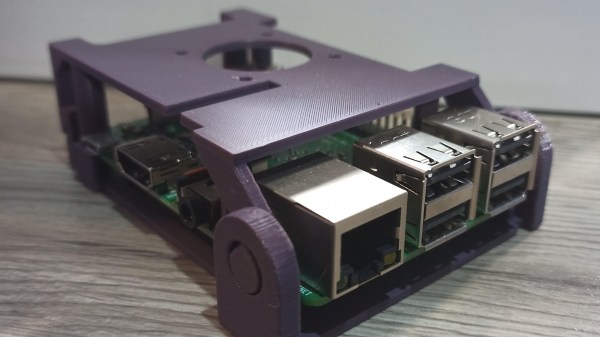
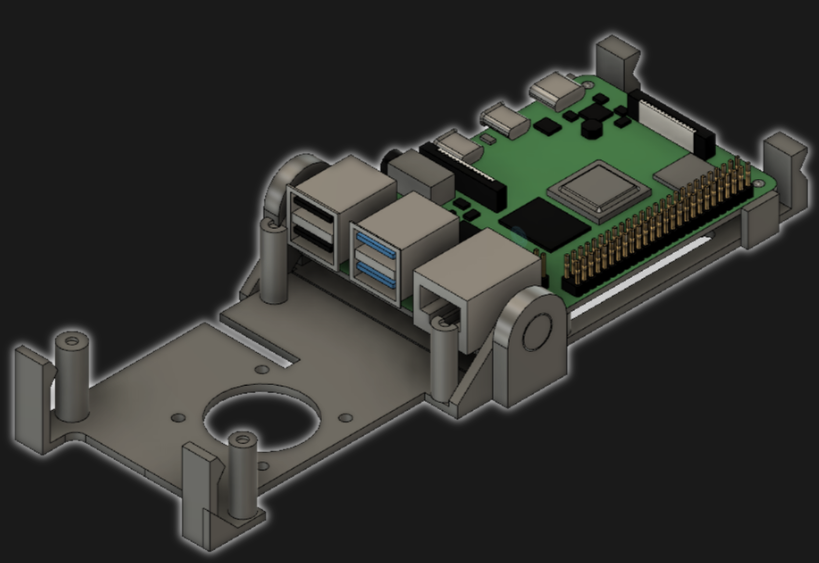
[jcprintnplay] has challenged himself to making Raspberry Pi cases in different ways, and his Fold-a-Pi enclosure tries for a “less is more” approach while also leveraging the strong points of 3D printing. The enclosure prints as a single piece in about 3 hours, and requires no additional hardware whatsoever.

The design requires no screws or other fasteners, and provides a mounting hole for a fan as well as some holes for mounting the enclosure itself to something. All the ports and headers are accessible, and the folding one-piece design is not just a gimmick; in a workshop situation where the Pi needs to be switched out or handled a lot, it takes no time at all to pop the Raspberry Pi in and out of the enclosure.

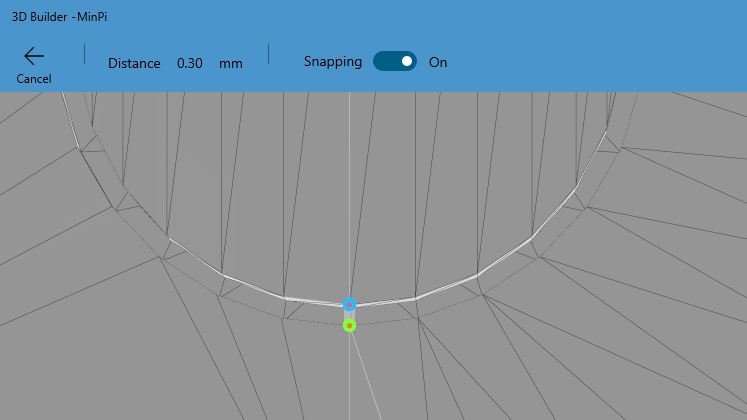
Microsoft’s 3D Builder has a pretty useful measurement tool for STLs.

[James] points out that the trick with a print-in-place hinge like this is leaving enough space between the parts so that the two pieces aren’t fused together, but not so much space that the print fails. He doesn’t go into detail about how much space worked or didn’t work, but an examination of the downloadable model shows that the clearance used looks like 0.30 mm, intended to be printed with a 0.4 mm nozzle.

[James] also demonstrates the value of being able to do quick iterations on a design when prototyping. In a video (embedded below) The first prototype had the hinge not quite right. In the second prototype there was a lack of clearance when closing. The third one solved both and shows the final design.

Continue reading “Folding Raspberry Pi Enclosure Prints In One Piece, No Screws In Sight” →

3D Printable Kinematic Couplings, Ready To Use

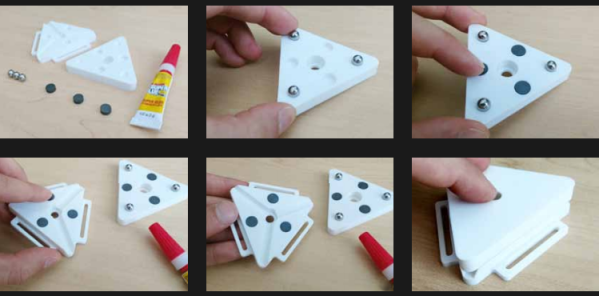
Time may bring change, but kinematic couplings don’t. This handy kinematic couplings resource by [nickw] was for a design contest a few years ago, but what’s great is that it includes ready-to-use models intended for 3D printing, complete with a bill of materials (and McMaster-Carr part numbers) for hardware. The short document is well written and illustrated with assembly diagrams and concise, practical theory. The accompanying 3D models are ready to be copied and pasted anywhere one might find them useful.

What are kinematic couplings? They are a way to ensure that two parts physically connect, detach, and re-connect in a precise and repeatable way. The download has ready-to-use designs for both a Kelvin and Maxwell system kinematic coupling, and a more advanced design for an optomechanical mount like one would find in a laser system.

The download from Pinshape requires a free account, but the models and document are licensed under CC – Attribution and ready to use in designs (so long as the attribution part of the license is satisfied, of course.) Embedded below is a short video demonstrating the coupling using the Maxwell system. The Kelvin system is similar.

Continue reading “3D Printable Kinematic Couplings, Ready To Use” →

See The Science Behind VR Display Design, And What Makes A Problem Important

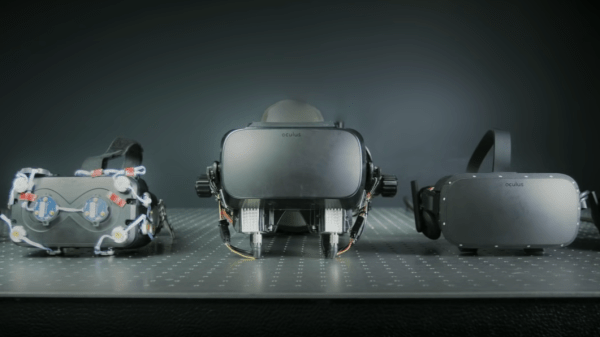
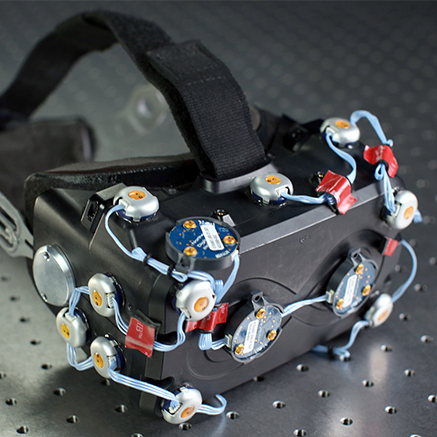
VR headsets are more and more common, but they aren’t perfect devices. That meant [Douglas Lanman] had a choice of problems to address when he joined Facebook Reality Labs several years ago. Right from the start, he perceived an issue no one seemed to be working on: the fact that the closer an object in VR is to one’s face, the less “real” it seems. There are several reasons for this, but the general way it presents is that the closer a virtual object is to the viewer, the more blurred and out of focus it appears to be. [Douglas] talks all about it and related issues in a great presentation from earlier this year (YouTube video) at the Electronic Imaging Symposium that sums up the state of the art for VR display technology while giving a peek at the kind of hard scientific work that goes into identifying and solving new problems.

Early varifocal prototype

[Douglas] chose to address seemingly-minor aspects of how the human eye and brain perceive objects and infer depth, and did so for two reasons: one was that no good solutions existed for it, and the other was that it was important because these cues play a large role in close-range VR interactions. Things within touching or throwing distance are a sweet spot for interactive VR content, and the state of the art wasn’t really delivering what human eyes and brain were expecting to see. This led to years of work on designing and testing varifocal and multi-focal displays which, among other things, were capable of presenting images in a variety of realistic focal planes instead of a single flat one. Not only that, but since the human eye expects things that are not in the correct focal plane to appear blurred (which is itself a depth cue), simulating that accurately was part of things, too.

The entire talk is packed full of interesting details and prototypes. If you have any interest in VR imaging and headset design and have a spare hour, watch it in the video embedded below.

Continue reading “See The Science Behind VR Display Design, And What Makes A Problem Important” →