3D-Printed Tooling Enables DIY Electrochemical Machining

When it comes to turning a raw block of metal into a useful part, most processes are pretty dramatic. Sharp and tough tools are slammed into raw stock to remove tiny bits at a time, releasing the part trapped within. It doesn’t always have to be quite so violent though, as these experiments in electrochemical machining suggest.

Electrochemical machining, or ECM, is not to be confused with electrical discharge machining, or EDM. While similar, ECM is a much tamer process. Where EDM relies on a powerful electric arc between the tool and the work to erode material in a dielectric fluid, ECM is much more like electrolysis in reverse. In ECM, a workpiece and custom tool are placed in an electrolyte bath and wired to a power source; the workpiece is the anode while the tool is the cathode, and the flow of charged electrolyte through the tool ionizes the workpiece, slowly eroding it.

The trick — and expense — of ECM is generally in making the tooling, which can be extremely complicated. For his experiments, [Amos] took the shortcut of 3D-printing his tool — he chose [Suzanne] the Blender monkey — and then copper plating it, to make it conductive. Attached to the remains of a RepRap for Z-axis control and kitted out with tanks and pumps to keep the electrolyte flowing, the rig worked surprisingly well, leaving a recognizably simian faceprint on a block of steel.

[Amos] admits the setup is far from optimized; the loop controlling the distance between workpiece and tool isn’t closed yet, for instance. Still, for initial experiments, the results are very encouraging, and we like the idea of 3D-printing tools for this process. Given his previous success straightening his own teeth or 3D-printing glass, we expect he’ll get this fully sorted soon enough.

Cool WS2811 Trick Makes LED Art Installation Smooth

Normally, when a project calls for addressable LEDs, we just throw a strip of WS2812s and an Arduino together, cobble together some code from the examples in the FastLED library, and call it a day. We don’t put much thought into what’s going on under the hood, unless and until we run into an LED project that’s a little more challenging.

Inventor [Leo Fernekes] found himself in such a situation recently, when he pitched in on an LED art installation. The project called for rings of LED bars around the trunks of trees on a private estate. The physical size of the project and the aesthetic requirements created significant challenges, though. One of these was finding a way to control the LED bars, each of which draws about 100 mA and needs to be very smoothly dimmed. [Leo] looked at the WS2811 LED driver, but found that the low drive current and the 8-bit PWM output failed to tick either of those boxes.

[Leo] solved both problems by using two of the three PWM channels on the chip in concert — one to control the current and one to PWM the LED. The circuit he came up with is deceptively simple — just four transistors, a Schottky diode, and a bunch of passives. The other clever bit is the data interface between LED bars, which can be configured as either single-ended or differential. This allows the same interface to be used for the short distance between bars on a tree, and the longer runs between trees.

As usual, [Leo] does a great job of explaining his design and how it works, which we find very instructional. He did something similar when he managed to dim a non-dimmable LED fixture.

Continue reading “Cool WS2811 Trick Makes LED Art Installation Smooth”

Parts Shortage Forces Creativity For This Recursive Clock Of Clocks

We’ve been seeing a lot of metaclocks lately — a digital clock whose display is formed by the sweeping hands of an array of individual analog clocks. They can look fantastic, and we’ve certainly seen some great examples.

But in this time of supply pinches, it’s not always possible to gather the parts one needs for a full-scale build. Happily, that didn’t stop [Erich Styger] from executing this circular multi-metaclock with only thirteen of his custom dual-shaft stepper analog movements. Normally, his clocks use double that number of movements, which he arranges in a matrix so that the hands can be positioned to form virtual seven-segment displays. By arranging the movements in a circle, the light-pipe hands can mimic an analog clock face, or perform any of [Erich]’s signature “intermezzo” animations, each of which is graceful and engaging to watch. Check out a little of what this charmingly recursive clock has to offer in the video below.

[Erich] could easily have gotten stuck on the original design — he’s been at this metaclock game for a while, after all. The fact that the reduced part count forced him to get creative on the display is the best part of this build, at least to us.

Continue reading “Parts Shortage Forces Creativity For This Recursive Clock Of Clocks”

Hackaday Links Column Banner

Hackaday Links: July 25, 2021

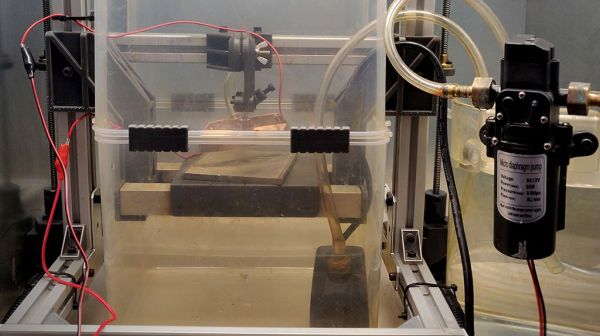
Everyone makes mistakes in their job, but very few of us get the chance to make a one-character mistake with the potential to brick millions of devices. But that’s what happened to a hapless Google developer, who made an understandable typo in the ChromeOS code that ended up making it all the way to production. The error, which was in the OS encryption keys vault, was supposed to include the “&&” operator for a logical AND. The developer instead used a single ampersand, which broke the who conditional statement. This meant the OS evaluated even correct passwords as invalid, leaving users locked out of their Chromebooks. To be fair to the developer there should be a lot of QA steps between that typo and production, but it still has to sting.

Speaking of whoopsies, sometimes it just doesn’t pay to be right on the internet. It started when a player of the popular tank battle simulator “War Thunder” took issue with the in-game 3D model of the British Challenger 2 main battle tank. The player argued that the model was inaccurate to the point of affecting gameplay, and thought the model should be changed to make things more realistic. There seemed to be some basis for this, as the player claimed to have been a Challenger 2 commander and gunnery instructor. What’s more, like any good Netizen, the player cited sources to back up the claims, including excerpts from the official Challenger 2 instruction manual. Players on the War Thunder forum flagged this as likely classified material, but the player insisted that it wasn’t — right up to the point where the UK Ministry of Defence said, “Not so fast.” It turns out that the manual hasn’t been declassified, and that releasing the material potentially runs afoul of the Official Secrets Act, which carries with it up to 14 years detention at Her Majesty’s pleasure.

For fans of pinball, the announcement that the Museum of Pinball in Banning, California is closing its doors for good is probably a mix of good news and bad. It’s obviously bad news for any museum to close, especially one that curates collections from popular culture. And there’s no denying that pinball has been a big part of that culture, and that the machines themselves are often works of electromechanical art. But it appears that the museum just couldn’t make a go of it, and now its cavernous space will be sold off to a cannabis grower. But the sad news is tempered by the potential for private collectors and other pinball aficionados to score one of the estimated 1,100 pins the museum now needs to find a home for. We’ve never been to the museum, so it’s hard to say what kinds of machines they have and how collectible they are, but regardless, the market is about to be flooded. If you’re nearby, you might want to take a chance to see and play some of these machines one last time, before they get shipped off to private game rooms around the world.

And finally, exciting news from Hackaday superfriend Fran Blanche, who will soon tick an item off her bucket list with a zero-G ride on “G-Force 1”. Not to be confused with its military cousin the “Vomit Comet”, the weightlessness-simulating aircraft will afford Fran a total of about five minutes of free-fall when she takes the ride in a couple of months. There will also be periods of the flight that will simulate the gravity on both the Moon and Mars, so Fran has promised some Matt Damon mythbusting and Buzz Aldrin moonbouncing. And always one to share, Fran will bring along a professional video crew, so she can concentrate on the experience rather than filming it. We’ve actually scheduled Fran for a Hack Chat in August, to talk about the flight and some of her other cool goings-on, so watch out for that.

Automatic Coil Winder Gets It Done With Simple Hardware And Software

We’ve grown to expect seeing mechatronics project incorporate a standard complement of components, things like stepper motors, Arduinos, lead screws, timing belts and pulleys, and aluminum extrusions. So when a project comes along that breaks that mold, even just a little, we sit up and take notice.

Departing somewhat from this hardware hacking lingua franca is [tuenhidiy]’s automatic coil winder, which instead of aluminum extrusions and 3D-printed connectors uses simple PVC pipe and fittings as a frame. Cheap, readily available, and easily worked, the PVC does a fine job here, and likely would on any project where forces are low and precision isn’t critical. The PVC frame holds two drive motors, one to wind the wire onto a form and one to drive a lead screw that moves the form back and forth. An Arduino with a CNC shield takes care of driving the motors, and the G-code needed to do so is generated by a simple spreadsheet that takes into account the number turns desired, the number of layers, the dimensions of the spool, and the diameters of the wire. The video below shows the machine going through its paces, with pretty neat and tidy results.

Being such a tedious task, this is far from the first coil winder we’ve seen. Some adhere to the standard design language, some take off in another direction entirely, but they’re all instructive and fun to watch in action.

Continue reading “Automatic Coil Winder Gets It Done With Simple Hardware And Software”

Simple Tip Helps With Powder Coating Perfection On Difficult Parts

To say that that the commercially available garden path lights commonly available at dollar stores are cheap is a vast overstatement of their true worthlessness. These solar-powered lights are so cheaply built that there’s almost no point in buying them, a fact that led [Mark Presling] down a fabrication rabbit hole that ends with some great tips on powder coating parts with difficult geometries.

Powder coating might seem a bit overkill for something as mundane as garden lights, but [Mark] has a point — if you buy something and it fails after a few weeks in the sun, you might as well build it right yourself. And a proper finish is a big part of not only getting the right look, but to making these totally un-Tardis-like light fixtures last in the weather. The video series below covers the entire design and build process, which ended up having an aluminum grille with some deep grooves. Such features prove hard to reach with powder coating, where the tiny particles of the coating are attracted to the workpiece thanks to a high potential difference between them. After coating, the part is heated to melt the particles and form a tough, beautiful finish.

But for grooves and other high-aspect-ratio features, the particles tend to avoid collecting in the nooks and crannies, leading to an uneven finish. [Mark]’s solution was to turn to “hot flocking”, where the part is heated before applying uncharged coating to the deep features. This gets the corners and grooves well coated before the rest of the coating is applied in the standard way, leading to a much better finish.

We love [Presser]’s attention to detail on this build, as well as the excellent fabrication tips and tricks sprinkled throughout the series. You might want to check out some of his other builds, like this professional-looking spot welder.

Continue reading “Simple Tip Helps With Powder Coating Perfection On Difficult Parts”

Modified 3D-Printer Solders Through-Hole Components

Surface-mount technology has been a fantastic force multiplier for electronics in general and for hobbyists in particular. But sometimes you’ve got no choice but to use through-hole components, meaning that even if you can take advantage of SMDs for most of the design, you still might need to spend a little time with soldering iron in hand. Or not, if you’ve got a spare 3D printer lying around.

All we’ve got here is a fairly brief video from [hydrosys4], so there aren’t a lot of build details. But it’s pretty clear what’s going on here. Starting with what looks like a Longer LK4 printer, [hydrosys4] added a bracket to hold a soldering iron, and a guide for solder wire. The solder is handled by a more-or-less standard extruder, which feeds it into the joint once it’s heated by the iron. The secret sauce here is probably the fixturing, with 3D-printed jigs that hold the through-hole connectors in a pins-up orientation on the bed of the printer. With the PCB sitting on top of the connectors, it’s just a matter of teaching the X-Y-Z position of each joint, applying heat, and advancing the solder with the extruder.

The video below shows it in action at high speed; we slowed it down to 25% to get an idea of how it is in reality, and while it might not be fast, it’s precise and it doesn’t get tired. It may not have much application for one-off boards, but if you’re manufacturing small PCB runs, it’s a genius solution. We’ve seen similar solder bots before, but hats off to [hydrosys4] for keeping this one simple.

Continue reading “Modified 3D-Printer Solders Through-Hole Components”