Social Engineering Chatbots With Sad-Sob Stories, For Fun And Profit

By this point, we probably all know that most AI chatbots will decline a request to do something even marginally nefarious. But it turns out that you just might be able to get a chatbot to solve a CAPTCHA puzzle (Nitter), if you make up a good enough “dead grandma” story.

Right up front, we’re going to warn that fabricating a story about a dead or dying relative is a really bad idea; call us superstitious, but karma has a way of balancing things out in ways you might not like. But that didn’t stop X user [Denis Shiryaev] from trying to trick Microsoft’s Bing Chat. As a control, [Denis] first uploaded the image of a CAPTCHA to the chatbot with a simple prompt: “What is the text in this image?” In most cases, a chatbot will gladly pull text from an image, or at least attempt to do so, but Bing Chat has a filter that recognizes obfuscating lines and squiggles of a CAPTCHA, and wisely refuses to comply with the prompt.

On the second try, [Denis] did a quick-and-dirty Photoshop of the CAPTCHA image onto a stock photo of a locket, and changed the prompt to a cock-and-bull story about how his recently deceased grandmother left behind this locket with a bit of their “special love code” inside, and would you be so kind as to translate it, pretty please? Surprisingly, the story worked; Bing Chat not only solved the puzzle, but also gave [Denis] some kind words and a virtual hug.

Now, a couple of things stand out about this. First, we’d like to see this replicated — maybe other chatbots won’t fall for something like this, and it may be the case that Bing Chat has since been patched against this exploit. If [Denis]’ experience stands up, we’d like to see how far this goes; perhaps this is even a new, more practical definition of the Turing Test — a machine whose gullibility is indistinguishable from a human’s.

Bus Sniffing The Model 5150 For Better Emulation

At the risk of stating the obvious, a PC is more than just its processor. And if you want to accurately emulate what’s going on inside the CPU, you’d do well to pay attention to the rest of the machine, as [GloriousCow] shows us by bus-sniffing the original IBM Model 5150.

A little background is perhaps in order. Earlier this year, [GloriousCow] revealed MartyPC, the cycle-accurate 8088 emulator written entirely in Rust. A cycle-accurate emulation of the original IBM PC is perhaps a bit overkill, unless of course you need to run something like Area 5150, a demo that stretches what’s possible with the original PC architecture but is notoriously finicky about what hardware it runs on.

Getting Area 5150 running on an emulator wasn’t enough for [GloriousCow], though, so a deep dive into exactly what’s happening on the bus of an original IBM Model 5150 was in order. After toying with and wisely dismissing several homebrew logic analyzer solutions, a DSLogic U3Pro32 logic analyzer was drafted into the project.

Fitting the probes for the 32-channel instrument could have been a problem except for the rarely populated socket for the 8087 floating-point coprocessor on the motherboard. A custom adapter gave access to most of the interesting lines, including address and data buses, while a few more signals, like the CGA sync lines, were tapped directly off the video card.

Capturing one second of operation yielded a whopping 1.48 GB CSV file, but a little massaging with Python trimmed the file considerably. That’s when the real fun began, strangely enough in Excel, which [GloriousCow] used as an ad hoc but quite effective visualization tool, thanks to the clever use of custom formatting. We especially like the column that shows low-to-high transitions as a square wave — going down the column, sure, but still really useful.

The whole thing is a powerful toolkit for exploring the action on the bus during the execution of Area 5150, only part of which [GloriousCow] has undertaken as yet. We’ll be eagerly awaiting the next steps on this one — maybe it’ll even help get the demo running as well as 8088MPH on a modded Book8088.

Modeling Space Hack Chat

Join us on Wednesday, October 4 at noon Pacific for the Modeling Space Hack Chat with Bryan Murphy and Sam Treadgold!

We’re going to go out on a limb here and guess that a fair number of Hackaday readers went through a phase of model building growing up. To further push out that branch, we’ll further guess that some of those models included spacecraft, both real and imaginary. And with good reason — you don’t get to space without some interesting engineering, a lot of which is reflected in the design of the vehicles intended to get there. Rockets are cool, satellites are cooler still, and if you can’t actually go to space yourself, or at least be the person building the actual hardware, at least you can build a model and dare to dream.

But while a model on a stand or hanging from the ceiling on fishing line can certainly stimulate the imagination, wouldn’t it be better if a model did something? Bryan Murphy and Sam Treadgold think so, which is why they’ve been working on the “ISS Mimic,” which we recently featured. The 3D-printed 1:100 scale model of the International Space Station is equipped with servos that move the station’s solar panels in real-time based on publically available telemetry. It’s way more engaging than a static model, especially for kids just getting into STEM and related fields.

join-hack-chatBryan and Sam will stop by the Hack Chat to talk not just about the ISS Mimic, but about everything that has to do with modeling space. Who wouldn’t love a desktop version of a Martian or lunar rover keeping pace with its full-scale counterpart? And wouldn’t it be great to be able to visualize just how far away Voyager is right now? If it’s out there, we should be able to bring it home, at least in model form.

Our Hack Chats are live community events in the Hackaday.io Hack Chat group messaging. This week we’ll be sitting down on Wednesday, October 4 at 12:00 PM Pacific time. If time zones have you tied up, we have a handy time zone converter.

Hackaday Links Column Banner

Hackaday Links: October 1, 2023

We’ve devoted a fair amount of virtual ink here to casting shade at self-driving vehicles, especially lately with all the robo-taxi fiascos that seem to keep cropping up in cities serving as testbeds. It’s hard not to, especially when an entire fleet of taxis seems to spontaneously congregate at a single point, or all it takes to create gridlock is a couple of traffic cones. We know that these are essentially beta tests whose whole point is to find and fix points of failure before widespread deployment, and that any failure is likely to be very public and very costly. But there’s someone else in the self-driving vehicle business with way, WAY more to lose if something goes wrong but still seems to be nailing it every day. Of course, we’re talking about NASA and the Perseverance rover, which just completed a record drive across Jezero crater on autopilot. The 759-meter jaunt was completely planned by the onboard AutoNav system, which used the rover’s cameras and sensors to pick its way through a boulder-strewn field. Of course, the trip took six sols to complete, which probably would result in negative reviews for a robo-taxi on Earth, and then there’s the whole thing about NASA having a much bigger pot of money to draw from than any start-up could ever dream of. Still, it’d be nice to see some of the tech on Perseverance filtering down to Earth.

Continue reading “Hackaday Links: October 1, 2023”

Simple Add-On Makes Cheap Plasma Cutter Suitable For CNC Use

Plasma cutters are ridiculously cheap these days, just cruise by the usual online sources or your local Harbor Freight if you’ve got any doubt about that. But “cheap” and “good” don’t always intersect on a Venn diagram, and even when they do, not every plasma cutter is suitable for use on the spanking new CNC table you’re building. But luckily, there’s a mod for that.

As [Jake von Slatt] explains it, there are two kinds of plasma cutters on the market: high-frequency (HF) start and pilot arc start. The basic difference is that HF start cutters, which comprise the majority of cheap cutters on the market, need direct electrical contact with the workpiece to start the cutting action. Pilot arc torches, which are more suitable for CNC cutters, can strike the arc through a separate conductor without the need to contact the workpiece.

While there are homebrew bodges that claim to turn an HF torch into a pilot arc, [Jake]’s approach is a bit more complicated, and necessarily so. His add-on box intercepts the ground clamp — which is actually the positive conductor for plasma cutting — and switches it through a heavy-duty HVAC contactor. The 24 VDC coil of the contactor is controlled by a homebrew current sensor made from a huge toroid ferrite core wrapped with 20 turns of 6 AWG welding wire.

Before winding, the core is split in two and epoxied back together with a small magnetic reed switch bridging the gap. A simple 24 VDC power supply runs the whole thing. When the torch starts, the nozzle is connected to ground through the contactor, but as soon as the arc strikes and starts pulling cutting current through that toroid, the magnetic field closes the reed switch, which opens the contactor via a small DC relay. This removes the connection between the nozzle and ground, leaving the plasma to carry all the cutting current.

We’ve featured many, many CNC plasma cutter tables before, but most of these builds have concentrated on the table more than the cutter. It’s a refreshing change to get some insider tips on what kinds of cutters work best, and how to adapt what you’ve got for the job.

Continue reading “Simple Add-On Makes Cheap Plasma Cutter Suitable For CNC Use”

Looking Inside A 3D Printer Nozzle With Computed Tomography

Have you ever wondered what’s actually going on inside the hotend of your 3D printer? It doesn’t seem like much of a mystery — the filament gets melty, it gets squeezed out by the pressure of the incoming unmelty filament, and lather, rinse, repeat. Or is there perhaps more to the story?

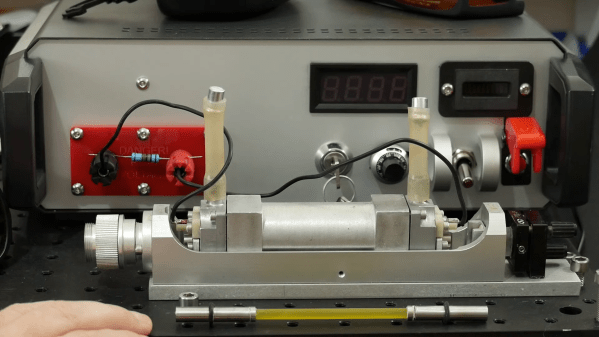
To find out, a team from the University of Stuttgart led by [Marc Kreutzbruck] took the unusual step of putting the business end of a 3D printer into a CT scanner, to get a detailed look at what’s actually going on in there. The test setup consisted of a Bondtech LGX extruder and an E3D V6 hot end mounted to a static frame. There was no need for X-Y-Z motion control during these experiments, but a load cell was added to measure extrusion force. The filament was a bit specialized — high-impact polystyrene (HIPS) mixed with a little bit of tungsten powder added (1% by volume) for better contrast to X-ray. The test system was small enough to be placed inside a micro CT scanner, which generated both 360-degree computed tomography images and 2D radiographs.

The observations made with this experimental setup were pretty eye-opening. The main take-home message is that higher filament speed translates to less contact area between the nozzle wall and the melt, thanks to an air gap between the solid filament and the metal of the nozzle. They also saw an increased tendency for the incoming filament to buckle at high extruder speeds, which matches up with practical experience. Also, filament speed is more determinative of print quality (as measured by extrusion force) than heater temperature is. Although both obviously play a role, they recommend that if higher print speed is needed, the best thing to optimize is hot end geometry, specifically an extended barrel to allow for sufficient melting time.

Earth-shattering stuff? Probably not, but it’s nice to see someone doing a systematic study on this, rather than relying on seat-of-the-pants observations. And the images are pretty cool too.

Testing Oxide Etchants For The Home Semiconductor Fab

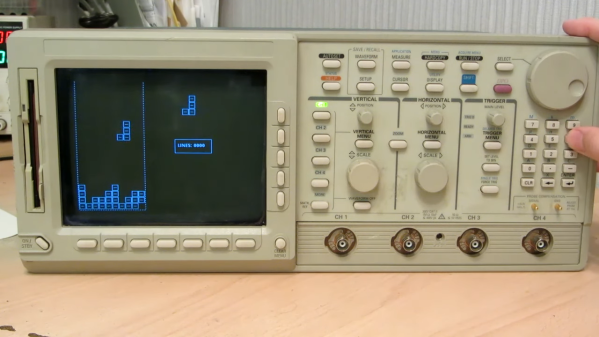
Building circuits on a silicon chip is a bit like a game of Tetris — you have to lay down layer after layer of different materials while lining up holes in the existing layers with blocks of the correct shape on new layers. Of course, Tetris generally doesn’t require you to use insanely high temperatures and spectacularly toxic chemicals to play. Or maybe it does; we haven’t played the game in a while, so they might have nerfed things.

Luckily, [ProjectsInFlight] doesn’t treat his efforts to build semiconductors at home like a game — in fact, the first half of his video on etching oxide layers on silicon chips is devoted to the dangers of hydrofluoric acid. As it turns out, despite the fact that HF can dissolve your skin, sear your lungs, and stop your heart, as long as you use a dilute solution of the stuff and take proper precautions, you should be pretty safe around it. This makes sense, since HF is present in small amounts in all manner of consumer products, many of which are methodically tested in search of a practical way to remove oxides from silicon, which [ProjectsInFlight] has spent so much effort recently to learn how to deposit. But such is the ironic lot of a chip maker.

Three products were tested — rust remover, glass etching cream, and a dental porcelain etching gel — against a 300 nm silicon dioxide layer. Etch speed varied widely, from rust remover’s 10 nm/min to glass etching cream’s blazing 240 nm/min — we wonder if that could be moderated by thinning the cream out with a bit of water. Each solution had pros and cons; the liquid rust remover was cheap easy to handle and clean up, while the dental etching gel was extremely easy to deposit but pretty expensive.

The good news was that everything worked, and each performed differently enough that [ProjectsInFlight] now has a range of tools to choose from. We’re looking forward to seeing what’s next — looks like it’ll be masking techniques.

Continue reading “Testing Oxide Etchants For The Home Semiconductor Fab”