Gear Up Your Gear Knowledge With Gears

Gears are fairly straightforward way to couple rotational motion, and the physics topics required to understand them are encountered in an entry level physics classroom, not a university degree. But to really dig down to the root of how gears transfer motion may be somewhat more complex than it seems. [Bartosz Ciechanowski] put together an astonishingly good interactive teaching tool on gears, covering the fundamentals of motion up through multi-stage gear trains.

Illustrating the distance traveled at different points on the disc

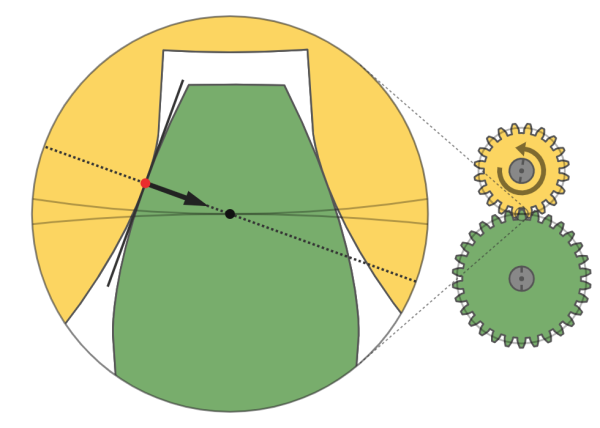
The post starts at the beginning – not “how to calculate a gear ratio” – but how does rotational motion work at all. The illustrations help give the reader an intuitive sense for how the rate of rotation is measured and what that measurement actually represents in the real world. From there [Bartosz] builds up to describing how two discs touching edge to edge transfer motion and the relationship of their size on that process. After explaining torque he has the fundamentals in place to describe why gears have teeth, and why they work at all.

Well written explanatory copy aside, the real joy in this post is the interactivity. Each concept is illustrated, and each illustration is interactive. Images are accompanied by a slider which lets you adjust what’s shown, either changing the speed of a rotating gear or advancing the motion of two teeth interlocking. We found that being able to move through time this way really helped form an intuitive understanding of the concepts being discussed. This feels like the dream of interactive multimedia textbooks come to life.

Slice Through Your Problems With A Shukran

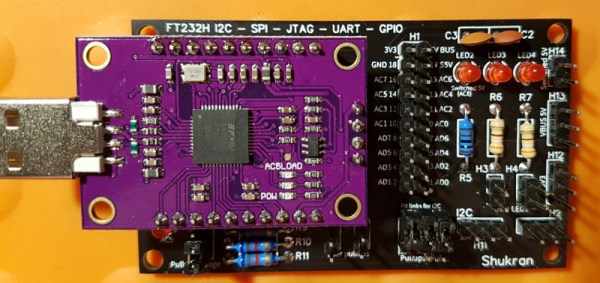
We’d wager most hackers are familiar with FTDI as the manufacturer of the gold standard USB-UART interfaces. Before parts like the ultra cheap CH340 and CP2102 became common, if you needed to turn a USB cable into a TTL UART device, “an FTDI” (probably an FT232RL) was the way to make that happen. But some of the parts in the FT232* family are capable of much more. Wanting to get at more than a UART, [linker3000] designed the Shukran to unlock the full potential of the FT232H.

The FT232H is interesting because it’s an exceptionally general purpose interface device. Depending on configuration it can turn USB into UART, JTAG, SPI, I2C, and GPIO. Want to prototype the driver for a new sensor? Why bother flashing your Teensy when you can drive it directly from the development machine with an FT232H and the appropriate libraries?

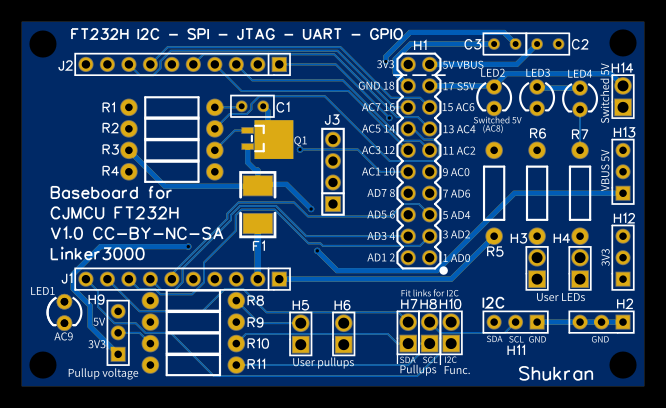
The Shukran is actually a breakout for the “CJMCU FT232H” module available from many fine internet retailers. This board is a breakout that exposes a USB-A connecter on one side and standard 0.1″ headers on the other, with a QFN FT232H and all the passives in the middle. But bare 0.1″ headers (in a square!) require either further breadboarding or a nest of jumper wires to be useful. Enter the Shukran. In this arrangement, the CJMCU board is cheap and handles the SMT components, and the Shukran is easy to assemble and makes it simple to use.

The Shukran gives you LEDs, buttons and switches, and a bunch of pull up resistors (for instance, for I2C) on nicely grouped and labeled headers. But most importantly it provides a fused power supply. Ever killed the USB controller in your computer because you forgot to inline a sacrificial USB hub? This fuse should take care of that risk. If you’re interested in building one of these handy tools, sources and detailed BOM as well as usage instructions are available in the GitHub repo linked at the top.

Little Hex Tricks Make Little Displays A Little Easier

Depending on the device in hand and one’s temperament, bringing up a new part can be a frolic through the verdant fields of discovery or an endless slog through the grey marshes of defeat. One of the reasons we find ourselves sticking with tried and true parts we know well is that interminable process of configuration. Once a new display controller is mostly working, writing convenience functions to make it easier to use can be very satisfying, but the very first thing is figuring out how to make it do anything at all. Friend of Hackaday [Dan Hienzsch] put together a post describing how to use a particular LED controller which serves as a nice walkthrough of figuring out the right bitmath to make things work, and includes a neat trick or two.

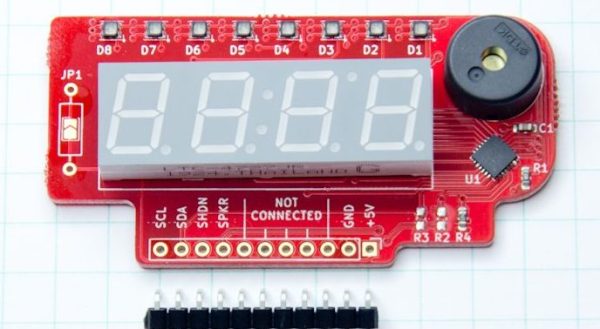
The bulk of the post is dedicated to describing the way [Dan] went about putting together his libraries for a 7-segment display demo board he makes. At its heart the board uses the IS31FL3728 matrix driver from ISSI. We love these ISSI LED controllers because they give you many channels of control for relatively low cost, but even with their relative simplicity you still need to do some bit twiddling to light the diodes you need. [Dan]’s post talks about some strategies for making this easier like preconfigured lookup tables with convenient offsets and masking bits to control RGB LEDs.

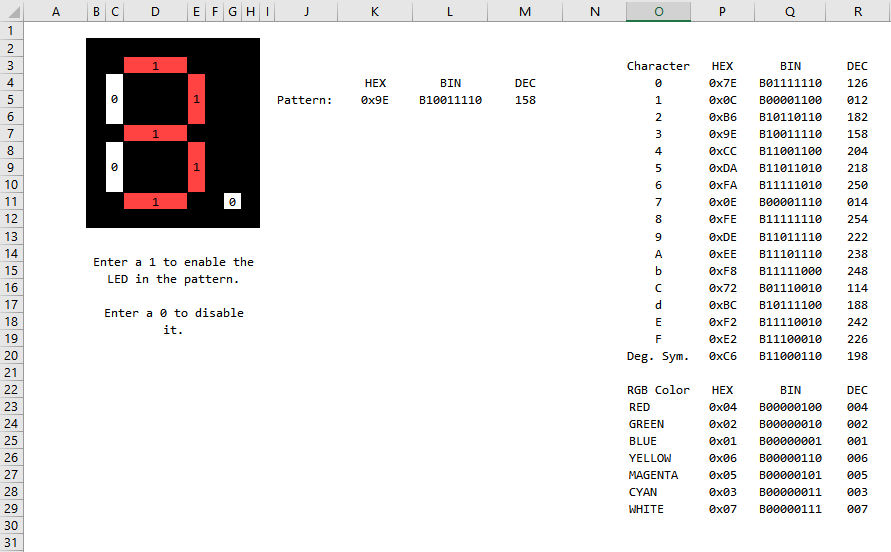
There’s one more trick which we think is the hidden star of the show; a spreadsheet which calculates register values based on “GUI” input! Computing the bit math required to control a display can be an exercise in frustration, especially if the logical display doesn’t fit conveniently in the physical register map of the controller. A spreadsheet like this may not be particularly sexy but it gets the job done; exactly the kind of hack we’re huge fans of here. We’ve mirrored the spreadsheet so you can peek at the formulas inside, and the original Excel document is available on his blog.

Open Laptop Soon To Be Open For Business

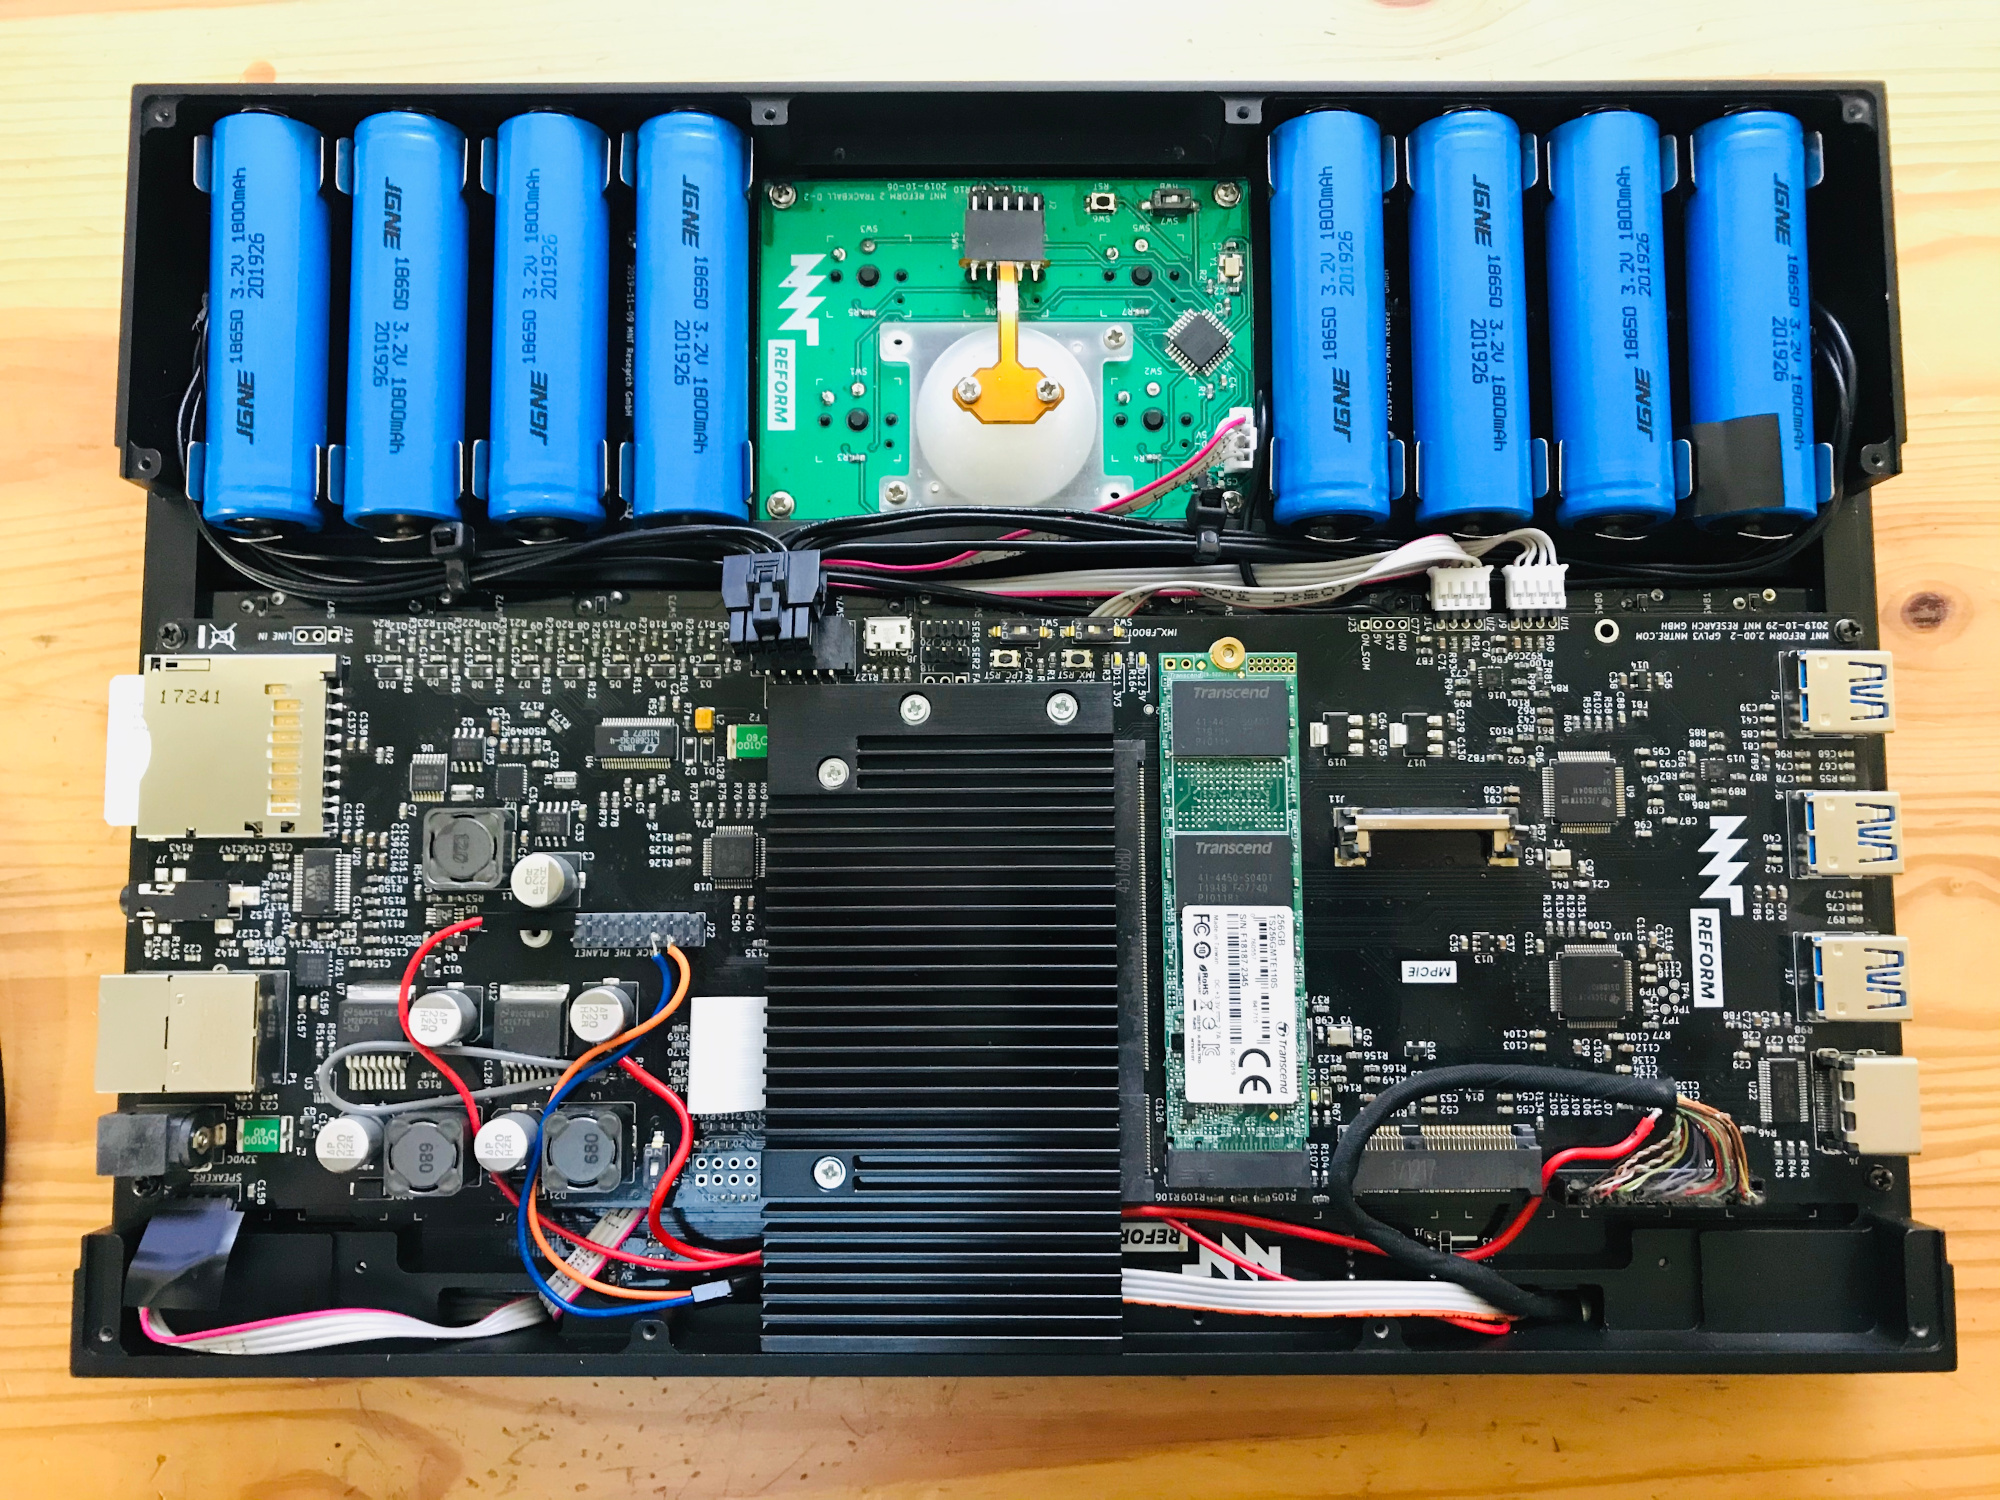
How better to work on Open Source projects than to use a Libre computing device? But that’s a hard goal to accomplish. If you’re using a desktop computer, Libre software is easily achievable, though keeping your entire software stack free of closed source binary blobs might require a little extra work. But if you want a laptop, your options are few indeed. Lucky for us, there may be another device in the mix soon, because [Lukas Hartmann] has just about finalized the MNT Reform.

Since we started eagerly watching the Reform a couple years ago the hardware world has kept turning, and the Reform has improved accordingly. The i.MX6 series CPU is looking a little peaky now that it’s approaching end of life, and the device has switched to a considerably more capable – but no less free – i.MX8M paired with 4 GB of DDR4 on a SODIMM-shaped System-On-Module. This particular SOM is notable because the manufacturer freely provides the module schematics, making it easy to upgrade or replace in the future. The screen has been bumped up to a 12.5″ 1080p panel and steps have been taken to make sure it can be driven without blobs in the graphics pipeline.
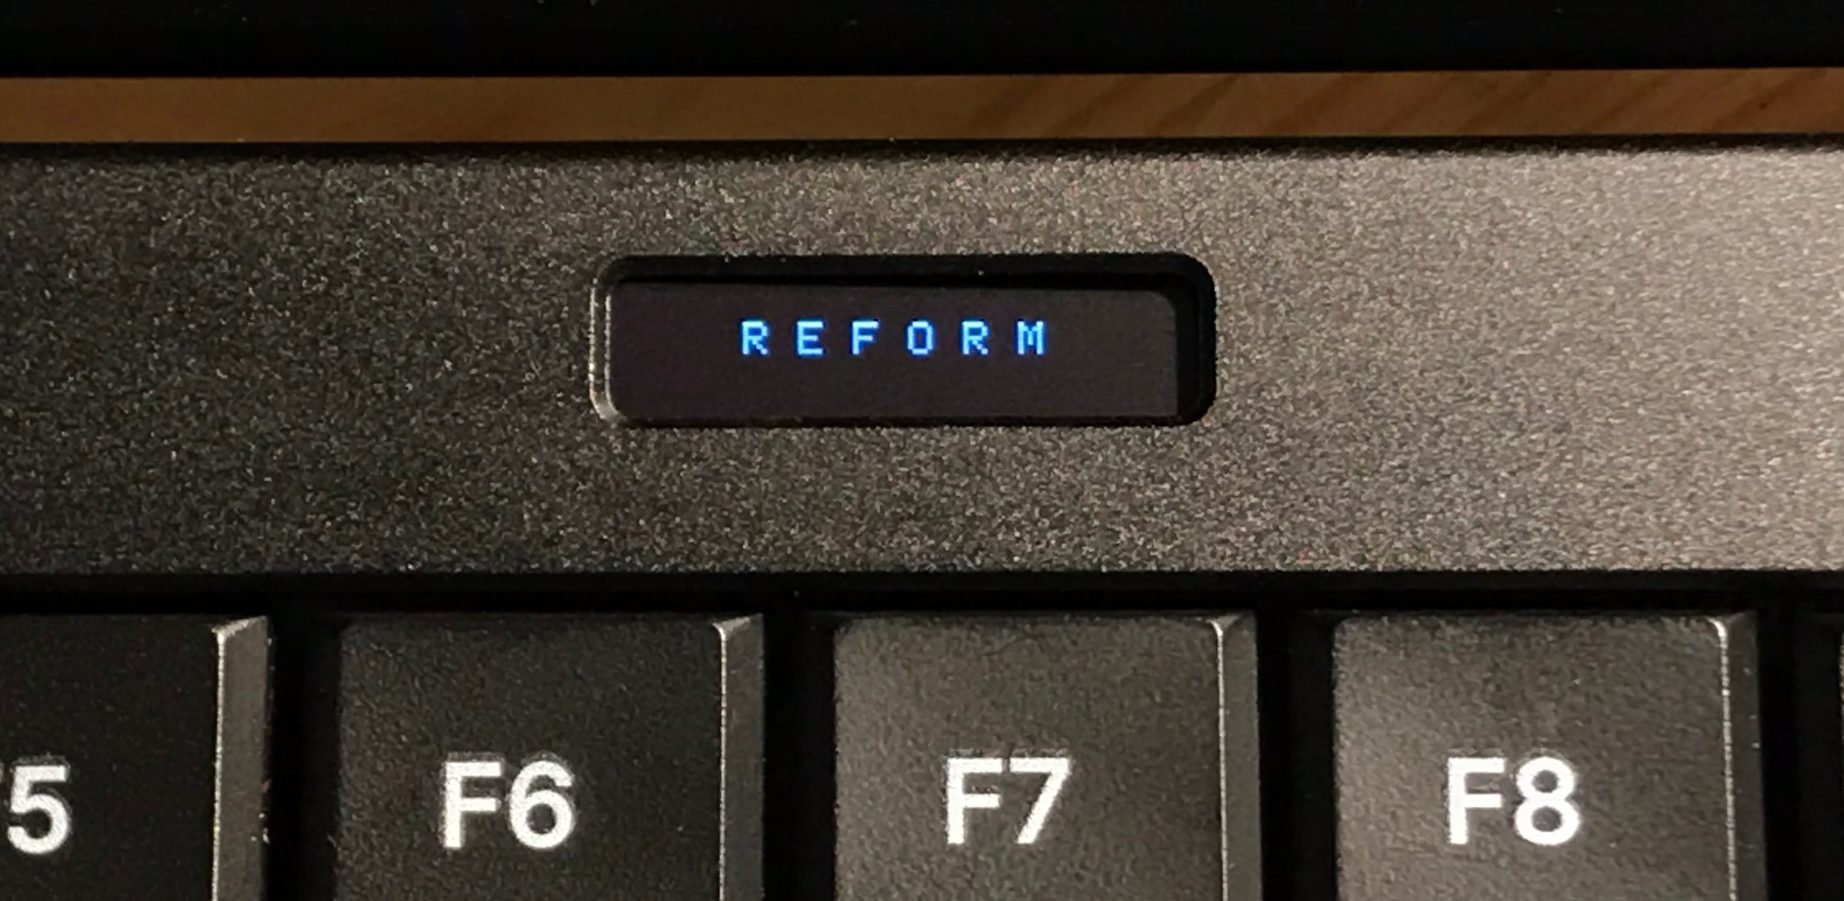
If you’re worried that the chassis of the laptop may have been left to wither while the goodies inside got all the attention, there’s no reason for concern. Both have seen substantial improvement. The keyboard now uses the Kailh Choc ultra low profile mechanical switches for great feel in a small package, while the body itself is milled out of aluminum in five pieces. It’s printable as well, if you want to go that route. All in all, the Reform represents a heroic amount of work and we’re extremely impressed with how far the design has come.

Of course if any of the above piqued your interest full electrical, mechanical and software sources (spread across a few repos) are available for your perusal; follow the links in the blog post for pointers to follow. We’re thrilled to see how production ready the Reform is looking and can’t wait to hear user reports as they make their way into to the wild!

Via [Brad Linder] at Liliputing.

These Bit Twiddling Tricks Will Make Your Coworkers Hate You

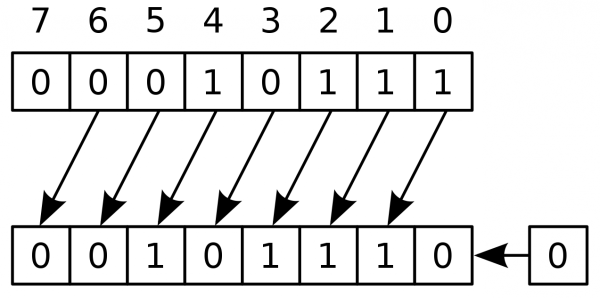
In the embedded world, twiddling a few bits is expected behavior. Firmware is far enough down the stack that the author may care about the number of bits and bytes used, or needs to work with registers directly to make the machine dance. Usually these operations are confined to the typical shifting and masking but sometimes a problem calls for more exotic solutions. If you need to descend down these dark depths you invariably come across the classic Bit Twiddling Hacks collected by [Sean Eron Anderson]. Here be dragons.

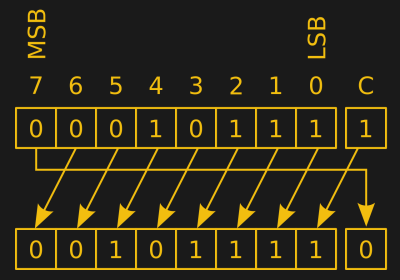
Discussions of bit math are great opportunities to revisit Wikipedia’s superb illustrations

Bit Twiddling Hacks is exactly as described; a page full of snippets and suggestions for how to perform all manner of bit math in convenient or efficient ways. To our surprise upon reading the disclaimer at the top of the page, [Sean] observes that so many people have used the contents of the page that it’s effectively all been thoroughly tested. Considering how esoteric some of the snippets are we’d love to know how the darkest corners found use.

The page contains a variety of nifty tricks. Interview content like counting set bits makes an early appearance.  There’s more esoteric content like this trick for interleaving the bits in two u16’s into a single u32, or rounding up to the next power of two by casting floats. This author has only been forced to turn to Bit Twiddling Hacks on one occasion: to sign extend the output from an unfortunately designed sensor with unusual length registers.

Next time you need to perform an operation with bitmatch, check out Bit Twiddling Hacks. Have you ever needed it in production? How did you use it? We’d love to hear about it in the comments.

Apple HomeKit Accessory Development Kit Gets More Accessible

Every tech monopoly has their own proprietary smart home standard; how better to lock in your customers than to literally build a particular solution into their homes? Among the these players Apple is traditionally regarded as the most secretive, a title it has earned with decades of closed standards and proprietary solutions. This reputation is becoming progressively less deserved when it comes to HomeKit, their smart home gadget connectivity solution. In 2017 they took a big step forward and removed the need for a separate authentication chip in order to interact with HomeKit. Last week they took another and released a big chunk of their HomeKit Accessory Development Kit (ADK) as well. If you’re surprised not to have heard sooner, that might be because it was combined the the even bigger news about Apple, Amazon, the Zigbee Alliance, and more working together on more open, interoperable home IoT standards. Check back in 2030 to see how that is shaping up.

“The HomeKit ADK implements key components of the HomeKit Accessory Protocol (HAP), which embodies the core principles Apple brings to smart home technology: security, privacy, and reliability.”
– A descriptive gem from the README

Apple’s previous loosening-of-restrictions allowed people to begin building devices which could interact natively with their iOS devices without requiring a specific Apple-sold “auth chip” to authenticate them. This meant existing commercial devices could become HomeKit enabled with an OTA, and hobbyists could interact in sanctioned, non-hacky ways. Part of this was a release of the (non-commercial) HomeKit specification itself, which is available here (with Apple developer sign in, and license agreement).

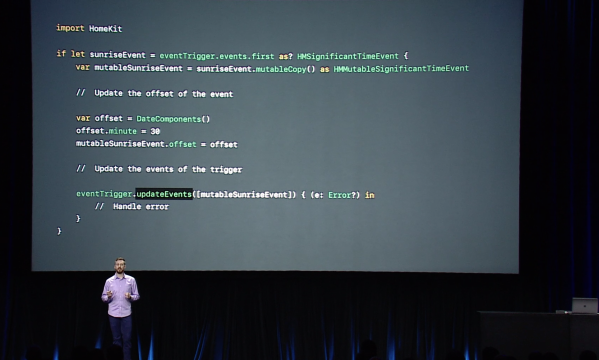
Despite many breathless mentions in the press release it’s hard to tell what the ADK actually is. The README and documentation directory are devoid of answers, but spelunking through the rest of the GitHub repo gives us an idea. It consists of two primary parts, the HomeKit Accessory Protocol itself and the Platform Abstraction Layer. Together the HAP implements HomeKit itself, and the PAL is the wrapper that lets you plug it into a new system. It’s quite a meaty piece of software; the HAP’s main header is a grueling 4500 lines long, and it doesn’t take much searching to find some fear-inspiring 50 line preprocessor macros. This is a great start, but frankly we think it will take significantly more documentation to make the ADK accessible to all.

If it wasn’t obvious, most of the tools above are carefully licensed by Apple and intended for non-commercial use. While we absolutely appreciate the chance to get our hands on interfaces like this, we’re sure many will quibble over if this really counts as “open source” or not (it’s licensed as Apache 2.0). We’ll leave that for you in the comments.

Journey Through The Inner Workings Of A PCB

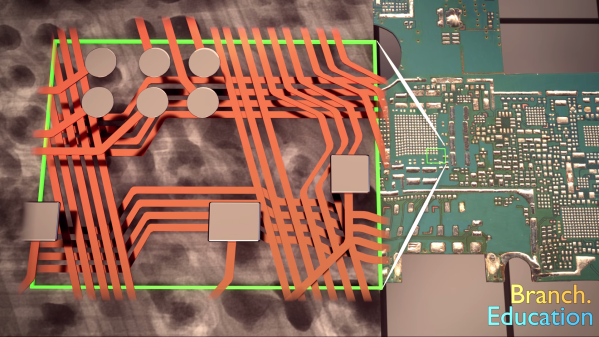
Most electronics we deal with day to day are comprised of circuit boards. No surprise there, right? But how do they work? This might seem like a simple question but we’ve all been in the place where those weird green or black sheets are little slices of magic. [Teddy Tablante] at Branch Eduction put together a lovingly crafted walkthrough flythrough video of how PCB(A)s work that’s definitely worth your time.

[Teddy]’s video focuses on unraveling the mysteries of the PCBA by peeling back the layers of a smartphone. Starting from the full assembly he separates components from circuit board and descends from there, highlighting the manufacturing methods and purpose behind what you see.

What really stands out here is the animation; at each step [Teddy] has modeled the relevant components and rendered them on the PCBA in 3D. Instead of relying solely on hard to understand blurry X-ray images and 2D scans of PCBAs he illustrates their relationships in space, an especially important element in understanding what’s going on underneath the solder mask. Even if you think you know it all we bet there’s a pearl of knowledge to discover; this writer learned that VIA is an acronym!

If you don’t like clicking links you can find the video embedded after the break. Credit to friend of the Hackaday [Mike Harrison] for acting as the best recommendation algorithm and finding this gem.

Continue reading “Journey Through The Inner Workings Of A PCB”