IP Tracker

An Arduino Device That Monitors Your External IP Address

[Bayres’] dad setup a webcam as a surveillance camera for a remote property. The only problem was that the only stable Internet connection they could get at this property was DSL. This meant that the external IP address of the webcam would change somewhat often; the needed a way to keep track of the external IP address whenever it changed. That’s when [Bayres] built a solution using Arduino and an Ethernet shield.

The main function of this device is to monitor the public IP address and report any changes. This is accomplished by first making a request to checkip.dyndns.org. This website simply reports your current public IP address. [Bayres] uses an Arduino library called Textfinder in order to search through the returned string and identify the IP address.

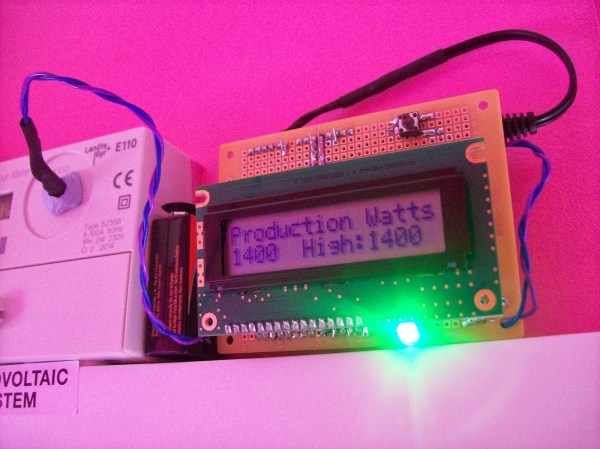
From there, the program compares this current value to the previous one. If there is any change, the program uses the Sendmail() function to reach out to an SMTP server and send an e-mail alert to [Beyres’] dad. The system also includes a small LCD. The Arduino outputs the current IP address to this display, making it easy to check up on the connection. The LCD is driven by 74HC595 shift register in order to conserve pins on the Arduino.

The system is also designed with a pretty slick setup interface. When it is booted, the user can enter a configuration menu via a Serial terminal. This setup menu allows the user to configure options such as SMTP server, email address, etc. These variables are then edited and can be committed to EEPROM as a more permanent storage solution. Whenever the system is booted, these values are read back out of the EEPROM and returned to their appropriate variables. This means you can reconfigure the device on the fly without having to edit the source code and re-upload.

Decoding ZeuS Malware Disguised As A .DOC

[Ronnie] recently posted about his adventures in decoding malware. One of his users reported a phishy email, which did indeed turn out to contain a nasty attachment. The process that [Ronnie] followed in order to figure out what this malware was trying to do is quite fascinating and worth the full read.

[Ronnie] started out by downloading the .doc attachment in a virtual machine. This would isolate any potential damage to a junk system that could be restored easily. When he tried to open the .doc file, he was presented with an error stating that he did not have either enough memory or disk space to proceed. With 45GB of free space and 2GB of RAM, this should not have been an issue. Something was definitely wrong.

The next step was to open the .doc file in Notepad++ for analysis. [Ronnie] quickly noticed that the file was actually a .rtf disguised as a .doc. [Ronnie] scanned through large chunks of data in an attempt to guess what the malware was trying to do. He noticed that one data chunk ended with the bytes “FF” and D9″, which are also found as the ending two bytes of .gif files.

[Ronnie] copied this data into a new document and removed all new line and return characters. He then converted the hex to ASCII, revealing some more signs that this was actually image data. He saved this file as a .gif and opened it up for viewing. It was a 79KB image of a 3D rendered house. He also found another chunk of data that was the same picture, but 3MB in size. Strange to say the least.

After finding a few other weird bits of data, [Ronnie] finally started to see more interesting sections. First he noticed some strings with mixed up capital and lowercase letters, a tactic sometimes used to avoid antivirus signatures. A bit lower he found a section of data that was about the size of typical shellcode. He decoded this data and found what he was looking for. The shellcode contained a readable URL. The URL pointed to a malicious .exe file that happened to still be available online.

Of course [Ronnie] downloaded the .exe and monitored it to see how it acted. He found that it set a run key in the registry to ensure that it would persist later on. The malware installed itself to the user’s appdata folder and also reached out repeatedly to an IP address known to be affiliated with ZeuS malware. It was a lot of obfuscation, but it was still no match for an experienced malware detective.

Big Jacobs Ladder

11,000 Volt Jacob’s Ladder Sounds Like A Lightsaber

In the high-voltage world, a Jacob’s ladder is truly a sight to behold. They are often associated with mad scientist labs, due to both the awesome visual display and the sound that they make. A Jacob’s ladder is typically very simple. You need a high voltage electricity source and two bare wires. The wires are placed next to each other, almost in parallel. They form a slight “V” shape and are placed vertically. The system acts essentially as a short-circuit. The voltage is high enough to break through the air at the point where the wires are nearest to each other. The air rises as it heats up, moving the current path along with it. The result is the arc slowly raising upwards, extending in length. The sound also lowers in frequency as the arc gets longer, and once [Gristc] tuned his system just right the sound reminds us of the Holy Trilogy.

We’ve seen these made in the past with other types of transformers that typically put out around 15,000 Volts at 30mA. In this case, [Gristc] supersized the design using a much beefier transformer that puts out 11,000 Volts at 300mA. He runs the output from the transformer through eight microwave oven capacitors as a ballast. He says that without this, the system will immediately trip the circuit breakers in his house.

In the demo video below, you can see just how large the arc is. It appears to get about 10 inches long before breaking with a sound different from any Jacob’s ladders we’ve seen in the past as well. Continue reading “11,000 Volt Jacob’s Ladder Sounds Like A Lightsaber”

Power Meter

Solar Panel System Monitoring Device Using Arduino

[Carl] recently upgraded his home with a solar panel system. This system compliments the electricity he gets from the grid by filling up a battery bank using free (as in beer) energy from the sun. The system came with a basic meter which really only shows the total amount of electricity the panels produce. [Carl] wanted to get more data out of his system. He managed to build his own monitor using an Arduino.

The trick of this build has to do with how the system works. The panel includes an LED light that blinks 1000 times for each kWh of electricity. [Carl] realized that if he could monitor the rate at which the LED is flashing, he could determine approximately how much energy is being generated at any given moment. We’ve seen similar projects in the past.

Like most people new to a technology, [Carl] built his project up by cobbling together other examples he found online. He started off by using a sketch that was originally designed to calculate the speed of a vehicle by measuring the time it took for the vehicle to pass between two points. [Carl] took this code and modified it to use a single photo resistor to detect the LED. He also built a sort of VU meter using several LEDs. The meter would increase and decrease proportionally to the reading on the electrical meter.

[Carl] continued improving on his system over time. He added an LCD panel so he could not only see the exact current measurement, but also the top measurement from the day. He put all of the electronics in a plastic tub and used a ribbon cable to move the LCD panel to a more convenient location. He also had his friend [Andy] clean up the Arduino code to make it easier for others to use as desired.

Screensaver Hack

Bypassing The Windows Lock Screen

Most of us know that we should lock our computers when we step away from them. This will prevent any unauthorized users from gaining access to our files. Most companies have some sort of policy in regards to this, and many even automatically lock the screen after a set amount of time with no activity. In some cases, the computers are configured to lock and display a screen saver. In these cases, it may be possible for a local attacker to bypass the lock screen.

[Adrian] explains that the screen saver is configured via a registry key. The key contains the path to a .scr file, which will be played by the Adobe Flash Player when the screen saver is activated. When the victim locks their screen and steps away from the computer, an attacker can swoop in and defeat the lock screen with a few mouse clicks.

First the attacker will right-click anywhere on the screen. This opens a small menu. The attacker can then choose the “Global settings” menu option. From there, the attacker will click on “Advanced – Trusted Location Settings – Add – Add File”. This opens up the standard windows “Open” dialog that allows you to choose a file. All that is required at this point is to right-click on any folder and choose “Open in a new window”. This causes the folder to be opened in a normal Windows Explorer window, and from there it’s game over. This window can be used to open files and execute programs, all while the screen is still locked.

[Adrian] explains that the only remediation method he knows of is to modify the code in the .swf file to disable the right-click menu. The only other option is to completely disable the flash screen saver. This may be the safest option since the screen saver is most likely unnecessary.

Update: Thanks [Ryan] for pointing out some mistakes in our post. This exploit specifically targets screensavers that are flash-based, compiled into a .exe file, and then renamed with the .scr extension. The OP mentions these are most often used in corporate environments. The exploit doesn’t exist in the stock screensaver.

Uber Hack

Stumbling Upon An Uber Vulnerability

[Nathan] is a mobile application developer. He was recently debugging one of his new applications when he stumbled into an interesting security vulnerability while running a program called Charles. Charles is a web proxy that allows you to monitor and analyze the web traffic between your computer and the Internet. The program essentially acts as a man in the middle, allowing you to view all of the request and response data and usually giving you the ability to manipulate it.

While debugging his app, [Nathan] realized he was going to need a ride soon. After opening up the Uber app, he it occurred to him that he was still inspecting this traffic. He decided to poke around and see if he could find anything interesting. Communication from the Uber app to the Uber data center is done via HTTPS. This means that it’s encrypted to protect your information. However, if you are trying to inspect your own traffic you can use Charles to sign your own SSL certificate and decrypt all the information. That’s exactly what [Nathan] did. He doesn’t mention it in his blog post, but we have to wonder if the Uber app warned him of the invalid SSL certificate. If not, this could pose a privacy issue for other users if someone were to perform a man in the middle attack on an unsuspecting victim.

[Nathan] poked around the various requests until he saw something intriguing. There was one repeated request that is used by Uber to “receive and communicate rider location, driver availability, application configurations settings and more”. He noticed that within this request, there is a variable called “isAdmin” and it was set to false. [Nathan] used Charles to intercept this request and change the value to true. He wasn’t sure that it would do anything, but sure enough this unlocked some new features normally only accessible to Uber employees. We’re not exactly sure what these features are good for, but obviously they aren’t meant to be used by just anybody.

Fish Feeder

3D Printed Fish Feeder

[Helios Labs] recently published version two of their 3D printed fish feeder. The system is designed to feed their fish twice a day. The design consists of nine separate STL files and can be mounted to a planter hanging above a fish tank in an aquaponics system. It probably wouldn’t take much to modify the design to work with a regular fish tank, though.

The system is very simple. The unit is primarily a box, or hopper, that holds the fish food. Towards the bottom is a 3D printed auger. The auger is super glued to the gear of a servo. The 9g servo is small and comes with internal limiters that only allow it to rotate about 180 degrees. The servo must be opened up and the limiters must be removed in order to enable a full 360 degree rotation. The servo is controlled by an Arduino, which can be mounted directly to the 3D printed case. The auger is designed in such a way as to prevent the fish food from accidentally entering the electronics compartment.

You might think that this project would use a real-time clock chip, or possibly interface with a computer to keep the time. Instead, the code simply feeds the fish one time as soon as it’s plugged in. Then it uses the “delay” function in order to wait a set period of time before feeding the fish a second time. In the example code this is set to 28,800,000 milliseconds, or eight hours. After feeding the fish a second time, the delay function is called again in order to wait until the original starting time.