Poking Around Inside Of A Linux Security Camera

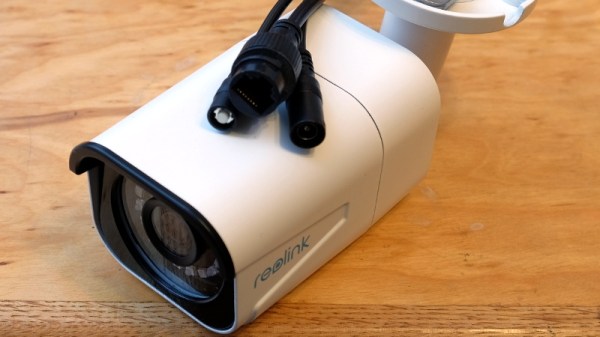
This deep dive into the Linux-powered Reolink B800 IP camera started because of a broken promise from its manufacturer. When [George Hilliard] purchased a kit that included six of the cameras and a video recorder, the website said they were capable of outputting standard RTSP video. But once he took delivery of the goods, and naturally after his return window had closed, the site was updated to say that the cameras can only function with the included recorder.

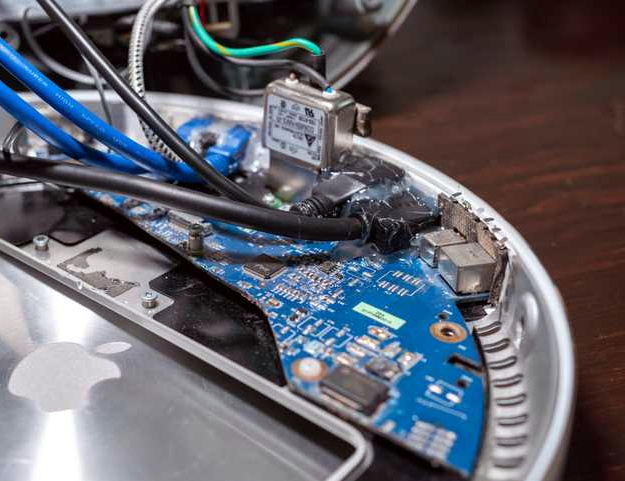
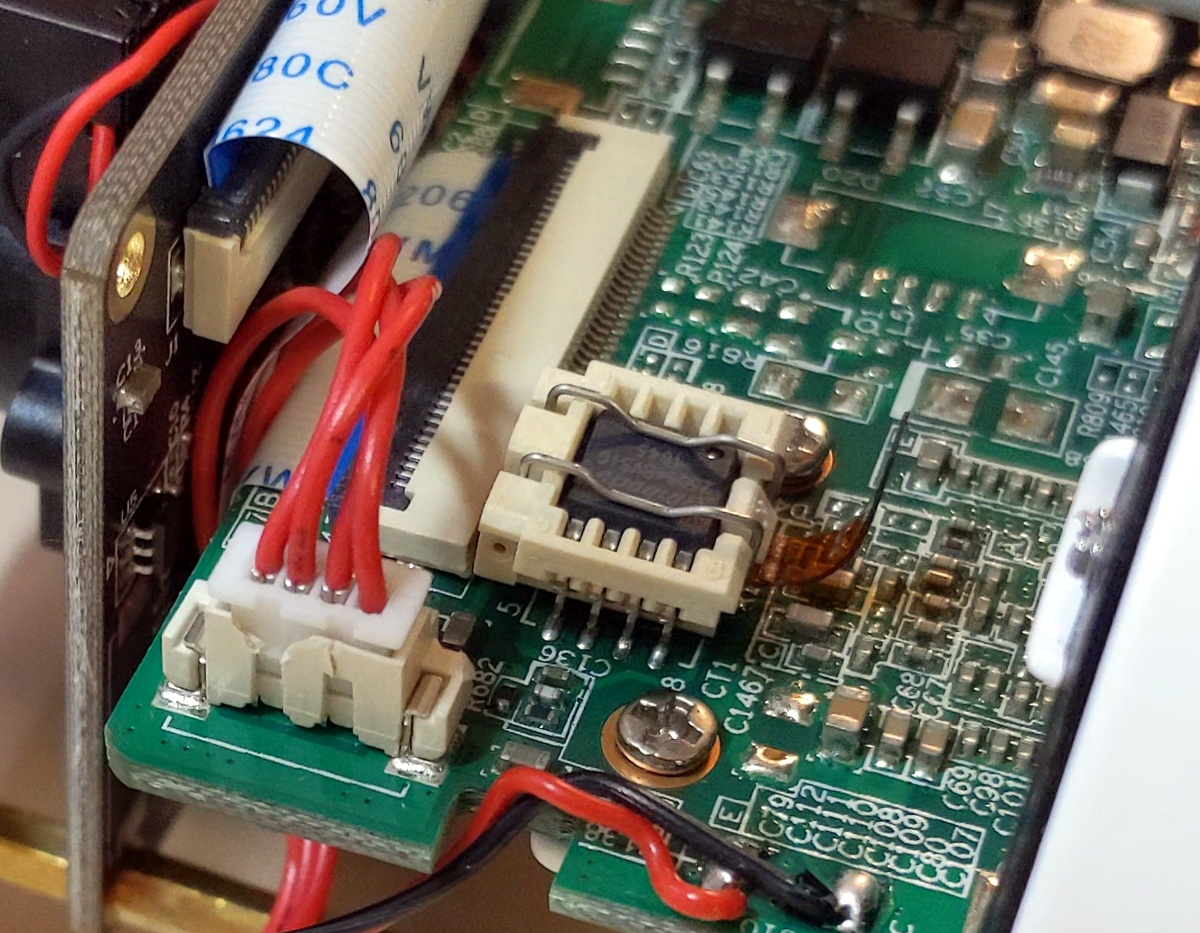
Taking that as something of challenge, [George] got to work. His first big break came when he desoldered the camera’s SPI flash chip and replaced it with a socket. That allowed him to easily take the chip out of the device for reading and flashing as he tinkered with modifying the firmware. After adding cross-compiled versions of busybox, gdb, and strace to the extracted firmware, he bundled it back up and flashed it back to the hardware.

If you think that’s the end of the story, it isn’t. In fact, it’s just the beginning. While getting root-level access to the camera’s OS would have potentially allowed for [George] to dump all the proprietary software it was running and replace it with open alternatives, he decided to take a different approach.

Instead of replacing the camera’s original software, he used his newly granted root powers to analyze it and figure out how it worked. This allowed for to sniff out some very suspect “encryption” routines built into the software, and eventually write his own server side in Rust that finally allowed him to use the cameras with his own server…albeit with a bit more work than he bargained for.

Projects like these are a fantastic look at real world reverse engineering, and a reminder that sometimes achieving your ultimate goal means taking the long way around. Even if you’re not in the market for a hacked security camera, there’s no doubt that reading the thorough write-up [George] has prepared will teach you a few things. But of course, we’d expect no less from a guy who runs Linux on his business card.

Weather Display Is Cloudy With A Chance Of ESP8266

[Mukesh Sankhla] writes in to share this unique weather display that looks to be equal parts art and science. Rather than show the current conditions with something as pedestrian as numbers, this device communicates various weather conditions to the user with 25 WS2812B LEDs embedded into the 3D printed structure. It also doubles as a functional planter for your desk.

So how does this potted plant tell you if it’s time to get your umbrella? Using a NodeMCU ESP8266 development board, it connects to openweathermap.org and gets the current conditions for your location. Relative temperature is conveyed by changing the color of the pot itself; going from blue to red as things heat up. If there’s rain, the cloud over the plant will change color and flash to indicate thunder.

[Mukesh] has made all of the STL files for the printed components available, as well as the source code for the ESP8266. You’ll need to provide your own soil and plant though, there’s only so much you can send over the Internet. Incidentally, if the clever way he soldered these WS2812B modules together in the video catches your eye, you’ll really love his “RGB Goggles” project that we covered earlier.

Continue reading “Weather Display Is Cloudy With A Chance Of ESP8266”

Bolt-On Clog Detection For Your 3D Printer

Desktop 3D printing technology has improved by leaps and bounds over the last few years, but they can still be finicky beasts. Part of this is because the consumer-level machines generally don’t offer much in the way of instrumentation. If the filament runs out or the hotend clogs up and stops extruding, the vast majority of printers will keep humming along with nothing to show for it.

Looking to prevent the heartache of a half-finished print, [Elite Worm] has been working on a very clever filament detector that can be retrofitted to your 3D printer with a minimum of fuss. The design, at least in its current form, doesn’t actually interface with the printer beyond latching onto the part cooling fan as a convenient source of DC power. Filament simply passes through it on the way to the extruder, and should it stop moving while the fan is still running (indicating that the machine should be printing), it will sound the alarm.

Inside the handy device is a Digispark ATtiny85 microcontroller, a 128 x 32  I2C OLED display, a buzzer, an LED, and a photoresistor. An ingenious 3D printed mechanism grabs the filament on its way through to the extruder, and uses this movement to alternately block and unblock the path between the LED and photoresistor. If the microcontroller doesn’t see the telltale pulse after a few minutes, it knows that something has gone wrong.

In the video after the break, [Elite Worm] fits the device to his Prusa i3 MK2, but it should work on essentially any 3D printer if you can find a convenient place to mount it. Keep a close eye out during the video for our favorite part of the whole build, using the neck of a latex party balloon to add a little traction to the wheels of the filament sensor. Brilliant.

Incidentally, Prusa tried to tackle jam detection optically on the i3 MK3 but ended up deleting the feature on the subsequent MK3S since the system proved unreliable with some filaments. The official line is that jams are so infrequent with high-quality filament that the printer doesn’t need it, but it does seem like an odd omission when even the cheapest paper printer on the market still beeps at you when things have run afoul.

Continue reading “Bolt-On Clog Detection For Your 3D Printer”

IMac G4 Reborn With Intel NUC Transplant

Released in 2002, Apple’s iMac G4 was certainly a unique machine. Even today, its hemispherical case and integrated “gooseneck” display is unlike anything else on the market. Whether or not that’s a good thing is rather subjective of course, but there’s no denying it’s still an attention grabber nearly 20 years after its release. Unfortunately, it’s got less processing power than a modern burner phone.

Which is why [Tom Hightower] figured it was the perfect candidate for a retrofit. Rather than being little more than a display piece, this Intel NUC powered iMac is now able to run the latest version of Mac OS. He even went as far as replacing the display with a higher resolution panel, though it sounds like it was dead to begin with so he didn’t have much choice in the matter.

Somewhere, an early 2000s Apple engineer is screaming.

The retrofit starts off with a brief teardown, which is quite interesting in itself. [Tom] notes a number of unique design elements, chief among them the circular motherboard. The two banks of memory also use different form factors, and only one of them is easily accessible to the end user. Something to think about the next time somebody tells you that Apple’s “brave” hardware choices are only a modern phenomena.

There was plenty of room inside the iMac’s dome to fit the NUC motherboard, and some extension cables and hot glue got the computer’s rear panel suitably updated with the latest-and-greatest ports and connectors. But the conversion wasn’t a total cakewalk. That iconic “gooseneck” put up quite a fight when it was time to run the new wires up to the display. Between the proprietary screws that had to be coerced out with a Dremel to the massive spring that was determined to escape captivity, [Tom] recommends anyone else looking to perform a similar modification just leave the wires on the outside of the thing. That’s what he ended up doing with the power wires for the display inverter.

If you like the idea of reviving old Apple hardware but don’t want to anger the goose, you could start on something a little easier. Like putting an iPad inside of a Macintosh Classic shell.

Jumbo LED Matrix Brings Classic Sprites To Life

Despite all the incredible advancements made in video game technology over the last few decades, the 8-bit classics never seem to go out of style. Even if you weren’t old enough to experience these games when they were new, it’s impossible not to be impressed by what the early video game pioneers were able to do with such meager hardware. They’re a reminder of what can be accomplished with dedication and technical mastery.

The grid has been split up for easier printing.

If you’d like to put a little retro inspiration on your desk, take a look at this fantastic 16 x 16 LED matrix put together by [Josh Gerdes]. While it’s obviously not the only thing you could use it for, the display certainly seems particularly adept at showing old school video game sprites in all their pixelated glory. There’s something about the internal 3D printed grid that gives the sprites a three dimensional look, while the diffused glow reminds us of nights spent hunched over a flickering CRT.

The best part might be how easy it is to put one of these together for yourself. You’ve probably got most of what you need in the parts bin; essentially it’s just a WS2812B strip long enough to liberate 256 LEDs from and a microcontroller to drive them. [Josh] used an Arduino Nano, but anything compatible with the FastLED library would be a drop-in replacement. You’ll also need a 3D printer to run off the grid, and something to put the whole thing into. The 12×12 shadowbox used here looks great, but we imagine clever folks such as yourselves could make do with whatever might be laying around if you can’t nip off to the arts and crafts store right now.

Beyond looking great, this project is a fantastic reminder of how incredibly handy WS2812 LEDs really are. Whether you’re recreating iconic game sprites or fashioning your own light-up sunglasses, it’s hard to imagine how we managed before these little wonders hit the scene.

Continue reading “Jumbo LED Matrix Brings Classic Sprites To Life”

Plasma “Ghosts” May Help Keep Future Aircraft Safe

Air-to-air combat or “dogfighting” was once a very personal affair. Pilots of the First and Second World War had to get so close to land a hit with their guns that it wasn’t uncommon for altercations to end in a mid-air collision. But by the 1960s, guided missile technology had advanced to the point that a fighter could lock onto an enemy aircraft and fire before the target even came into visual range. The skill and experience of a pilot was no longer enough to guarantee the outcome of an engagement, and a new arms race was born.

An F-15 launching flare countermeasures.

Naturally, the move to guided weapons triggered the development of defensive countermeasures that could confuse them. If the missile is guided by radar, the target aircraft can eject a cloud of metallic strips known as chaff to overwhelm its targeting system. Heat-seeking missiles can be thrown off with a flare that burns hotter than the aircraft’s engine exhaust. Both techniques are simple, reliable, and have remained effective after more than a half-century of guided missile development.

But they aren’t perfect. The biggest problem is that both chaff and flares are a finite resource: once the aircraft has expended its stock, it’s left defenseless. They also only work for a limited amount of time, which makes timing their deployment absolutely critical. Automated dispensers can help ensure that the countermeasures are used as efficiently as possible, but sustained enemy fire could still deplete the aircraft’s defensive systems if given enough time.

In an effort to develop the ultimate in defensive countermeasures, the United States Navy has been working on a system that can project decoy aircraft in mid-air. Referred to as “Ghosts” in the recently published patent, several of these phantom aircraft could be generated for as long as the system has electrical power. History tells us that the proliferation of this technology will inevitably lead to the development of an even more sensitive guided missile, but in the meantime, it could give American aircraft a considerable advantage in any potential air-to-air engagements.

Continue reading “Plasma “Ghosts” May Help Keep Future Aircraft Safe”

ESP32 Trail Camera Goes The Distance On AA Batteries

There’s no shortage of things to like about the ESP8266 and ESP32, but if we had to make a list of the best features these WiFi-enabled microcontrollers have to offer, their power management capabilities would certainly be near the top. Which is how we assumed [Mark] was able to take a whopping 23,475 pictures on his ESP32 camera while powered by nothing more exotic than four AA batteries from the grocery store.

But as it turns out, the full story is quite a bit more interesting. As far as we can tell, [Mark] isn’t bothering with the ESP32’s sleep modes all. In fact, it looks like you could pull this trick off with whatever chip you wanted, which certainly makes it worth mentally filing away for the future; even if it depends on a fairly specific use case.

In the most simplistic of terms, [Mark] is cutting power to the ESP32 completely when it’s not actively taking pictures. The clever circuit he’s come up with only turns on the microcontroller when a PIR sensor detects something moving around in front of the camera. Once the chip is powered up and running code, it brings one of its GPIO pins high which in turn triggers a 4N37 optoisolator connected to the gate on the circuit’s MOSFET. As long as the pin remains high, the circuit won’t cut power to the ESP32. This gives the chip time to take the requested number of pictures and get everything in order before bringing the pin low and allowing the circuit to pull the plug.

If you’re looking to maximize runtime without wrangling any MOSFETs, we’ve seen some excellent examples of how the low power modes on the ESP8266 and ESP32 can be put to impressive use.

[Thanks to Jason for the tip.]