DOOM Ported To Sega Naomi Arcade Hardware

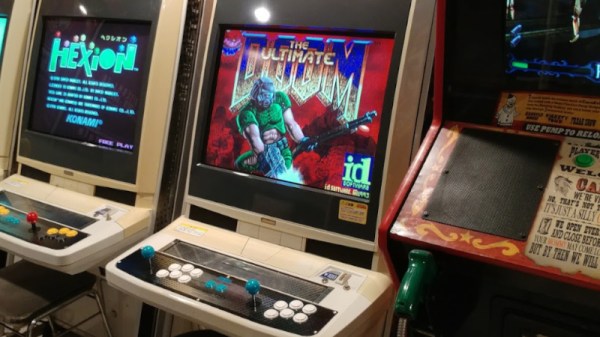
Porting DOOM to new hardware and software platforms is a fun pastime for many in the hacker scene. [DragonMinded] noticed that nobody had ported the game to the Sega Naomi arcade hardware, and set about doing so herself.

The port builds on work by [Kristoffer Andersen] who built a framebuffer port of DOOM previously. It’s available pre-compiled, complete with the shareware WAD for those eager to load it up on their own Naomi arcade cabinets.

Unlike some limited ports that only give the appearance of a functional version of DOOM, this port is remarkably complete. Loading, saving, and options menus are all present and accounted for, as well as directional sound and even WAD auto-discovery. With that said, there’s only 32 KB of space for save games on the Naomi hardware, so keep that in mind if you find yourself playing regularly.

We love a good DOOM port, whether it’s on an arcade machine, an old forgotten Apple OS, or even a UFI module.

Continue reading DOOM Ported To Sega Naomi Arcade Hardware”

Your Building’s RFID Access Tags Might Be Really Insecure

[Gabe Schuyler] had a frustrating problem when it came to getting into his building’s garage. The RFID access system meant he had to remove his gloves while sitting on his motorcycle to fish out the keytag for entry. He decided to whip up a better solution with less fuss.

His initial plan was to duplicate the keytag and to sew one into his gloves. Purchasing a 125 KHz RFID tag duplicator off eBay, he was able to quickly copy the tag, and create one that worked with his garage’s entry system. While the duplicate tags worked well, they were still too big to easily fit into a glove. Attempts to create a duplicate with a smaller tag failed, too. Eventually, [Gabe] turned up a ring complete with a compatible RFID chip, and was able to duplicate his entry tag onto that. Now, by wearing the ring, he can enter his garage and building with a simple wave of the hand, gloves on or off.

Of course, duplicating an RFID tag is no major hack. As per [Gabe]’s Shmoocon talk on the topic, however, it shows that many buildings are using completely insecure RFID access methods with little to no security whatsoever. Anyone that found an access tag lying on the ground could easily replicate as many as they wanted and enter the building unimpeded. It also bears noting that you can snoop RFID cards from further away than you might expect.

Hacking A New Display Into A Fluke 8050A Multimeter

Old lab equipment was often built to last, and can give decades of service when treated properly. It’s often so loved that when one part fails, it’s considered well worth repairing rather than replacing with something newer. [Michael] did just that, putting in the work to give his Fluke 8050A multimeter a shiny new display.

The Fluke 8050A is a versatile device, capable of measuring voltage, current, and resistance in addition to decibels at various impedences and conductance, too. The original display doesn’t show some of the finer details so well, so [Michael] elected to improve on that when he installed a new 2.2″ graphical LCD to replace the basic 7-segment LCD that originally came with the hardware.

To achieve the install, the original LCD display module was removed from the chassis. A piggyback device that sits under the Fluke’s microcontroller was then used to break out signals for the new graphical LCD without requiring modification to the meter’s PCB itself. An Atmega32u4 microcontroller then takes in these signals, and then drives the graphical LCD accordingly.

It’s a great hack that makes the old multimeter easier to use, and the new white-on-green display is far kinder on the eyes, too. We’ve seen other multimeters get screen transplants before, too. Of course, if you’re new to the world of segmented LCDs and want to learn more about how they work, [Joey Castillo]’s talk from last year’s Remoticon will get you up to speed!

3D Printer Helps Make A Neat Lyric Video

These days, it’s a lot easier to get attention online if your lovely music comes with some kind of visual accompaniment. Of course, shooting a full-scale music video can be expensive, so lyric videos have become a more affordable, approachable avenue that are growing in popularity. [prash] whipped one up recently with the help of a 3D printer.

The video is a timelapse of a 3D print, something we’re very familiar with around these parts. [prash] embedded words in the various layers of the objects to be printed. Thus, as the prints are laid down on the build plate, the words are revealed to the camera shooting the time lapse. The scene is further improved by shaping the prints to reference the lyrics of the song, and using attractive infill designs like spirals and stripes. There are even some strategically placed clouds and pretty lighting to improve the effect.

It’s a neat use of 3D printing, and an artful one at that. We’re pretty confident that [prash] has put together a highly unique lyric video, and it’s much more impressive than the dodgy 3D printing [Will.i.am] featured in his not-quite-a-Britney song a decade ago. Video after the break.

Continue reading “3D Printer Helps Make A Neat Lyric Video”

Automated Blinds Can Be A Cheap And Easy Build

Blinds are great for blocking out the sun, but having to get up to open and close them grows tiresome in this computationally-advanced age. [The Hook Up] decided to automate his home blinds instead, hooking them up to the Internet of Things with some common off-the-shelf parts.

The basic idea was to use stepper motors to turn the tilt rod which opens and closes the blinds. An early attempt to open blinds with unipolar stepper motors proved unsuccessful, when the weak motors weren’t capable of fully closing the blinds when running on 5 volts. Not wanting to throw out the hardware on hand, the motors were instead converted to bipolar operation. They were then hooked up to DRV8825 driver boards and run at 12 volts to provide more torque.

With the electromechanical side of things sorted out, it was simple to hook up the motor drivers to a NodeMCU, based on the ESP8266. The IoT-ready device makes it easy to control the motors remotely via the web.

The build came in at a low cost of around $10 per blind. That’s a good saving over commercial options which can cost hundreds of dollars in comparison. We’ve seen other work from [The Hook Up] before too, like his creative Flex Seal screen build. Video after the break.

Continue reading “Automated Blinds Can Be A Cheap And Easy Build”

3D-Printed Gear Press Can Squash Stuff, Kinda

A press is a useful thing to have, whether you like destroying stuff or you simply want to properly install some bearings. [Retsetman] decided to build one from scratch, eschewing the typical hydraulic method for a geared design instead.

The benefit of going with a gear press design is that [Retsetman] was able to 3D print the required gears himself. The design uses a series of herringbone gears to step down the output of two brushed DC motors. This is then turned into linear motion via a rack and pinion setup. Naturally, the strength of the gears and rack is key to the performance of the press. As you might expect, a fair few of the printed gears suffered failures during the development process.

The final press is demonstrated by smooshing various objects, in true YouTube style. It’s not really able to destroy stuff like a proper hydraulic press, but it can kind of crush a can and amusingly squash a teddy bear. If you’re really keen on making a gear press, though, you’re probably best served by going with a metal geartrain. Video after the break.

Continue reading “3D-Printed Gear Press Can Squash Stuff, Kinda”

Comparing 3D Printed Tires: Resin Vs. TPU

Many robot builders and RC enthusiasts find themselves turning to 3D printed tires. The benefit is you can make them in any size and style you want, and they’re as readily available for as long as your home printer is still working. [Michael Rechtin] printed some up and decided to see how long they’d actually last in use.

[Michael] printed a pair of tires for the test. One was made in TPU on a typical FDM printer, while the other was printed in flexible resin. The tires were then installed on hubs and fitted with gear motors for drive. The assembly was then fitted to the end of a test tether that would turn in circles for hours to put mileage on the tires.

After many hours and around 10 miles of testing, both tires were showing signs of wear. Notably, the resin tires showed a lot more wear than the TPU version, suggesting the latter material is a better choice for printing hard-wearing tires.

Overall, it’s reminiscent of the tether testing we saw from [rctestflight] recently. There’s something compelling about thrashing something round in circles to learn something in the process! Video after the break.

Continue reading “Comparing 3D Printed Tires: Resin Vs. TPU”