2022 Hackaday Prize Enters Second Round: Reuse, Recycle, Revamp

Ding! That’s the bell for the second challenge round of the 2022 Hackaday Prize. If your project reuses or recycles what would otherwise be waste materials, or helps you to do the same for further projects, we want to see it.

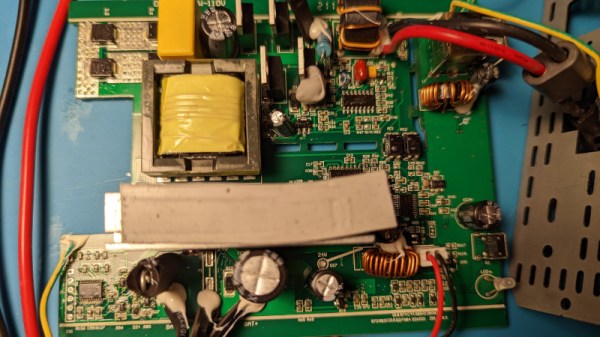
Hackers are often frugal folk — we’ll recycle parts for projects because it’s easier on the pocketbook when prototyping. But in these strangest of times, when we’ve seen $1 microcontrollers in such shortage that they fetch $57 apiece (if you can get the parts at all), making use of what you’ve got on hand can be an outright necessity. If this is going to become the new normal, it’s going to make sense that we automate it. There’s gold, literally and metaphorically, in busted PCBs. How are you going to get the most value out of our broken electronic waste in our post-apocalyptic near future? Have you built an unpick-and-unplace machine? We’d like to see it.

But electronic parts are a small fraction of your recyclable materials, and plastics might play a larger role. If you’re a 3D printerer, you’ve doubtless thought about recycling plastic bottles into filament. Or maybe you’d like to take some of the existing plastics that are thrust upon you by this modern world and give them a second life? This factory churning out paving stones by remelting plastic with sand is doing it on an industrial scale, but could this be useful for the home gamer? Precious Plastic has a number of inspirational ideas. Or maybe you just need an HDPE hammer?

Have you built a fancy can crusher, or a plastics sorter, or a recycling robot? Head on over to Hackaday.io, write it up, and enter it into the Prize!

Basically any project that helps you recycle or reuse the material around you is fair game here. (But note that if you’ve got epic repair hacks, you’ll want to enter them in the upcoming Round Three: Hack it Back.) This round runs until June 12th and there are ten $500 awards up for grabs, so get hacking!

About As Cold As It Gets: The Webb Telescope’s Cryocooler

If you were asked to name the coldest spot in the solar system, chances are pretty good you’d think it would be somewhere as far as possible from the ultimate source of all the system’s energy — the Sun. It stands to reason that the further away you get from something hot, the more the heat spreads out. And so Pluto, planet or not, might be a good guess for the record low temperature.

But, for as cold as Pluto gets — down to 40 Kelvin — there’s a place that much, much colder than that, and paradoxically, much closer to home. In fact, it’s only about a million miles away, and right now, sitting at a mere 6 Kelvin, the chunk of silicon at the focal plane of one of the main instruments aboard the James Webb Space telescope makes the surface of Pluto look downright balmy.

The depth of cold on Webb is all the more amazing given that mere meters away, the temperature is a sizzling 324 K (123 F, 51 C). The hows and whys of Webb’s cooling systems are chock full of interesting engineering tidbits and worth an in-depth look as the world’s newest space telescope gears up for observations.

Continue reading “About As Cold As It Gets: The Webb Telescope’s Cryocooler”

Photo of the spectrophotometer in question, with a screenshot of the decoding software on the right

Exporting Data From Old Gear Through LCD Sniffing

[Jure Spiler] was at a flea market and got himself a spectrophotometer — a device that measures absorbance and transmittance of light at different wavelengths. This particular model seems to be about 25 years old, and it’s controlled by a built-in keyboard and uses a graphical LCD to display collected data. That might have been acceptable when it was made, but it wasn’t enough for [Jure]. Since he wanted to plot the spectrophotometry data and be able to save it into a CSV file, hacking ensued.

He decided to tap into the the display communication lines. This 128×64 graphical display, PC-1206B, uses a 8-bit interface, so with a 16-channel logic analyzer, he could see the data being sent to the display. He even wrote decoder software – taking CSV files from the logic analyzer and using primitive optical recognition on the decoded pixels to determine the digits being shown, and drawing a nice wavelength to absorbance graph. From there, he set out to make a standalone device sniffing the data bus and creating a stream of data he could send to a computer for storage and processing.

[Jure] stumbled into a roadblock, however, when he tried to use an Arduino for this task. Even using a sped-up GPIO library (as opposed to notoriously inefficient digitalRead), he couldn’t get a readout frequency higher than 80 KHz – with the required IO readout rate deemed as 1 MHz, something else would be called for. We do wonder if something like RP2040 with its PIO machinery would be better for making such captures.

At that point, however, he found out that there’s undocumented serial output on one of the pins of the spectrophotometer’s expansion port, and is currently investigating that, having shelved the LCD sniffing direction. Nevertheless, this serves as yet another example for us, for those times when an LCD connection is all that we can make use of.

We’ve seen hackers sniff LCD interfaces to get data from reflow ovens, take screenshots from Game Boys and even equip them with HDMI and VGA ports afterwards. With a skill like this, you can even give a new life to a vintage calculator with a decayed display! Got an LCD-equipped device but unsure about which specific controller it uses? We’ve talked about that!

Continue reading “Exporting Data From Old Gear Through LCD Sniffing”

TWANG32 Brings LED Strip Gaming To The ESP32

Under the Hackaday TV is a modern game console, it’s a well-known model that many of you also probably have, and its main feature is a 3D accelerator which allows it to create the beautifully rendered worlds we’ve all come to know and love. [Mircemk] eschews such fripperies with the Twang project, because it’s a game that’s not 3D, nor 2D, but 1D. The display, indeed the entire gaming surface, is a single strip of addressable LEDs which can be seen int he video below the break.

Behind it all is an ESP32, and a unique one-dimensional joystick using an accelerometer. There’s an audio channel with a little piezoelectric speaker too, and the LED strip is a particularly high-density one from DFRobot. Because this is an ESP32-driven device it has WiFi, upon which is exposed an access point for a network over which is served the game stats as a web page. It may not displace that modern console, but it’s certainly inventive.

Long-time Hackaday readers will be aware that this is only the latest of a long line of one-dimensional games, including a 1D take on the famous PONG.

Continue reading TWANG32 Brings LED Strip Gaming To The ESP32″

Bringing Zelda Classic To The Browser

Finding a device or app that isn’t a web browser doesn’t seem easy. These days, it is either connected to the web (looking at you ESP32) or is just a web browser pretending to be something else (a la electron, PWAs, or React Native). So, of course, it is on us to create more and more exciting things to browse. [Connor Clark] is one of those people, and he brought Zelda Classic to the browser.

Zelda Classic (ZC) isn’t an official Zelda game. Instead, it’s an old engine designed to run the world in the OG Legend of Zelda and be easily modified to support hundreds of different games. To date, there are over 600 games submitted by a large community. ZC is an Allegro-based Windows-only game, so the first step was to bust out Emscripten to start tweaking the C++ code to support a web environment. Rather than completely port the huge codebase over from Allegro, [Connor] made the jump from Allegro 4 to 5. Allegro 5 has SDL as a backend and adds support for Emscripten.

Unfortunately, the 4 to 5 wasn’t as simple as changing the dependency. The API was wholly re-written, and there is a handy adapter known as Allegro Legacy to help transition a project from one to another. After squashing a multitude of bugs, it was a relatively painless procedure. After a quick detour getting music and level data working, [Connor] faced his next challenge: multi-threading. Efforts to move the main loop off of the browser thread and into a web worker ran into issues with having to yield in loops, deadlocks, and recursive mutexes. Finally, he added music and gamepad support after fixing several bugs in SDL and Allegro.

It’s an incredible journey with many tips and tricks for debugging seemingly intractable bugs. The code is up on GitHub, or jump in and start playing if you’re interested. Why not check out this browser-based OpenSCAD as well?

partially finished print, with the embedded animation

Flip Book Animations On The Inside Of 3D Prints

We’ve all seen 3D printed zoetropes, and drawn flip book animations in the corner of notebooks. The shifting, fluid shape of the layers forming on a 3D printer is satisfying. And we all know the joy of hidden, nested objects.

Hackaday alumnus [Caleb Kraft] has a few art pieces that all reflect all these. He’s been making animations by recording a 3D printer. The interesting bit is that his print is made of two objects. An outer one with normal infill that gives a solid form, and a layer cake like inner one with solid infill. It’s documented in this video on YouTube.

CAD model of the stack of frames

There are lots of things to get right.  The outer object needs to print without supports. The thickness of the “layer cake” layers determines the frame rate. I had to wonder how he triggered the shutter  when the head wasn’t in the way.

His first, experimental, piece is the classic ‘bouncing ball’ animation, inside a ball, and his mature piece is Eadward Muybridge’s “The Horse, In Motion” inside a movie camera.

We’ve covered [Caleb Kraft] before, of course. His Moon On A Budget piece is wonderful.  And we’ve covered a number of 3D printer animations. and 3D zoetropes.  We particularly were drawn to this one.

Thanks [jmc] for the tip!

Continue reading “Flip Book Animations On The Inside Of 3D Prints”

The TPM module that Viktor designed, inserted into the motherboard

TPM Module Too Expensive? DIY Your Own Easily!

Since Windows 11 has announced its TPM module requirement, the prices for previously abundant and underappreciated TPM add-on boards for PC motherboards have skyrocketed. We’ve been getting chips and soldering them onto boards of our own design, instead – and [viktor]’s project is one more example of that. [Viktor] has checked online marketplace listings for a TPM module for his Gigabyte AORUS GAMING 3 motherboard, and found out they started at around 150EUR – which is almost as much as the motherboard itself costs. So, as any self-respecting hacker, he went the DIY way, and it went with hardly a hitch.

Following the schematic from the datasheet, he quickly made a simple KiCad layout, matching it to the pinout from his motherboard’s user manual, then ordered the boards from PCBWay and SLB9665 chips from eBay. After both arrived, [viktor] assembled the boards, and found one small mistake – he designed a module for 2.54mm pin headers, but his motherboard had 2.0mm headers. He wired up a small adapter to make his assembled V1.0 boards work, and Windows 11 installed without any TPM complaints. He shows that he’s designed a new, V1.1 version with an updated connector, too, and published its (untested but should work) design files for us on GitHub. These modules can vary, by manufacturer and motherboard series, but with each module published, a bunch of hackers can save money – and get a weekend project virtually guaranteed to work out.

Regardless of whether the goal of running Windows 11 is ultimately worthwhile, it has been achieved. With scalpers preying on people who just want to use their hardware with a new OS, rolling your own TPM PCB is a very attractive solution! Last time we covered a DIY TPM module for ASrock server motherboards, we had a vivid discussion in the comments, and if you’re looking to create your own TPM board, you could do worse than checking them out for advice and insights!