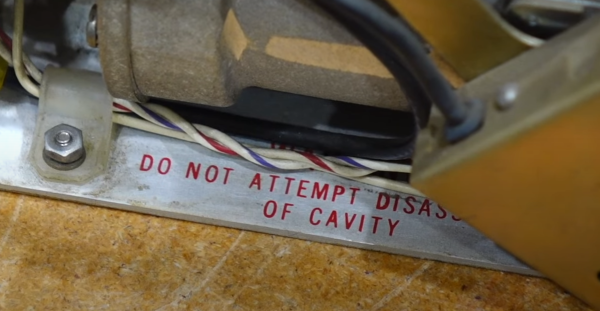
[CuriousMarc] is back with more vintage HP hardware repair. This time it’s the HP 5245L, a digital nixie-display frequency counter from 1963. This unit is old enough to be entirely made of discrete components, but has a real trick up its sleeve, with add-on components pushing the frequency range all the way up to 18 GHz. But this poor machine was in rough shape. There were previous repair attempts, some of which had to be re-fixed with proper components. When it hit [Marc]’s shop, the oscillator was working, as well as the frequency divider, but the device wasn’t counting, and the reference frequencies weren’t testing good at the front of the machine. There were some of the usual suspects, like blown transistors. But things got really interesting when one of the boards had a couple of tarnished transistors, and a handful of nice shiny new ones — but maybe not all the right transistors. Continue reading “Do Not Attempt Disassembly: Analog Wizardry In A 1960s Counter”
Two Pots On Your Moped
The fastest motorcycle in the world is not some elite racer piloted across the salt flats at crazy speeds, instead it’s your first bike. Even if it’s a 50 cc moped, no other motorcycle you will own afterwards will give you that same hit as the first time you sit astride it and open the throttle. It has to be admitted though, that 50 cc mopeds are slow if it’s not your first ever ride. Really slow. How can they be made faster? Perhaps an extra cylinder will do the trick. In the video below the break, [LeDan] takes a single cylinder Simson moped engine and turns it into a 2-cylinder model.
The build has something of the machining porn about it, but who doesn’t like to sit down and watch as rough metal is transformed into a machined finish? A second Simson engine is used as a donor, and from it another crankcase section is fabricated. In that foes a newly enlarged crankshaft which we’re supprised not to see being balanced, and on the end of the whole assembly goes the Simson end casting. Two cylinders and their blocks the bolt on top, and the engine is complete. It’s a twin-carb model, and we have to admit curiosity as to whether small two-strokes need their carbs balancing. The result seems to work, though we don’t see it on a bike or at high revs. The kid with this engine really would have the fastest motorcycle in the world — compared to his mates.
As you might expect, this isn’t the first small engine build we’ve seen.
Blind Camera: Visualizing A Scene From Its Sounds Alone

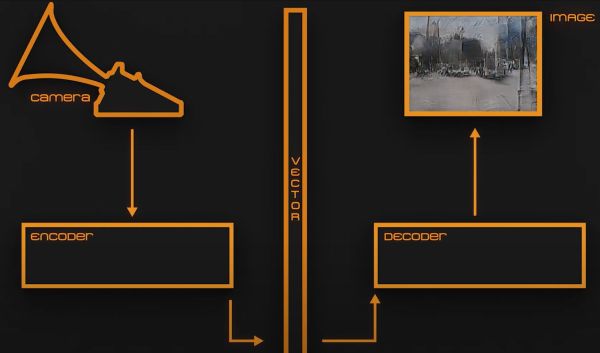
When we see a photograph or photo of a scene, we can likely imagine what sounds would go with it, but what if this gets inverted, and we have to imagine the scene that goes with the sounds? How close would we get to reconstructing the scene in our mind, without the biases of our upbringing and background rendering this into a near-impossible task? This is essentially the focus of a project by [Diego Trujillo Pisanty] which he calls Blind Camera.
Based on video data recorded in Mexico City, a neural network created using Tensorflow 3 was trained using an RTX 3080 GPU on a dataset containing frames from these videos that were associated with a sound. As a result, when the thus trained neural network is presented with a sound profile (the ‘photo’), it’ll attempt to reconstruct the scene based on this input and its model, all of which has been adapted to run on a single Raspberry Pi 3B board.
However, since all the model knows are the sights and sounds of Mexico City, the resulting image will always be presented as a composite of scenes from this city. As [Diego] himself puts it: for the device, everything is a city. In a way it is an excellent way to demonstrate how not only neural networks are limited by their training data, but so too are us humans.
Continue reading “Blind Camera: Visualizing A Scene From Its Sounds Alone”
A Ride-On Picnic Table For Those Idylic Summer Evenings
For most outsiders the Netherlands is a country of picturesque cities, windmills, tulips, and maybe those famous coffee shops. Head away from the coast though and you enter the country’s rural hinterland, farming country with lush green fields, dairy cattle, and farm lads doing what they do best, which is hacking old machinery to do crazy things under those wide skies. [Plodno] are based on a farm somewhere in the eastern Netherlands, and the latest of these lads’ creations is a motorised picnic table (Dutch language, you’ll need YouTube translated subtitles).
This is farm hacking at its best, with a scrap FIAT hatchback donating its running gear to a welded tubular frame, with a chain drive to a small single-cylinder engine. There’s no suspension save for the air in the tyres, the steering column is vertical, and the brake is a single inboard disk on the rear axle. Perhaps it’s fortunate that the intended beating heart, a Kawasaki motorycle engine, was misfiring, as it would have been truly lethal with that much power. We’re not too convinced at the legality of taking such a contraption on the public road in the Netherlands, but they seem to get away with it. Take a look at the build in the video below the break.
Here at Hackaday we like a good hacky farm build, even though sometimes they’re not so well-assembled.
Continue reading “A Ride-On Picnic Table For Those Idylic Summer Evenings”
A 489 Megapixel Camera For Not A Lot
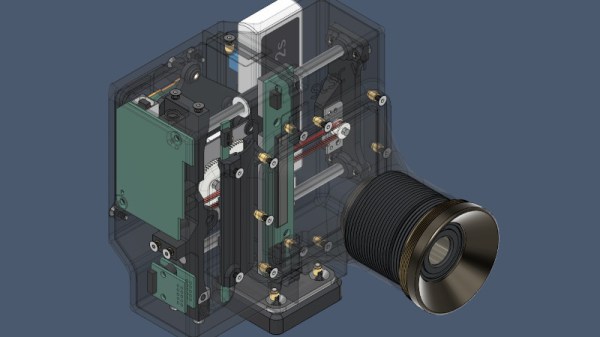
The megapixel wars of a decade ago saw cameras aggressively marketed on the resolution of their sensors, but as we progressed into the tens of megapixels it became obvious even to consumers that perhaps there might be a little more to the quality of a digital camera than just its resolution. Still, it’s a frontier that still has a way to go, even if [Yunus Zenichowski]’s 489 megapixel prototype is a bit of an outlier. As some of you may have guessed it’s a scanner camera, in which the sensor is a linear CCD that is mechanically traversed over the focal plane to capture the image line by line.
In the 3D printed shell are the guts of a cheap second-hand Canon scanner, and the lens comes from a projector. Both these components make it not only one of the highest resolution cameras we’ve ever brought you, but also by no means the most expensive. It’s definitely a work in progress and the results of a sensor designed for the controlled environment of a document scanner being used with real-world light leave something to be desired, but even with the slight imperfections of the projector lens it’s still a camera capable of some fascinating high-resolution photography. The files are all available, should you be interested, and you can see it in action in the video below the break.
It’s by no means the first scanner camera we’ve brought you, though some of the earlier projects now have dead links. It is however easily the one with the highest resolution.
Passionate Hams Make Their Mark On The Hack Chat
Let’s be honest — there are some not very pleasant stereotypes associated with amateur radio, at least if you ask outsiders. Hams are often thought of as being in two camps: old guys who can’t figure out modern technology or conspiracy theorists who think their knowledge of radio will give them an edge after the world becomes a post-apocalyptic hellscape. We’ll leave it to you to decide which is the worse brush to be painted with.
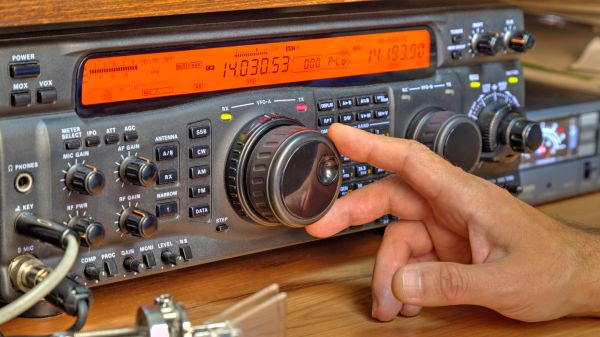
As is often the case, the best way to fight such ignorance is with education and outreach. Events like our weekly Hack Chat are a perfect platform for that, as it allows the curious to ask questions and get answers directly from subject matter experts. This is precisely why we invited Mark Hughes and Beau Ambur to helm last week’s Chat. The fact that they’re both relatively recent licensees makes them uniquely qualified to shed some light on what it’s like to become part of the ham radio community in the 21st century. As an added bonus, they’re both sharp and articulate technologists — about as far as you can get from the mental image of the doddering old granddad who prefers the simplicity of the Morse key to those newfangled smarty-phones.
Continue reading “Passionate Hams Make Their Mark On The Hack Chat”
High Voltage Ion Engines Take Trip On The High Seas
Over the last several months, we’ve been enjoying a front-row seat as [Jay Bowles] of Plasma Channel has been developing and perfecting his design for a high voltage multi-stage ionic thruster. With each installment, the unit has become smaller, lighter, and more powerful. Which is important, as the ultimate goal is to power an RC aircraft with them.
There’s still plenty of work to be done before [Jay] will be able to take his creation skyward, but he’s making all the right moves. As a step towards his goal, he recently teamed up with [RcTestFlight] to attach a pair of his thrusters — which have again been further tweaked and refined since we last saw them — to a custom catamaran hull. The result is a futuristic craft that skims across the water with no moving parts and no noise…if you don’t count the occasional stray arc from the 40,000 volts screaming through its experimental thrusters, anyway. Continue reading “High Voltage Ion Engines Take Trip On The High Seas”

