Hackaday’s own [Arsenijs Picugins] has been rather busy hacking old laptops apart and learning what can and cannot be easily reused, and presents for the 2021 Hackaday Remoticon, a heavily meme-loaded presentation with some very practical advice.
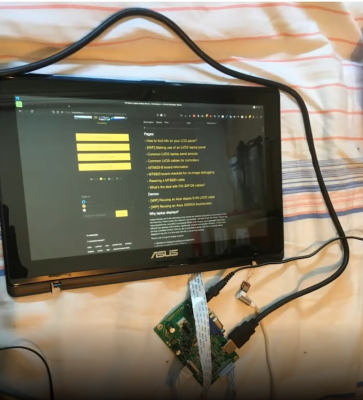
What parts inside a dead laptop are worth keeping? Aside from removable items like RAM stick and hard drives, the most obvious first target is the LCD panel. These are surprisingly easy to use, with driver boards available on the usual marketplaces, so long as you make sure to check the exact model number of your panel is supported.
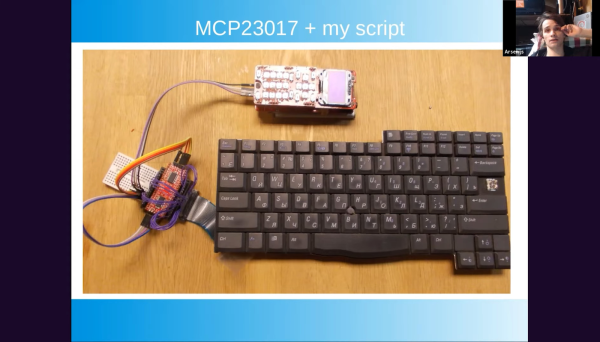
Many components inside laptops are actually USB devices, things like touch screen controllers, webcams and the like are usually separate modules, which simply take power and USB. This makes sense, since laptops already have a fair amount of external USB connectivity, why not use it internally too? Other items are a bit trickier: trackpads seem to be either PS/2 or I2C and need a bit more hardware support. Digital microphones mostly talk I2S, which means some microcontroller coding.
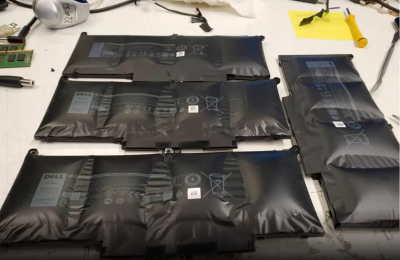
Some items need a little more care, however, so maybe avoid older Dell batteries, with their ‘spicy pillow’ tendencies. As [Arsenijs] says, take them when they are ripe for the picking, but not too ripe. Batteries need a little care and feeding, make sure you’ve got some cell protection, if you pull raw cells! Charging electronics are always on the motherboard, so that’s something you’ll need to arrange yourself if you take a battery module, but it isn’t difficult, so long as you can find your way around SMBus protocol.
Older laptops were much more modular and some even designed for upgrade or modification, and this miniaturization-driven trend of shrinking everything — where a laptop now needs to be thin enough to shave with — is causing some manufacturers to move in a much more proprietary direction regarding hardware design.
This progression conflicts with our concerns of privacy, repairability and waste elimination, resulting in closed boxes filled with unrepairable, non-reusable black boxes. We think it’s time to take back some of the hardware, so three cheers to those taking upon themselves the task to reverse engineer and publish reusability information, and long may it be possible to continue.
Continue reading “Remoticon 2021 // Arsenijs Tears Apart Your Laptop”