Between the mini bike and the nearby woods, [HowToLou] has a lot for the rest of us to be envious of. Unfortunately, the terrain on the dirt path is too bumpy and uneven for a nice ride. But rather than spend hundreds to buy or rent an official grader box, [Lou] looked at his riding mower and said, I can do that myself (YouTube, embedded below).
This grader box is made from a heavy-duty oak pallet, plus a piece of particle board to complete the rocks box. [Lou] hooks up tow straps to the hooks and drags it behind the riding mower a few times to get the path nice and even. The line of lag bolts busts up the bumps, and the boards smooth out the surface under the weight of several large rocks. We think the result looks great, and doubt that [Lou] could have done any better with a fancy grader box. Check it out in action after the break.
The Van de Graaff generator is a staple of science museums, to the point that even if the average person might not know its name, there’s an excellent chance they’ll be familiar with the “metal ball that makes your hair stand up” description. That’s partly because they’re a fairly safe way to show off high voltages, but also because they’re surprisingly cheap and easy to build.
In his latest Plasma Channel video [Jay Bowles] builds a large Van de Graaff generator that wouldn’t look out of place in a museum or university, which he estimates is producing up to 500,000 volts. It can easily throw impressive looking (and sounding) sparks 10 inches or more, and as you can see in the video below, is more than capable of pulling off those classic science museum tricks.
Lower pulley assembly.
It’s really quite amazing to see just how little it takes to generate these kinds of voltages with a Van de Graaff. In fact there’s nothing inside that you’d immediately equate with high voltage, the only electronic component in the generator’s base beyond the battery pack is a motor speed controller. While everything else might look suspiciously like magic, our own [Steven Dufresne] wrote up a properly scientific explanation of how it all works.
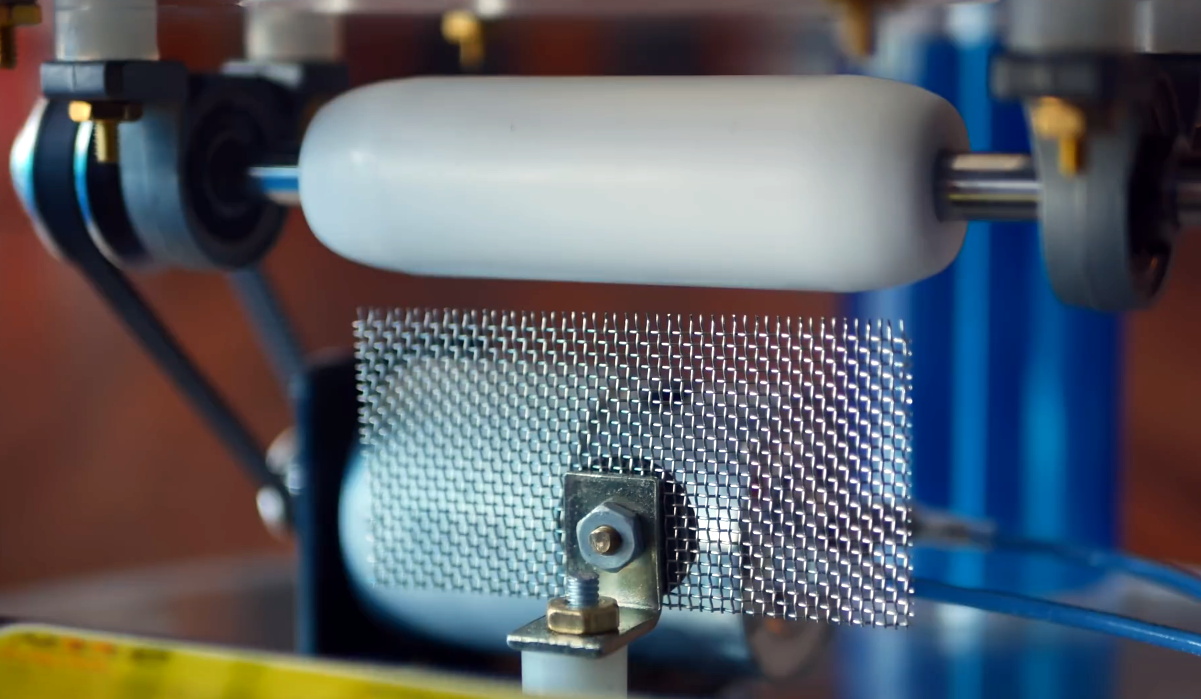
In this particular case, the motor spins a nylon pulley in the base of the generator, which is connected to a Teflon pulley in the top by way of a neoprene rubber belt. Combs made from fine metal mesh placed close to the belt at the top and bottom allow the Van de Graaff to build up a static charge in the sphere. Incidentally, it sounds like sourcing the large metal sphere was the most difficult part of this whole build, as it took [Jay] several hours to modify the garden gazing ball to fit atop the acrylic tube that serves as the machine’s core.
We’re blessed to have such a great community at Hackaday. Our tipline often overfloweth with all manner of projects and builds of all stripes. We see it all here, from beginners just starting out with their first Arduino to diehard hackers executing daringly complex builds in their downtime, and everything in between.
If you’re sitting there in the grandstands, watching in awe, you might wonder what it takes to grace these hallowed black pages. In life, nothing is guaranteed, but I’ve been specially authorised to share with you a few tips that can maximise your chances of seeing your project on Hackaday.
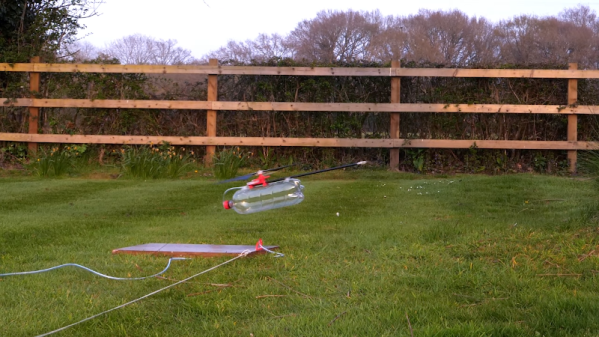
[Tom] likes to build little helicopters and decided to build one that runs on compressed air. (Video, embedded below.) Turns out it was a little harder than he thought. Originally, he was trying for a compressed air quadcopter. He’d already worked with an air turbine, but putting on a vehicle that can lift itself into the air turns out to have a lot of hidden gotchas.
[Tom] went through a lot of design considerations to arrive at the helicopter design. He considered counter-rotating props, but there were a host of problems involved. He finally settled on a single prob with a tail rotor that resides on the far end of a long boom to allow the resulting lever arm to reduce the work required of the tail rotor.
In the movies, everything is modular. Some big gun fell off the spaceship when it crashed? Good thing you can just pick it up and fire it as-is (looking at you, Guardians of the Galaxy 2). Hyperdrive dead? No problem, because in the Star Wars universe you can just drop a new one in and be on your way.
Of course, things just aren’t that simple in the real world. Most systems, be they spaceships or cell phones, are enormously complicated and contain hundreds or thousands of interconnected parts. If the camera in my Samsung phone breaks, I can’t exactly steal the one from my girlfriend’s iPhone. They’re simply not interchangeable because the systems were designed differently. Even if we had the same phone and the cameras were interchangeable, they wouldn’t be easy to swap. We’d have to crack open the phones and carefully perform the switch. Speaking of switches, the Nintendo Switch is a good counterexample here. Joycon break? Just buy a new one and pop it on.
What if more products were like the Nintendo Switch? Is its modularity just the tip of the iceberg?
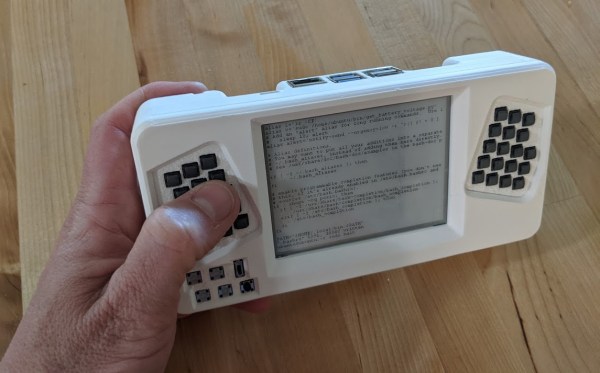
What’s the fastest way to master console stuff like screen or emacs? Force yourself to use it exclusively, of course. But maybe you’d be tempted to cheat with a desktop. We know we would be. In that case, you ought to build a console-only cyberdeck like this sweet little thing by [a8skh4].
This cyberdeck serves another purpose as well — the keyboard layout is Miryoku, so [a8ksh4] can get more practice with that at the same time. Fortunately, the layout is built for emacs.
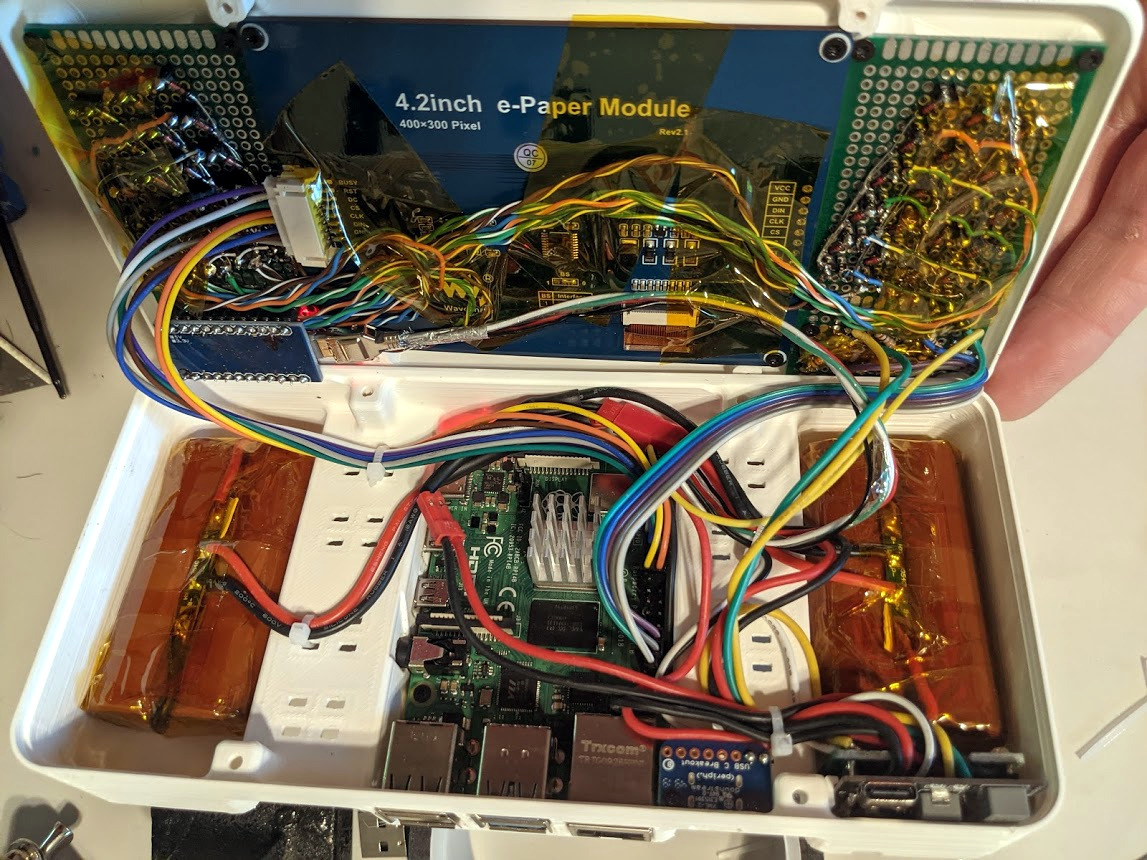
Inside is a Raspberry Pi 4 and what looks to be an Arduino handling the keyboard input. The Paper Pi spotlights a 4.2″ e-ink screen between a split thumb keyboard that’s made of soft, silent, tactile switches.
Since they’re SMD, [a8ksh4] made clever use of header pins to get them to work with protoboard. As much as we love the keyboard, it would be awesome to see a few switches on the shoulders or even the back that make use of the rest of the fingers. Check out more build pictures in the gallery.
Over the past few years a new class of soldering iron has arisen: a temperature controlled iron no longer tied to a bulky mains-powered base station, but using low-voltage DC power and with all electronics concealed in a svelte handle. First came the Miniware TS100, and then many more, with slightly different feature sets and at varying price points. We’ve reviewed a few of them over the years, and today we have the most recent contender in the Sequre SQ-D60. It follows the formula closely, but costs only £20 (about $26). This price puts it in an attractive budget category, and its USB-C power option makes it forward-looking over models with barrel jacks. Description over, it’s time to plug it in and put it through its paces.
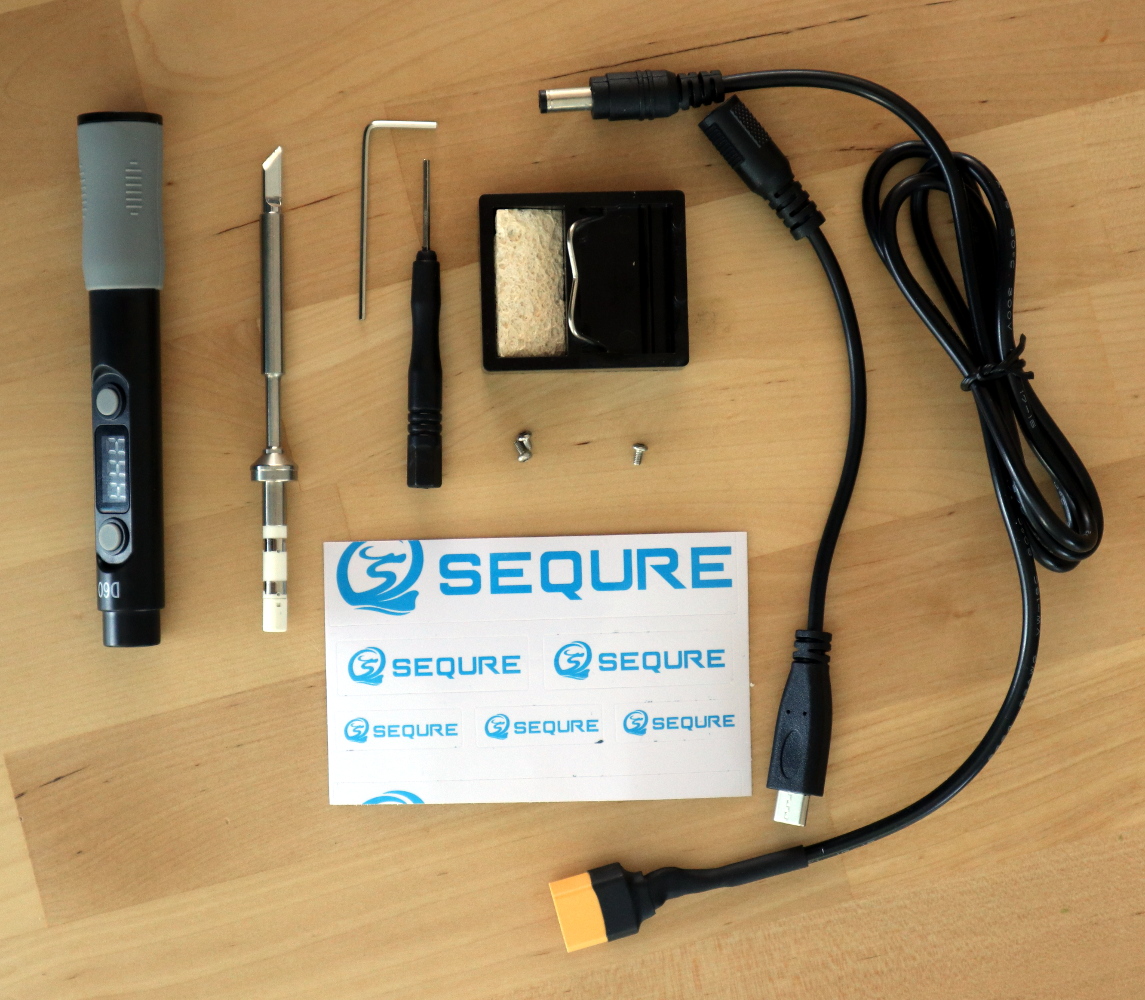
What’s In The Box?
That’s a lot of extra bits for a budget iron!
In the box, aside from the handle containing the electronics, were a surprisingly comprehensive array of parts and accessories. The handle itself is similarly-sized to its competitors, being only slightly longer than that of Pine64’s Pinecil. The tip supplied was unexpectedly a slanted chisel, so I may have managed to order incorrectly, though since it shares the same tip design as both the TS100 and the Pinecil I have plenty of alternative tips should I need one. Otherwise there was a little bag of hex screws along with a key and a driver for them, a little stand with a sponge, a set of Sequre stickers, a USB-C to barrel jack cable, and a barrel jack-to-XT60 connector for use with LiPo battery packs. These last two cables are a particularly useful addition.
At first sight the tip doesn’t seem to have any means of being fixed into its socket, but a closer inspection reveals that there is a hex screw hiding underneath a silicone finger sleeve that holds it securely when tightened. The handle has a simple enough interface, with just two buttons and a 3-digit, 7-segment display. Powering it up from a 45 W USB-PD power supply, and it heats up to 300 °C in around ten seconds after pressing one of the buttons. My usual soldering temperature is 360 °C, and it has an interface involving long presses of one of the buttons before they become up and down buttons to select the temperature. In prolonged use the handle doesn’t become noticeably warm, and aside from a slight new-electronics-getting-hot smell there was no immediate concern that it might release magic smoke. Continue reading “Review: Sequre SQ-D60 Temperature Controlled Soldering Iron”→