A Rotary Encoder: How Hard Can It Be?

As you may have noticed, I’ve been working with an STM32 ARM CPU using Mbed. There was a time when Mbed was pretty simple, but a lot has changed since it has morphed into Mbed OS. Unfortunately, that means that a lot of libraries and examples you can find don’t work with the newer system.

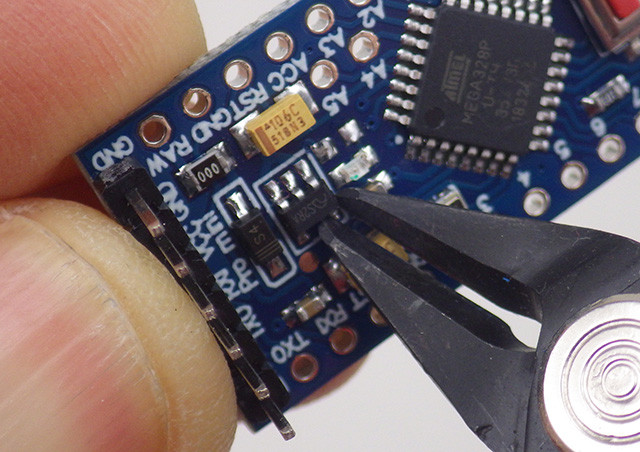
I needed a rotary encoder — I pulled a cheap one out of one of those “49 boards for Arduino” kits you see around. Not the finest encoder in the land, I’m sure, but it should do the job. Unfortunately, Mbed OS doesn’t have a driver for an encoder and the first few third-party libraries I found either worked via polling or wouldn’t compile with the latest Mbed. Of course, reading an encoder isn’t a mysterious process. How hard can it be to write the code yourself? How hard, indeed. I thought I’d share my code and the process of how I got there.

There are many ways you can read a rotary encoder. Some are probably better than my method. Also, these cheap mechanical encoders are terrible. If you were trying to do precision work, you should probably be looking at a different technology like an optical encoder. I mention this because it is nearly impossible to read one of these flawlessly.

So my goal was simple: I wanted something interrupt driven. Most of what I found required you to periodically call some function or set up a timer interrupt. Then they built a state machine to track the encoder. That’s fine, but it means you eat up a lot of processor just to check in on the encoder even if it isn’t moving. The STM32 CPU can easily interrupt with a pin changes, so that’s what I wanted.

The Catch

The problem is, of course, that mechanical switches bounce. So you have to filter that bounce either in hardware or software. I really didn’t want to put in any extra hardware more than a capacitor, so the software would have to handle it.

I also didn’t want to use any more interrupts than absolutely necessary. The Mbed system makes it easy to handle interrupts, but there is a bit of latency. Actually, after it was all over, I measured the latency and it isn’t that bad — I’ll talk about that a little later. Regardless, I had decided to try to use only a pair of interrupts.

Continue reading “A Rotary Encoder: How Hard Can It Be?”

A Power Button For Raspberry Pi, Courtesy Of Device Tree Overlays

As a standard feature of the Linux kernel, device tree overlays (DTOs) allow for easy enabling and configuration of features and drivers, such as those contained within the standard firmware of a Raspberry Pi system. Using these DTOs it’s trivial to set up features like as a soft power-off button, triggering an external power supply and enable drivers for everything from an external real-time clock (RTC) to various displays, sensors and audio devices, all without modifying the operating system or using custom scripts.

It’s also possible to add your own DTOs to create a custom overlay that combines multiple DTO commands into a single one, or create a custom device tree binary (DTB) for the target hardware. Essentially this DTB is loaded by the Linux kernel on boot to let it know which devices are connected and their configuration settings, very similar to what the BIOS component with x86-based architectures handles automatically.

Ultimately, the DTB concept and the use of overlays allow for easy configuration of such optional devices and GPIO pin settings, especially when made configurable through a simple text file as on the Raspberry Pi SBC platform.

Continue reading “A Power Button For Raspberry Pi, Courtesy Of Device Tree Overlays”

Building 7-Segment Displays With LEGO

Utter the words “7-segment display” amongst hackers and you’ll typically get people envisaging the usual LED and LCD versions that we all come across in our daily lives. However, mechanical versions do exist, and [ord] has assembled a couple of designs of their very own.

The first uses what appears to be two LEGO motors to drive individual segments of the display. Each segment consists of a pair of yellow axles thrust up through a black grid to represent parts of the number, as well as a minus sign as needed. [ord] demonstrates it by using it to display angle data from a tilt sensor inside a LEGO Powered Up controller brick. Further photos on Flickr show the drive system from underneath.

The second design relies upon a drum-like mechanism that seems to only be capable of displaying numbers sequentially. It works in a manner not dissimilar to that of a player piano. The required movements to display each number are programmed into sequences with Technic pins sticking out of beams in a drum assembly driven by either a hand crank or motor. It’s again demonstrated by [ord] using it to display angular data.

While it’s unlikely we’ll see LEGO displays used as angle of attack meters in light aircraft, you could do so if you wanted a cheap and unreliable device that is likely to fall to pieces if unduly jostled. In any case, it’s not the first time we’ve seen LEGO 7-segment displays, but it’s always great to see a new creative take on an existing concept. We’d love to see such a design implemented into a fancy clock, or perhaps even a news ticker running on a 16-segment version. Video after the break.

Continue reading “Building 7-Segment Displays With LEGO”

PiSpy, The Camera Setup Designed To Make Biological Observations Better

Back in grad school, we biology students were talking shop at lunch one day. We “lab rats” were talking about the tools of the trade, which for most of us included things like gel electrophoresis, restriction endonucleases, and polymerase chain reaction. Not to be left out, a fellow who studied fire ants chimed in that his main tool was a lawn chair, which he set up by a Dumpster in a convenience store parking lot to watch a fire ant colony. Such is the glamor of field biology.

Ants on the march. Tough luck for the crickets, though.

What our colleague [Mike] wouldn’t have given for something like PiSpy, the automated observation tool for organismal biology by [Greg Pask] of Middlebury College, et al. As discussed in the preprint abstract, an automated imaging platform can be key to accurate observations of some organisms, whose behavior might be influenced by the presence of a human observer, or even a grad student in a lawn chair. Plus, PiSpy offers all the usual benefits of automation — it doesn’t get tired, it doesn’t need to take bathroom breaks, and it can even work around the clock. PiSpy is based on commonly available components, like laser-cut plywood and a Raspberry Pi and camera, so it has the added advantage of being cheap and easy to produce — or at least it will be when the Pi supply picks back up again. PiSpy takes advantage of the Pi’s GPIO pins to enable triggering based on external events, or controlling peripherals like lights or servos.

While built for biological research, there are probably dozens of uses for something like PiSpy. It could be handy for monitoring mechanical testing setups, or perhaps for capturing UI changes during embedded device development. Or you could just use it to watch birds at a feeder. The source is all open-sourced, so whatever you make of PiSpy is up to you — even if it’s not for watching fire ants.

Careful Cuts Lets Logger Last A Year On A Coin Cell

Coin cells are great for backup power for things like real-time clocks, or even for powering incredibly small mechanical devices like watches. But for something like a data logger, running on a standard microcontroller, most people would reach for a lithium cell of some sort. Not so with this build, though, which squeezes every joule of energy from a coin cell in order to run a data logger for a full year.

Won’t be needing that anymore.

Most of the design and engineering required to improve the efficiency of the data logger involve standard practices for low-power devices such as shutting off unnecessary components and putting the device to sleep when not actively running, but this build goes far beyond that. The Vcc pin on the RTC was clipped which disables some of its internal logic but still keeps its basic functionality intact.

All of the voltage regulators were removed or disabled in favor of custom circuitry that doesn’t waste as much energy. The status and power LEDs were removed where possible, and the entire data logger is equipped with custom energy-efficient code as well.

If you’re starting a low-power project, even one that isn’t a datalogger, it’s worth checking out this build to see just how far you can go if you’re willing to hack at a PCB with cutting tools and a soldering iron. As to why this data logger needed such a low power requirement, it turns out it’s part of a kit being used in classrooms and using a coin cell brought the price of the entire unit down tremendously. Even if you have lithium cells on hand, though, it’s still worthwhile to check out the low power modes of your microcontroller.

Thanks to [Adrian] for the tip!

Review: DevTerm Linux Handheld Has Retro-Future Vibe

It’s not every day that an open-source, portable Linux handheld computer gets announced, so I couldn’t resist placing an order for the DevTerm by ClockworkPi back when we first learned about the stylish little terminal, which includes a 1280 x 480 screen (double-wide VGA) and a modular little thermal printer.

Of course, the global semiconductor shortage combined with shipping slowdowns led to delays, but things did ultimately come together for the project. I’ve always been a sucker for small-format machines, especially ones that come as a well-designed kit, and that means I can tell you all about what it was like to put it together and turn it on. There’s a lot to look at, so let’s get started.

Continue reading “Review: DevTerm Linux Handheld Has Retro-Future Vibe”

Hair Today Gone Tomorrow: Four Men Go To Fix A Wafer Prober

I’ve had a fairly varied early part of my career in the semiconductors business: a series of events caused me to jump disciplines a little bit, and after one such event, I landed in the test engineering department at Philips Semiconductors. I was tasked with a variety of oddball projects, supporting engineering work, fixing broken ATE equipment, and given a absolute ton of training: Good times!  Here’s a story that comes straight off the oddball pile.

We needed to assemble a crack team of experts and high-tail it to deepest darkest Wales, and sort out an urgent production problem. The brief was that the wafer probe yield was disastrous and the correlation wafer was not giving the correct results. Getting to the punch line is going to require some IC fabrication background, but if you like stories about silicon, or red-bearded test engineers, it’s worth it. Continue reading “Hair Today Gone Tomorrow: Four Men Go To Fix A Wafer Prober”