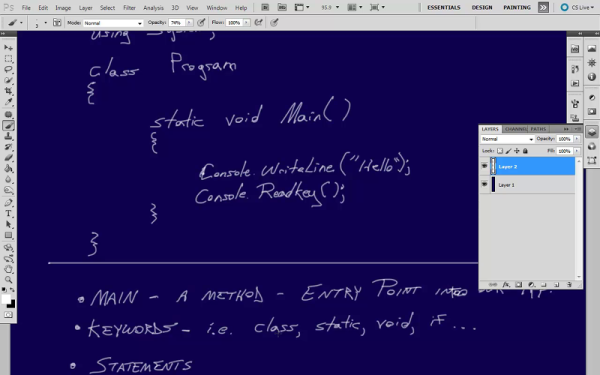
The Great Moon Hoax — No Not That One!

Humans first walked on the moon 50 years ago, yet there are some people who don’t think it happened. This story is not about them. It turns out there was another great conspiracy theory involving a well-known astronomer, unicorns, and humanoids with bat wings. This one came 134 years before the words “We chose to go to the moon” were uttered.

The 1835 affair — known as the Great Moon Hoax — took the form of six articles published in The Sun, a newspaper in New York City. Think of it like “War of the Worlds” but in newspaper form — reported as if true but completely made up. Although well-known astronomer John Herschel was named in the story, he wasn’t actually involved in the hoax. Richard Adams Locke was the reporter who invented the story. His main goal seemed to be to sell newspapers, but he also may have been poking fun at some of the more outlandish scientific claims of the day.

Continue reading “The Great Moon Hoax — No Not That One!”

DIY Teensy Looper Multiplies Music

If you’re into electronic music, chances are good that you like to roll your own. While step one is usually to build something, anything that makes sound, a natural step two is to build a looping device to extend and play with those sounds.

[Cutlasses] has finished version one of his Teensy-based Eurorack-style looper. He plugs in a thing, records some tunes, and the resulting loop gets divvied up into eight equal pieces. He can cut the loop together live using the eight buttons to jump around between sections. It supports unlimited overdubs, although too many will cause clipping. But hey, that just means free derivative sounds.

The looper records its audio to an SD card. Since this is typically a slow endeavor, [Cutlasses] used two circular buffers. One reads audio, and the other writes it. This took a lot of trial and error, which he may have to repeat with future SD cards.

[Cutlasses]’ plans for future versions include a separate audio CODEC for better sound, CV control, and a pedal option for hands-free operation. We’d love to hear some sweet Theremin loopage, wouldn’t you? Jog past the break to watch [Cutlasses] demo his looper with a kalimba and a DIY noise box that uses a string bow to make metal tines sing.

Feeling out of the music-making loop? There are (slightly) easier ways. Check out this LEGO looper or this multiplayer Pi-ano.

Continue reading “DIY Teensy Looper Multiplies Music”

The V Programming Language: Vain Or Virtuous?

If you stay up to date with niche software news, your ears may recently have twitched at the release of a new programming language: V. New hobby-project programming languages are released all the time, you would correctly argue; what makes this one special? The answer is a number of design choices which promote speed and safety: V is tiny and very fast. It’s also in a self-proclaimed alpha state, and though it’s already been used to build some interesting projects, is still at an early stage.

Continue reading “The V Programming Language: Vain Or Virtuous?”

I Love The Smell Of ABS Plastic In The Morning

One lesson we can learn from the Vietnam War documentary Apocalypse Now is that only crazy people like terrible smells just for fun. Surely Lt. Col. Kilgore would appreciate the smell of 3D printers as well, but for those among us who are a little less insane, we might want a way to eliminate the weird (and not particularly healthy) smell of melting ABS plastic.

While a simple solution would be a large fume hood or a filter to prevent inhaling the fumes, there are more elegant solutions to this problem. [Mark]’s latest project uses an electrostatic precipitator (ESP) to remove the volatile plastic particles from the air. Essentially it is a wire with a strong voltage applied to it enclosed in a vessel of some sort. The voltage charges particles, which then travel to a collecting electrode. Commercial offerings also include an X-ray generator to help clean the air, but [Mark] found this to be prohibitively expensive.

The ESP is built into a small tube through with the air can flow, and the entire device itself is housed in the printing enclosure. The pictures show the corona discharge in the device, and [Mark] plans to test it over the next few months to determine its effectiveness. He does note, however, that the electrostatic discharge creates ozone, which has its own set of problems, so he recommends against building one on your own. Ozone at least still smells like victory.

Vacuum Sputtering With A Homemade Magnetron

“You can never be too rich or too thin,” the saying goes, and when it comes to coatings, it’s true that thinner is often better. The way to truly thin coatings, ones that are sometimes only a few atoms thick, is physical vapor deposition, or PVD, a technique where a substance is transformed into a vapor and condensed onto a substrate, sometimes using a magnetron to create a plasma.

It sounds complicated, but with a few reasonable tools and a healthy respect for high voltages, a DIY magnetron for plasma sputtering can get you started. To be fair, [Justin Atkin] worked on his setup for years, hampered initially by having to settle for found parts and general scrap for his builds. As with many things, access to a lathe and the skills to use it proved to be enabling, allowing him to make custom parts like the feedthrough for the vacuum chamber as well as a liquid-cooled base, which prevents heat from ruining the magnets that concentrate the plasma onto the target metal. Using a high-voltage DC supply made from old microwave parts, [Justin] has been able to sputter copper films onto glass slides, with limited success using other metals. He also accidentally created a couple of dichroic mirrors by sputtering with copper oxides rather than pure copper. The video below has some beautiful shots of the ghostly green and purple glow.

A rig such as this opens up a lot of possibilities, from optics to DIY semiconductors. It may not be quite as elaborate as some PVD setups we’ve seen, but we’re still pretty impressed.

Continue reading “Vacuum Sputtering With A Homemade Magnetron”

Gesture Controlled Doom

DOOM will forever be remembered as one of the founding games of the entire FPS genre. It also stands as a game which has long been a fertile ground for hackers and modders. [Nick Bild] decided to bring gesture control to iD’s classic shooter, courtesy of machine learning.

The setup consists of a Jetson Nano fitted with a camera, which films the player and uses a convolutional neural network to recognise the player’s various gestures. Once recognised, an API request is sent to a laptop playing Doom which simulates the relevant keystrokes. The laptop is hooked up to a projector, creating a large screen which allows the wildly gesturing player to more easily follow the action.

The neural network was trained on 3300 images – 300 per gesture. [Nick] found that using a larger data set actually performed less well, as he became less diligent in reliably performing the gestures. This demonstrates that quality matters in training networks, as well as quantity.

Reports are that the network is fairly reliable, and it appears to work quite well. Unfortunately, playability is limited as it’s not possible to gesture for more than one key at once. Overall though, it serves as a tidy example of how to do gesture recognition with CNNs.

If you’re not convinced by this demonstration, you might be interested to learn that neural networks can also be used to name tomatoes. If you don’t want to roll your own pose detection, check out this selfie drone that uses CMU’s OpenPose library. Video after the break.

Continue reading “Gesture Controlled Doom”

High Precision Analog IO With Digital Pins

Reading the temperature of your environment is pretty easy right? A quick search suggests the utterly ubiquitous DHT11, which speaks a well documented protocol and has libraries for every conceivable microcontroller and platform. Plug that into your Arduino and boom, temperature (and humidity!) readings. But the simple solution doesn’t hit every need, sometimes things need to get more esoteric.

The technique summarized by an image from Microchip Appnote AN685

For years we’ve been watching [Edward]’s heroic efforts to build accessible underwater sensing hardware. When we last heard from him he was working on improving the accuracy of his Arduino’s measurements of the humble NTC thermistor. Now the goal is the same but he has an even more surprising plan, throw the ADC out entirely and sample an analog thermistor using digital IO. It’s actually a pretty simple trick based on an intuitive observation, that microcontrollers are better at measuring time than voltage. 

The basic circuit

The circuit has a minimum of four components: a reference resistor, the thermistor, and a small capacitor with discharge resistor. To sense you configure a timer to count, and an edge interrupt to capture the value in the timer when its input toggles. One sensing cycle consists of discharging the cap through the discharge resistor, enabling the timer and interrupt, then charging it through the value to measure. The value captured from the timer will be correlated to how long it took the cap to charge above the logic-high threshold when the interrupt triggers. By comparing the time to charge through the reference against the time to charge through the thermistor you can calculate their relative resistance. And by performing a few calibration cycles at different temperatures ([Edward] suggests at least 10 degrees apart) you can anchor the measurement system to real temperature.

For all the gory details, including tips for how to save every last joule of energy, check out [Edward]’s post and the Microchip appnote AN685 he references. Besides this series [Edward]’s Cave Pearl Project has already yielded an impressive number of Hackday posts. For more great hardware writeups check out a general hardware build for a single sensing node, or the “temperature sensor” [Edward] made with no external parts at all!