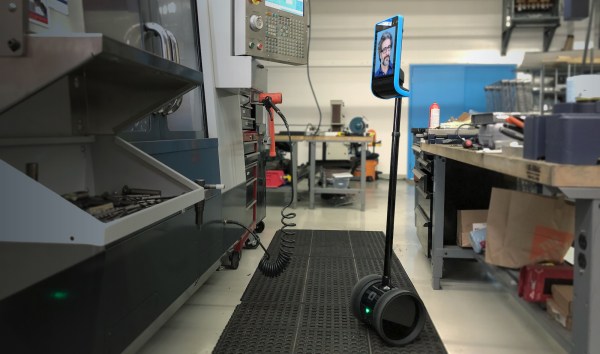
Telepresence is one of those futuristic buzzwords that’s popped up a few times over the decades; promising the ability to attend a meeting in New York City and another in Tokyo an hour later, all without having to leave the comfort of your home or office. This is the premise of Double Robotics’ Double 3, its most recent entry in this market segment, as the commercial counterpoint to more DIY offerings.
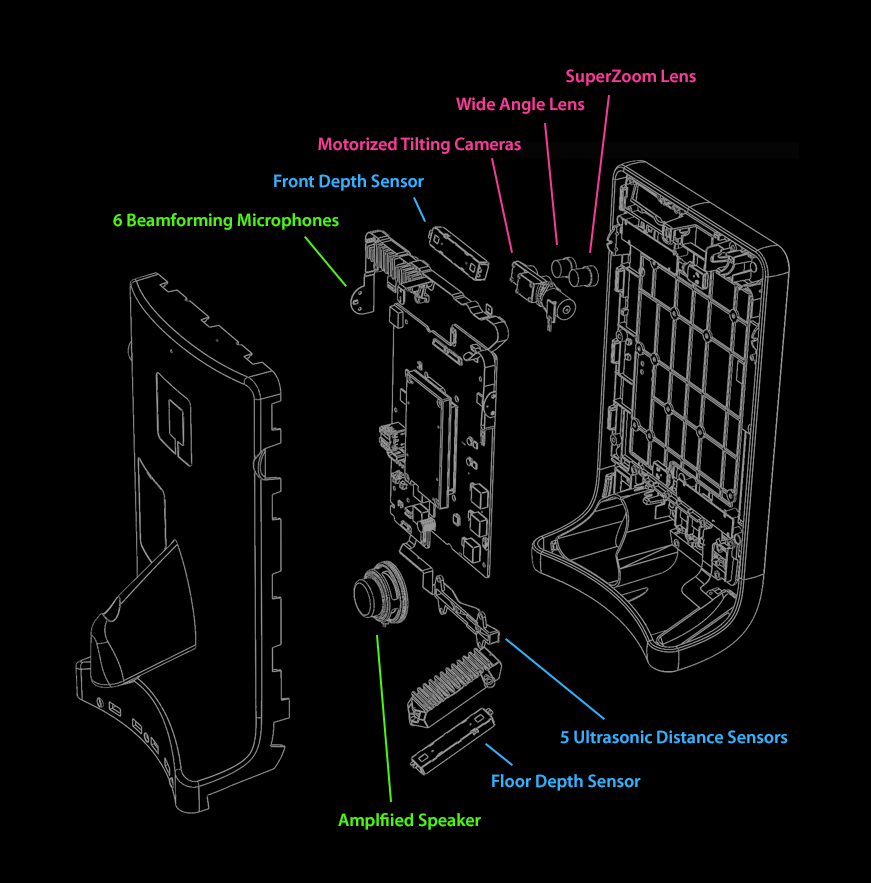
Looking like a tablet perched on top of a Segway, the built-in dual 13 megapixel cameras allow the controller to get a good look at their surroundings, while the 6 beamforming microphones should theoretically allow one to pick up any conversation in a meeting or on the work floor.
Battery life is limited to 4 hours, and it takes 2 hours to recharge the built-in battery. Fortunately one can just hop over to another, freshly charged Double 3 if the battery runs out. Assuming the $3,999 price tag doesn’t get in the way of building up a fleet of them, anyway.
Probably the most interesting aspect of the product is its self-driving feature, which has resulted in a whole range of sensors and cameras (Intel RealSense D430 stereo vision depth sensors) being installed. To handle the processing of this sensor data, the system is equipped with an NVidia Jetson TX2 ARM board, running Ubuntu Linux, which also renders the mixed-reality UI for the user with way points and other information.
Currently Double Robotics accepts sign-ups for the private beta of the Double 3 API, which would give developers access to the sensor data and various autonomous features of Double 3’s hardware. Co-founder of Double Robotics, [Marc DeVidts] stated to Hackaday that he is looking forward to seeing what people can build with it. Hopefully this time people will not simply take the thing for a joyride, like what happened with a predecessor of the Double 3.