The outlandish computers from 1995’s Hackers are easily one of the most memorable elements of the iconic cult classic. In the film, each machine is customized to reflect the individual hacker that operates it, and feature everything from spray painted camouflage paint schemes to themed boot animations based on the owner’s personal iconography. But what might not be so obvious is that the real-life props took a considerable amount of hardware hacking before they were ready for their big-screen debut.
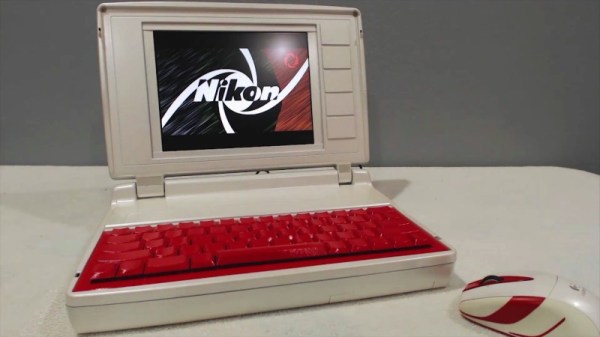
A group of dedicated Hackers fans have created a website to document, and ideally recreate, all the custom work that went into the various pieces of tech featured in the film. As explained by [Nandemoguy], the group’s latest triumph is a screen-accurate build of Lord Nikon’s laptop. The final product not only looks just like the machine used in the film, but thanks to the internal Raspberry Pi, is far more powerful than the original computer would have been.
Unless you’re on the team over at HackersCurator.com, you might not know that the laptops in the film were handmade chimeras that combined the external cases of various PCs with (usually) the internals of an Apple Powerbook 180c. Why the prop masters of the film would have gone through so much trouble to create the character’s computers is not immediately clear, but if we had to guess, presumably it was due to the requirements of the over-the-top graphical interfaces that are featured so heavily in the film.
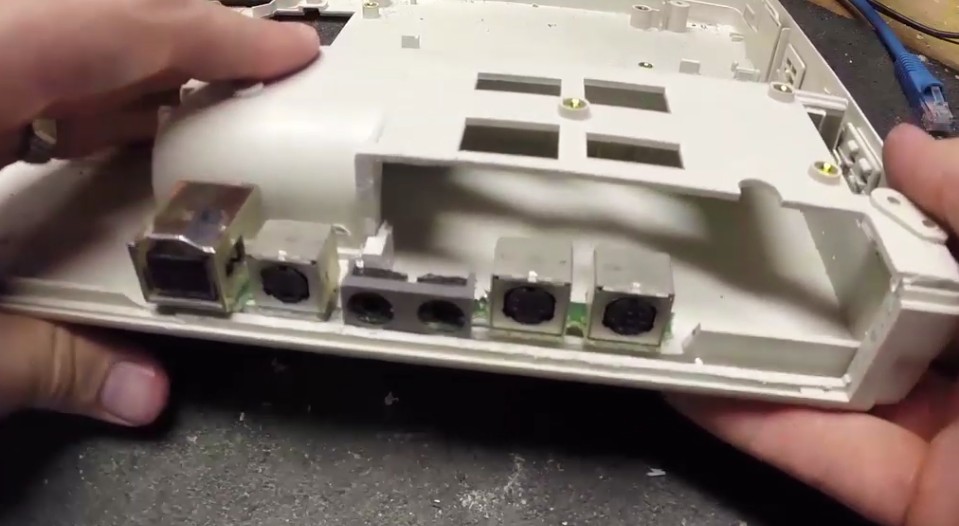 At any rate, the replica created by [Nandemoguy] is built in much the same way. At least for the parts you can see on the outside, anyway. He goes through the considerable case modifications required to replace the original keyboard on the Toshiba Satellite T1850 with a Powerbook keyboard, which as you might have guessed, has been converted into a USB HID device with a Teensy microcontroller. He even cuts the ports off the back of the Mac’s motherboard and glues them in place around the backside of the machine. But everything else, including the LCD, is all new hardware. After all, who really wants to go through all that trouble just to have a fancy Powerbook 180c in 2019?
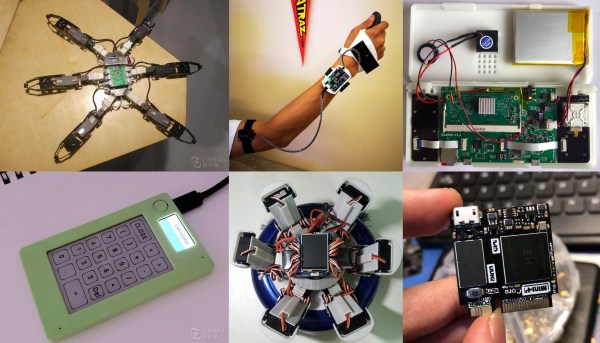
Even if you weren’t a fan of Hackers, the level of detail and effort put into this build it absolutely phenomenal. It’s interesting to see the parallels between this replica and the burgeoning cyberdeck scene; it seems like with a Teensy, a Raspberry Pi, and enough Bondo, anything can be turned into a functional computer.
Continue reading “Recreating Lord Nikon’s Laptop From Hackers“