Bringing Pro-Level Data Recording To RC Racing

We’re all familiar with the “Black Box” used on commercial aircraft, the flight data recorder which captures the minutia of each and every flight on the off-chance that it’s needed in the event of an accident. But even in less dire circumstances, the complete record of the aircraft’s performance versus what was commanded of it by the pilot can be used to fine tune performance or detect faults before they become serious.
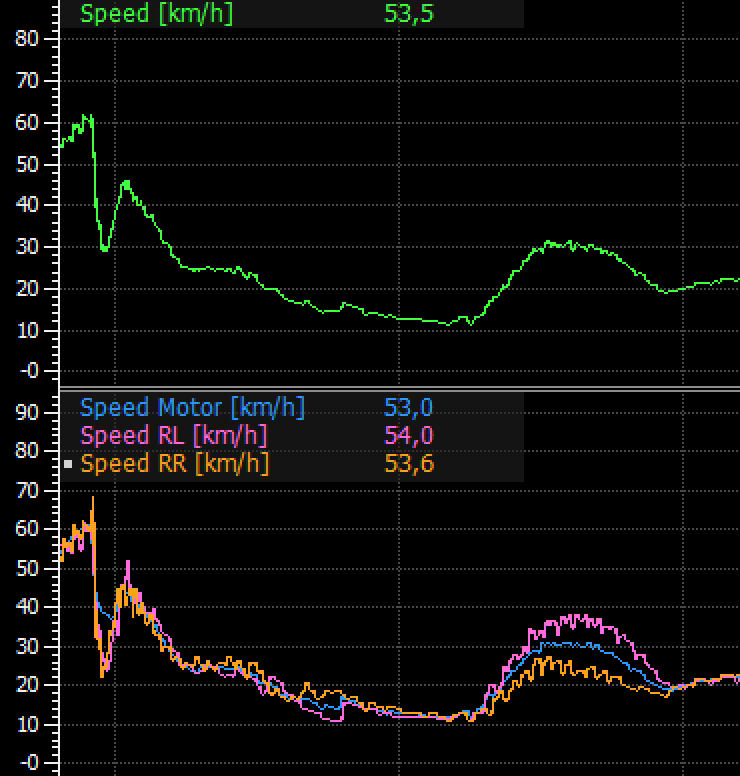
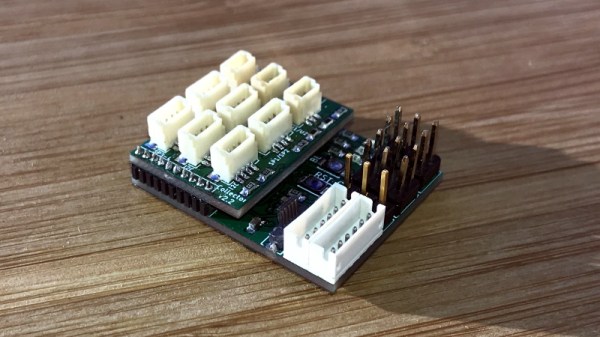
As a data engineer for professional motorsports, [Jussi Luopajärvi] knows similar recorders can be just as useful for vehicles stuck here on terra firma. His entry into the 2019 Hackaday Prize, TestLogger, aims to bring that same kind of technology to the world of RC racing. The gadget allows the driver to easily record a wealth of data about the vehicle during races, giving them valuable insight into the vehicle’s performance.

So what kind of variables are there to record on a 1/8th or 1/12th scale car? Don’t be fooled by their diminutive wheelbases, the modern RC car relies on an impressive amount of technical wizardry that benefits from a close eye.

Right now, [Jussi] says TestLogger can record not only obvious elements like battery level and throttle, but also more esoteric variables such as steering input, individual drive wheel speed, angular velocity, and even g-force in three dimensions. There’s also support for a trackside IR beacon that allows TestLogger to record lap times.

All of the data is stored on TestLogger’s SD card in standard CSV files, which makes it easy for us hacker types to parse and analyze. But for those who are more interested in driving than delimiting, there’s also a very slick website that will let users upload and compare their data. This complete user experience gives TestLogger a very professional feel, and we can’t wait to see where [Jussi] takes it from here.

With powerful microcontrollers available for a song, we expect this kind of detailed data collection is only going to become more common.


Doing What Id Couldn’t: Returning Music To Jaguar Doom

While the rest of the world has by and large forgotten the Atari Jaguar, the generously marketed console still has a fan base, and even some dedicated hackers prodding away at it. [Cyrano Jones] is one of them, and he managed something many considered unthinkable: restoring in-game music to the Jaguar port of Doom.

The Jaguar version of the classic shooter was developed by id Software themselves, and is generally considered one of the better console ports. For example, the large number of buttons on the Jaguar controller allowed players to select weapons directly rather than having to cycle through them. Unfortunately, the complete lack of music during gameplay was a glaring omission that took several points off of an otherwise fairly solid presentation.

The common culprit blamed for this was that the Jaguar’s DSP was already being used for math processing, so it didn’t have any cycles left for music playback. Coupled with a tight deadline, id probably cut their losses and released it without in-game music rather than try and spend more time engineering a solution. To compensate for the lack of in-game music, id did include the famous soundtrack in the intermission screens rather than entirely strip it out.

As [Cyrano] found out by studying the source code that’s been available since 2003, sound effects in the Jaguar version of Doom are played using something called a “ring buffer”: a cyclical fixed-length data buffer which constantly gets outputted as audio. With a patch of unused memory he could fit a second ring buffer in, rendering the music to it with close to no performance hit elsewhere in the code and then mixing both buffers for the final audio output. It looks as though id already had some of this solution in place, but with enough issues that forced them to abandon the idea in order to release the game on time.

Software hacks are not the only things that the Jaguar fan base can do though, and a fine example of a hardware one is this custom mod showing what it could’ve looked like with the CD add-on in an integrated unit.

Continue reading “Doing What Id Couldn’t: Returning Music To Jaguar Doom”

Apollo Guidance Computer Saved From The Scrap Yard

NASA needed a small and lightweight computer to send humans on their journey to the Moon and back, but computers of the day were made out of discrete components that were heavy, large, complicated, and unreliable. None of which are good qualities for spaceflight. The agency’s decision to ultimately trust the success of the Apollo program on the newly developed integrated circuit was an important milestone in computer history.

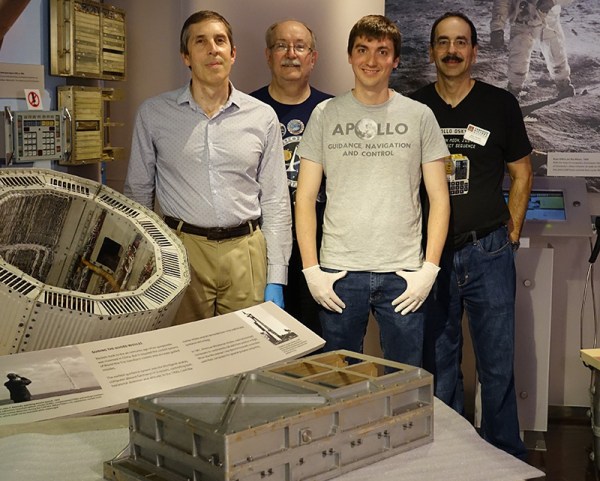
Given the enormity of the task at hand and the monumental effort it took, it’s surprising to learn that there aren’t very many left in existence. But perhaps not as surprising as the fact that somebody apparently threw one of them in the trash. A former NASA contractor happened to notice one of these historic Apollo Guidance Computers (AGC) at an electronics recycling facility, and thankfully was able to save it from getting scrapped.

The AGC was actually discovered in 1976, but it was decided to get the computer working again in time for the recent 50th anniversary of the Moon landing. A group of computer scientists in California were able to not only get the computer up and running, but integrate it into a realistic simulator that gives players an authentic look at what it took to land on the Moon in 1969.

Restoring a computer of this age and rarity is no easy feat. There aren’t exactly spare parts floating around for it, and the team had to go to great effort to repair some faults on the device. Since we covered the beginning stages of the restoration last year, the entire process has been extensively documented in a series of videos on YouTube. So while it’s unlikely you’ll find an AGC in your local recycling center, at least you’ll know what to do with it if you do.

Continue reading “Apollo Guidance Computer Saved From The Scrap Yard”

Dice Reader Brings Tech To Your Craps Game… Or, Ya Know, D&D

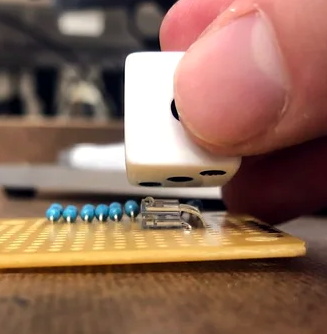
There are truisms about dice that you’ve probably already heard: if you have just one of them it’s called a “die”, opposite faces of each die always add up to seven, and those dots that you’re adding together are known as “pips”. But what about the infrared properties of those pips? It turns out they reflect less IR than the white body of the die and that trait can be used to build an automatic die reader.

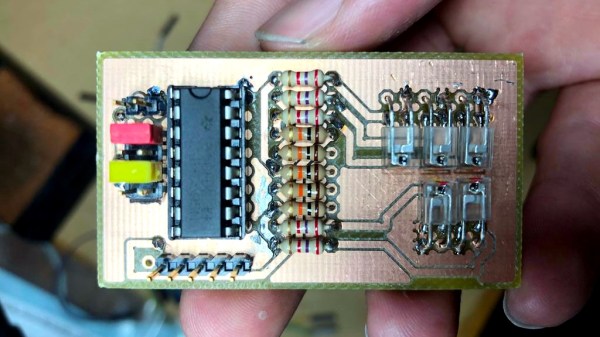
Great projects have a way of bubbling to the surface. The proof of concept comes from way back in 2009, and while the source blog is now defunct, it’s thankfully been preserved by the Internet Archive. In recreating the project based on that barebones description, [Calvin] reached for a set of five IR transmitter/receiver pairs. Take a close look and you’ll see each transmitter is hidden under its partnered receiver. The light shines up through the receiver and the presence of the pip is detected by measuring how much of it bounces back.

This board is only the sensor portion of the design. A 595 shift register provides the ability to control which IR pair is powered, plus five more signals heading out to the analog pins of an Arduino Uno to monitor how much light is being detected by the receivers. Hey, that’s another interesting fact about dice, you only need to read five different pips to establish the value shown!

We wish there were a demo video showing this in action, but alas we couldn’t find one. We were amused to hear [Calvin] mentioned this was a sorting assignment at University and the team didn’t want to build yet another candy sorter. Look, we love an epic M&M sorter just as much as the next electronic geek, but it’s pretty hard to one-up this dice-based random number generator which rolls 1.3 million times each day.

Reverse Engineering An Ancient SBC With An Apple ][

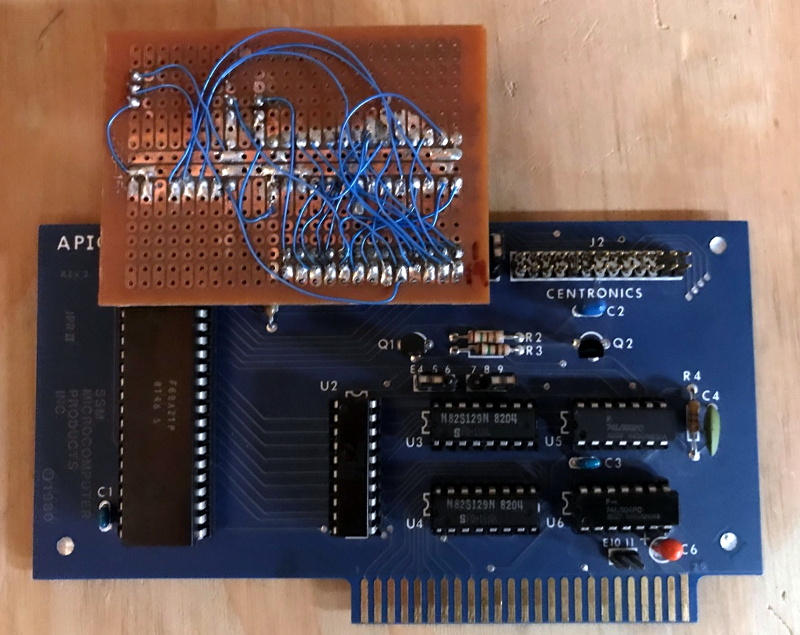
We spend a lot of time in our community discussing the many home computers from the 8-bit era, while almost completely ignoring their industrial equivalents. While today a designer of a machine is more likely than not to reach for a microcontroller, four decades ago they would have used a single-board computer which might have shared a lot of silicon with the one you used to play Pac Man.

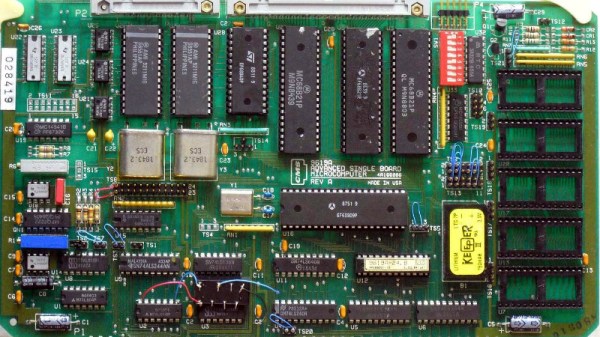
[Epooch] recently came into possession of a CMS 9619A Advanced Single Board Microcomputer, a rather unique Programmable Logic Controller intended for industrial applications. It’s powered by a Motorola 6809 CPU and features the usual array of peripheral chips. To unlock its secrets he reached not for an array of tools from 2019 but for a venerable Apple ][e microcomputer.

In this type of 8-bit machine the various peripherals are enabled through address decoding logic that toggles their chip select line when a particular I/O address is called. Sometimes this task is performed by a set of 74 or similar logic chips, but in the case of the CMS 9619A it falls upon a Programmable Array Logic (PAL). These chips, which could be thought of as a simple precursor to today’s FPGAs, were ideal for creating custom decoding logic.

As you might expect though, a PAL is an opaque device, so to deduce the address map it was necessary to reverse engineer it using the Apple ][‘s printer card and a bit of BASIC code. It then remained to do some ROM disassembly work and wire up the serial ports, before some ROM patching with the Apple ][ as an EPROM programmer to finally access the machine’s debugger.

The 6809 is famous as the brains of Radio Shack’s CoCo and the Dragon computers, but this isn’t the first time we’ve seen it in an SBC.

3D Printed Fan Filter Takes Cues From Costume Scene

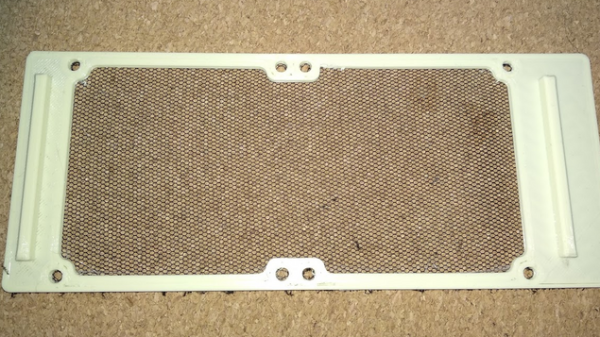
This custom fan filter created by [Kolomanschell] is a clever application of a technique used to create wearable 3D printed “fabrics”, which consist of printed objects embedded into a fine mesh like a nylon weave. The procedure itself is unchanged, but in this case it’s done not to embed 3D printed objects into a mesh, but to embed a mesh into a 3D printed object.

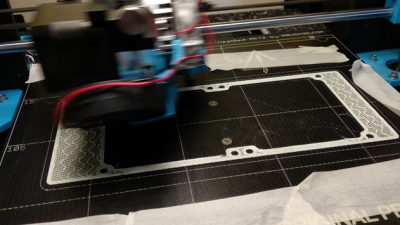
The basic idea is that a 3D print is started, then paused after a few layers. A fine fabric mesh (like tulle, commonly used for bridal veils) is then stretched taut across the print bed, and printing is resumed. If all goes well, the result is 3D printed elements embedded into a flexible, wearable sheet.


The beauty of this technique is that the 3D printer doesn’t need to be told a thing, because other than a pause and resume, the 3D print is nothing out of the ordinary. You don’t need to be shy about turning up the speed or layer height settings either, making this a relatively quick print. Cheap and accessible, this technique has gotten some traction in the costume and cosplay scene.

As [Kolomanschell] shows, the concept works great for creating bespoke filters, and the final result looks very professional. Don’t let the lack of a 3D model for your particular fan stop you from trying it for yourself, we’ve already shared a great resource for customizable fan covers. So if you’ve got a 3D printer and a bit of tulle, you have everything you need for a quick afternoon project.

Add A Microscope To Your 3D Printer

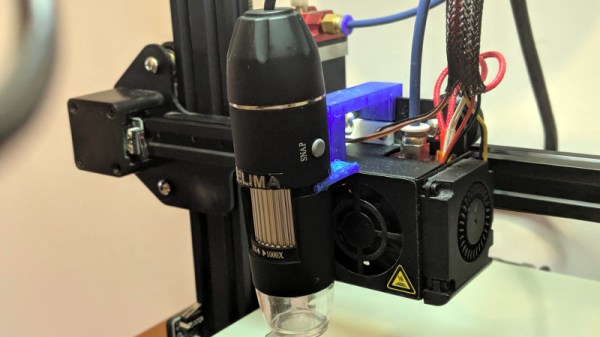
There are many ways to keep an eye on your 3D printer as it churns out the layers of your print. Most of us take a peek every now and then to ensure we’re not making plastic vermicelli, and some of us will go further with a Raspberry Pi camera or similar. [Uri Shaked] has taken this a step further, by adding a USB microscope on a custom bracket next to the hot end of his Creality Ender 3.

The bracket is not in itself anything other than a run-of-the-mill piece of 3D printing, but the interest comes in what can be done with it. The Ender 3 has a resolution of 12.5μm on X/Y axes, and 2.5μm on Z axes, meaning that the ‘scope can be positioned to within a hair’s-breadth of any minute object. Of course this achieves the primary aim of examining the integrity of 3D prints, but it also allows any object to be tracked or scanned with the microscope.

For example while examining a basil leaf, [Uri] noticed a tiny insect on its surface and was able to follow it with some hastily entered G-code. Better still, he took a video of the chase, which you can see below the break. From automated PCB quality control to artistic endeavours, we’re absolutely fascinated by the possibilities of a low-cost robotic microscope platform.

[Uri] is a perennial among Hackaday-featured projects, and has produced some excellent work over the years. Most recently we followed him through the production of an event badge.

Continue reading “Add A Microscope To Your 3D Printer”