Monstrous Suit Of Power Armor 3D Printed Over 140 Days

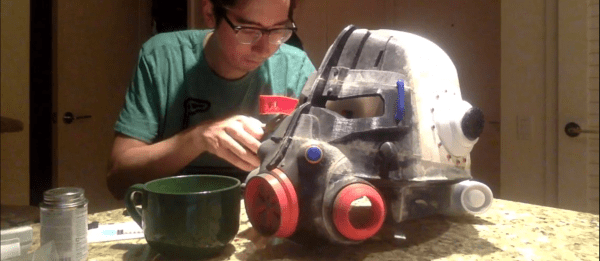
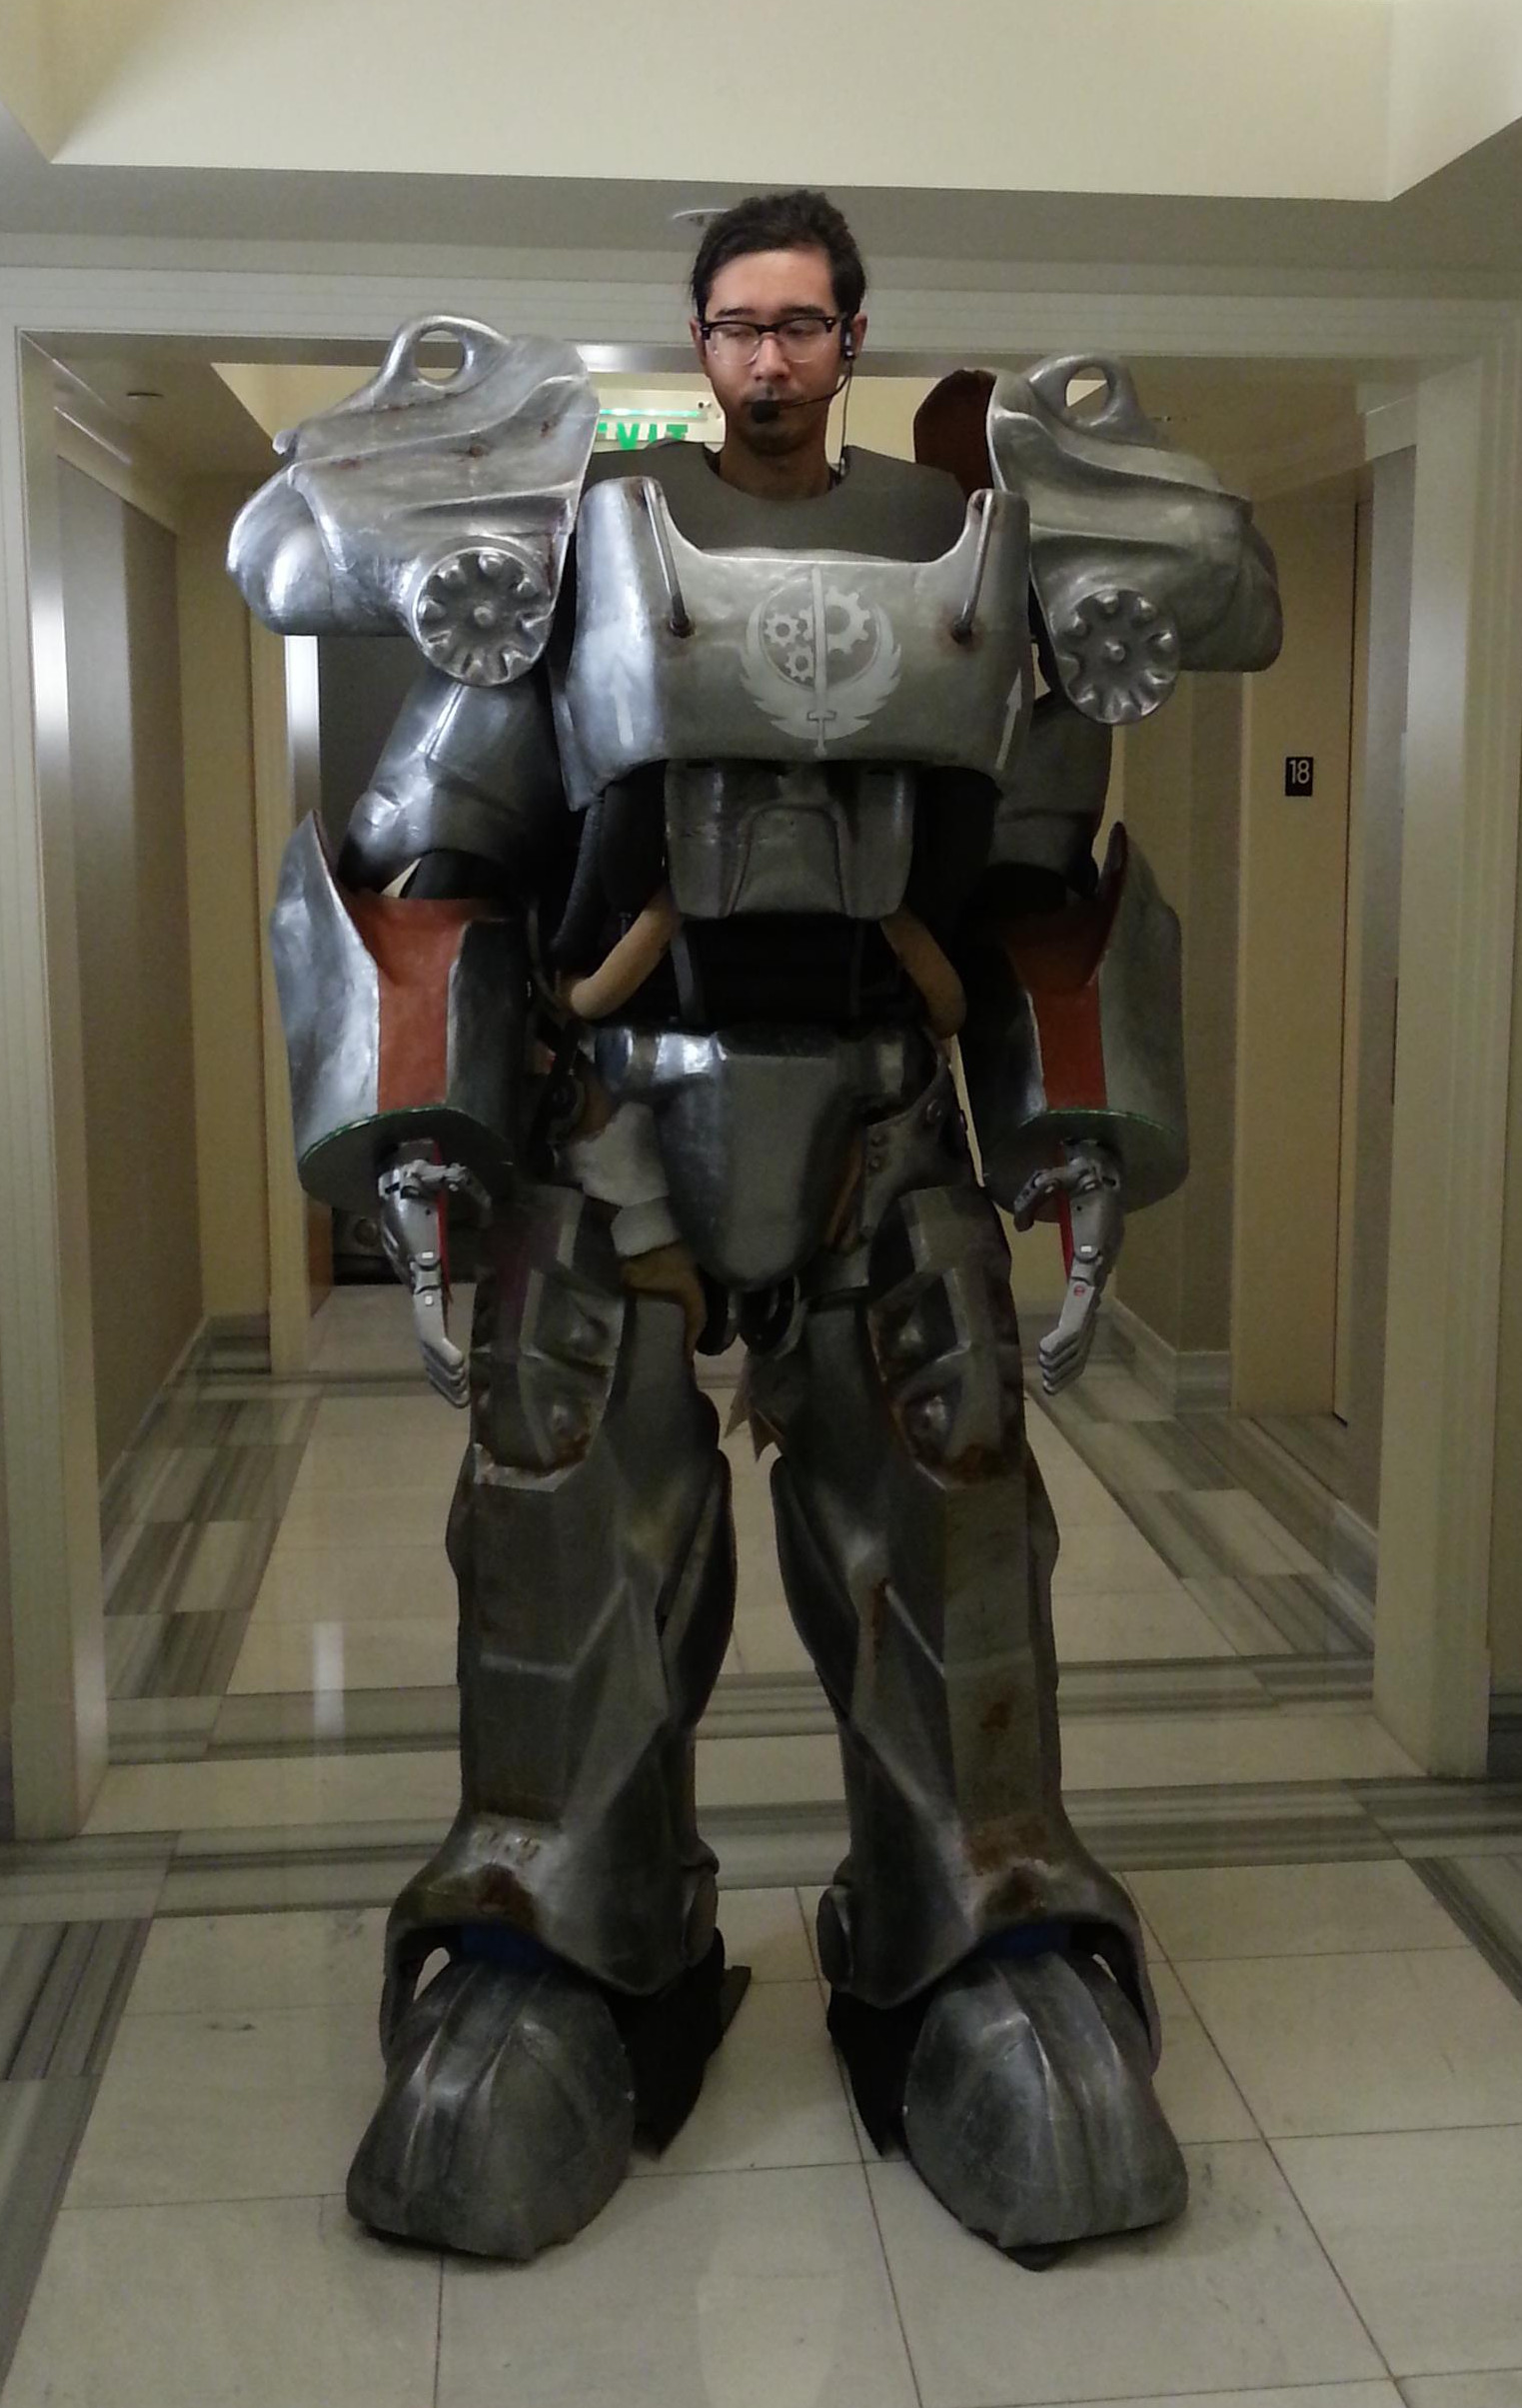
fallout-armour-3d-printed-no-helmet[hirocreations] printed an entire suit of enormous Fallout power armor on his Monoprice Maker Select 3D printer, which took some 140 days and over 120 pounds of IC3D PLA filament. Happily, [hirocreations] was able to arrange a sponsorship with IC3D for the build – who would be crazy enough to use so much filament over so long for an entire 7+ foot tall suit, right? Over those 140 days, the belts on the printer needed to be replaced twice but it otherwise chugged right along.

Most of the parts were printed at 0.46 mm layer height. Individual parts were welded (melted) together using what is essentially a soldering iron with a flat tip; many parts were too thin for any kind of joints or fixtures to be practical. Parts were smoothed with drywall spackle, lots of filler primer, and painted. Some of the parts – like the chest armor – are mounted on a frame made from PVC tubing. [hirocreations] may have gone through 120 pounds of filament, but the end result doesn’t weigh that much; the suit itself weighs in at 85-90 lbs, the rest of it went to support material, skirts, and print failures.

It was known from the start that weight could become a serious issue, so [hirocreations] went for a very light infill (10%) and 3-4 perimeter layers; he also extruded at a high temperature (~230C) which he said seemed to provide a very strong layer bond with the settings and filament he was using. So far, he says it’s taken some very hard knocks and nothing has broken or cracked. He has a short video series documenting the assembly, and you can see some of the raw armor parts before any finishing in one of the videos, embedded below.

Continue reading “Monstrous Suit Of Power Armor 3D Printed Over 140 Days”

Hackaday Prize Entry: Tongue Computer Interface

The Hackaday Prize is a celebration of the greatest hardware put together by the greatest hackers on the planet. If you go over the entries, you’ll find user interfaces for everything. Need a wheelchair controlled by eye gaze? That won last year. A foot controlled mouse? Done. Need a device to talk to the Internet while you’re in a lucid dream? We’ve seen that.

We’ve seen a lot of really cool, really strange stuff in the Hackaday Prize. We haven’t seen anything like Pallette, a finalist for the Assistive Technologies portion of this year’s prize. It’s a tongue-computer interface. You put Pallette in your mouth, like a retainer, and you can control a computer. Telekinesis with a tongue.

At its most basic level, Pallette is a Bluetooth mouse, hidden away behind the lower jaw. Infrared sensors triangulate the position of the tongue, and a microphone detects the tongue tapping on Pallette. Everything you can do with a mouse can be done with Pallette.

At first glance, Pallette seems to be just a little bit absurd. This idea changes when you see the video the Pallette team produced for the Hackaday Prize finals. Some people can’t use their arms, and for this, Pallette is a godsend. With this, anyone can use a computer, control a Sphero, or  fly a drone. It’s a completely novel device that can be used for anything, and an excellent example of what we’re looking for in the Hackaday Prize.

Continue reading “Hackaday Prize Entry: Tongue Computer Interface”

Rotating Frame Will Change Your View Of Vertical Images

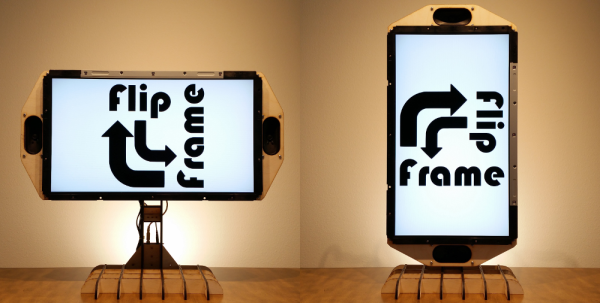
[Tim] was tired of compromising his portrait-oriented digital photos by shoehorning them into landscape-only frames. Unable to find a commercial solution, he built his own rotating digital photo frame from a 27″ LCD TV.

It uses a Raspi 3 to find [Tim]’s pictures on a giant SD card. He originally wanted to have the Pi pull pictures from Google Photos and display them randomly, but the API doesn’t work in that direction. Instead, a Python script looks at the pictures on the SD card and determines whether each is landscape or portrait-oriented. If a picture was taken in portrait-mode, the display will rotate 90 degrees. Rotation is handled with an Arduino, a stepper motor, and some 3D-printed herringbone gears. The first version was a bit noisy, so [Tim] re-printed the motor mount and the pinion gear out of flexible filament.

[Tim] designed the mount and frame himself and laser-cut the pieces out of birch plywood. We like that he accounted for the front-heaviness and that he covered the high voltage circuitry with acrylic to mitigate the risk of shock. All the code and design files are available on his project page. Make the jump to see a brief demonstration followed by a walk-through and stay for the six-minute slide show.

Continue reading “Rotating Frame Will Change Your View Of Vertical Images”

This Miniscule IR To HID Keyboard Hides In A Key Cap

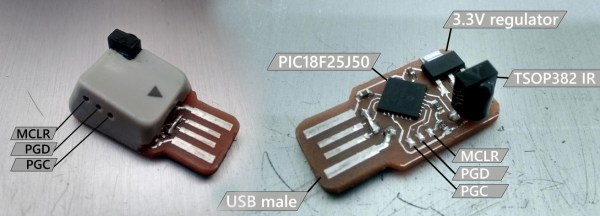
Shards of silicon these days, they’re systematically taking what used to be rather complicated and making it dead simple in terms of both hardware and software. Take, for instance, this IR to HID Keyboard module. Plug it into a USB port, point your remote control at it, and you’re sending keyboard commands from across the room.

To do this cheaply and with a small footprint used to be the territory of bit-banging software hacks like V-USB, but recently the low-cost lines of microcontrollers that are anything but low-end have started speaking USB in hardware. It’s a brave new world.

In this case we’re talking about the PIC18F25J50 which is going to ring in at around three bucks in single quantity. The other silicon invited to the party is an IR receiver (which demodulates the 38 kHz carrier signal used by most IR remotes) with a regulator and four passives to round out the circuit. the board is completely single-sided with one jumper (although the IR receiver is through-hole so you don’t quite get out of it without drilling). All of this is squeezed into a space small enough to be covered by a single key cap — a nice touch to finish off the project.

[Suraj] built this as a FLIRC clone — a way to control your home-built HTPC from the sofa. Although we’re still rocking our own HTPC, it hasn’t been used as a front-end for many years. This project caught our attention for a different reason. We want to lay down a challenge for anyone who is attending SuperCon (or not attending and just want to show off their chops).

This is nearly the same chip as you’ll find on the SuperCon badge. That one is a PIC18LF25K50, and the board already has an IR receiver on it. Bring your PIC programmer and port this code from MikroC over to MPLAB X for the sibling that’s on the badge and you’ll get the hacking cred you’ve long deserved.

[via Embedded Lab]

A DIY, Visual Alexa

Talking to computers is all the rage right now. We are accustomed to using voice to communicate with each other, so that makes sense. However, there’s a distinct difference between talking to a human over a phone line and conversing face-to-face. You get a lot of visual cues in person compared to talking over a phone or radio.

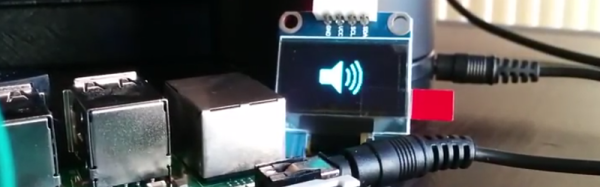
Today, most voice-enabled systems are like taking to a computer over the phone. It gets the job done, but you don’t always get the most benefit. To that end, [Youness] decided to marry an OLED display to his Alexa to give visual feedback about the current state of Alexa. It is a work in progress, but you can see two incarnations of the idea in the videos below.

A Raspberry Pi provides the horsepower and the display. A Python program connects to the Alexa Voice Service (AVS) to understand what to do. AVS provides several interfaces for building voice-enabled applications:

  • Speech Recognition/Synthesis – Understand and generate speech.
  • Alerts – Deal with events such as timers or a user utterance.
  • AudioPlayer – Manages audio playback.
  • PlaybackController – Manages playback queue.
  • Speaker – Controls volume control.
  • System – Provides client information to AVS.

We’ve seen AVS used to create an Echo clone (in a retro case, though). We also recently looked at the Google speech API on the Raspberry Pi.

Continue reading “A DIY, Visual Alexa”

Design And Hacking Drilldown: SuperCon Badge

One can imagine a political or business conference without an interactive badge — but not a hacker conference. Does this make the case for hackers being a special breed of people, always having something creative to show for their work? Yes, I think it does.

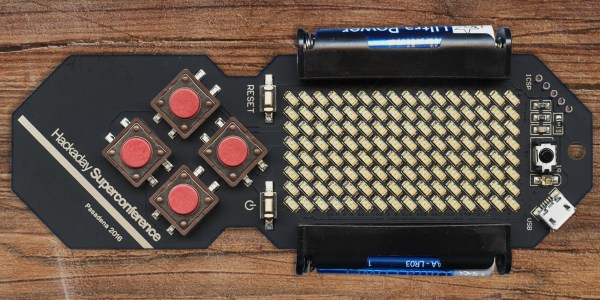
Following the Hackaday Belgrade conference in April of this year, we met at the Supplyframe offices to discuss the badge for the Hackaday SuperConference that will happen in Pasadena on 5+6th of November. The Belgrade conference badge (which was fully documented if you’re curious) was surprisingly popular, and I was asked to design the new one as well.

I was prepared to come up with something completely new, but [Mike Szczys] suggested keeping with the same basic concept for the project: “No reason to change anything, we have a badge that works”. To which I responded: “Well, the next one will also work”. But then I realized that “works” does not stand for “being functional”. The key is that it was embraced by visitors who played with it, coded on it, and solved a crypto challenge with it.

The World Doesn’t Have Enough LEDs

led-modules-versus-smdFast forward six months — here are the modifications made to the basic concept. First, the existing LED matrix, which was composed of two compact 8×8 blocks, was replaced by 128 discrete SMD LEDs. It was a much needed change to help scale down the dimensions and clunkiness, but also to avoid another painful experience of trying to purchase and have the matrix displays shipped, which seriously threatened the production of the previous badge.

It’s a long story which I discussed in my Belgrade talk — it turned out we did not manage to get enough common anode (CA) displays from all distributors in the whole world. We had a plan B, which also fizzled, leaving us with the plan C which actually included two “C”s: Common Cathode. We cleaned up all the supplies at five distributors, and managed to get 122 CA red, 340 CC red and 78 CA green displays (enough for only 270 badges) — the entire world supply. After that, you couldn’t get any 38 mm Kingbright’s display for months! The only problem was that there were two different versions of PCBs, one for CA and the other for CC displays, but luckily only one version of software, as it could autodetect the display type.
accelerometer-on-the-boardMotion and Expansion

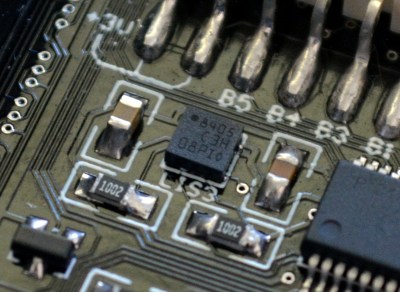
So, what else was new in the concept? In the Belgrade version, the badge supported an accelerometer module and included an unpopulated footprint in case you decided to install it, but now the badge has the MEMS chip LIS3 as an integral part. There are nine pads (with five I/O ports, driven directly from the MCU) to which you can add a 9-pin expansion connector. There will be a number of these connectors at the Design Lab, so that anyone can expand their badge for their convenience, on the spot.

The Visual Design

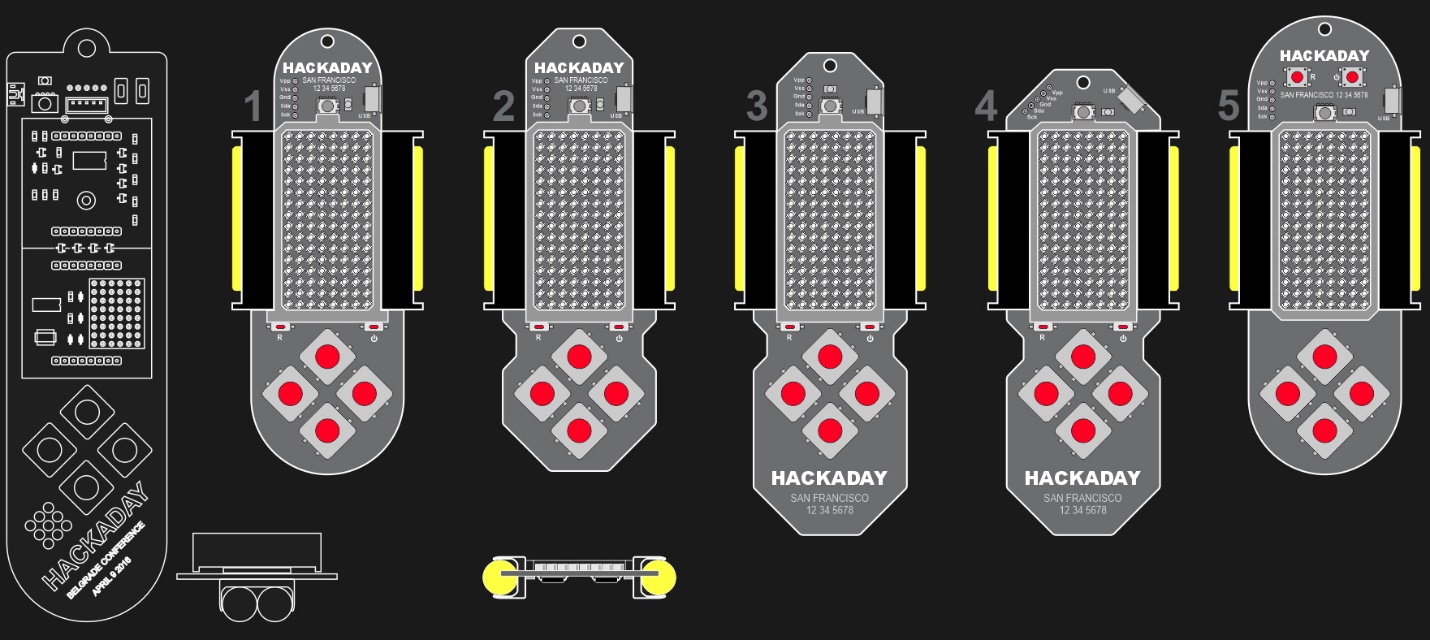
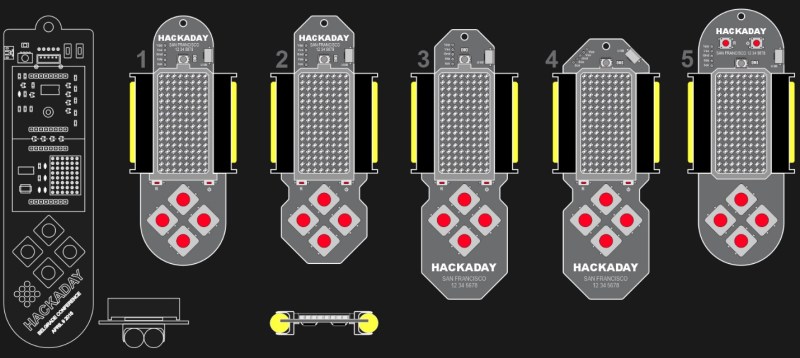
The biggest change was in the visual design. What we came up with ended up being a fair bit smaller, lighter, with a more convenient shape, and less than half the thickness of the previous one. After we had scrapped quite a few ideas during the development process (including stylized skull, frog, etc), we were left with a couple of options which you can see on the image below. The wireframe drawing on the left hand side is the Belgrade badge, shown here for a size comparison. At this point the locale and date of the conference weren’t yet definitive, which is why you see San Francisco written on the images.
design-options-2016-supercon-badge

Design number 4 prevailed, so the PCB layout could begin. I don’t like autorouted PCBs, so I was in for quite a rough time trying to solve the routing manually having only 2 layers on the board at my disposal.

Routing a Compact LED Matrix

The LED matrix is so dense that there was virtually no room on the LED layer, so most of the tracks on the component layer had to be routed as if it was a single layer PCB. To make matters worse, the LED layer is routed as a matrix, with a bunch of horizontal and vertical tracks, otherwise a good reason to use a 4-layer PCB. To stay inside the budget, everything had to be placed on 2 layers, and that’s why the final result seems so confusing at the populated area between batteries:

Continue reading “Design And Hacking Drilldown: SuperCon Badge”

It’s A Clock! It’s A Puzzle! It’s The GoonieBox!

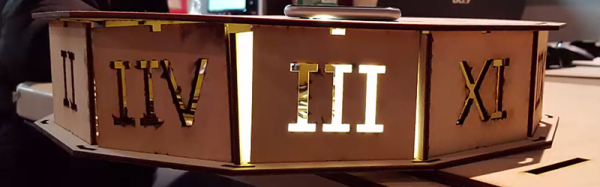
[Dr.Duino] recently completed the latest piece of what he calls “Interactive Furniture” – the GoonieBox. It took over 800 hours of design and assembly work and the result is fascinating. Part clock and part puzzle box, it’s loaded with symbols, moving parts, lights, riddles, sounds, switches, and locked compartments. It practically begs visitors to take a closer look.

The concept of Interactive Furniture led [Dr.Duino] to want to create a unique piece of decor that visitors could interact with. That alone wasn’t enough — he wanted something that wouldn’t require any explanation of how it worked; something that intrinsically invited attention, inspection, and exploration. This quest led to creating The GoonieBox, named for its twin inspirations of the 1985 film The Goonies as well as puzzles from the game “The Room“.

Embedded below are two short videos: the first demonstrates the functions of the box, and the second covers the build process. There’s laser-cut wood, plenty of 3D printed parts, and a whole lot of careful planning and testing.

Continue reading “It’s A Clock! It’s A Puzzle! It’s The GoonieBox!”