
You might think of the smartwatch era as beginning with Apple, relatively recently. Or, you might think back to those fancy Timex models with the datalink thing going on in the 1990s. Seiko can beat them all, though, with its UC-2000 smartwatch that debuted all the way back in 1984.
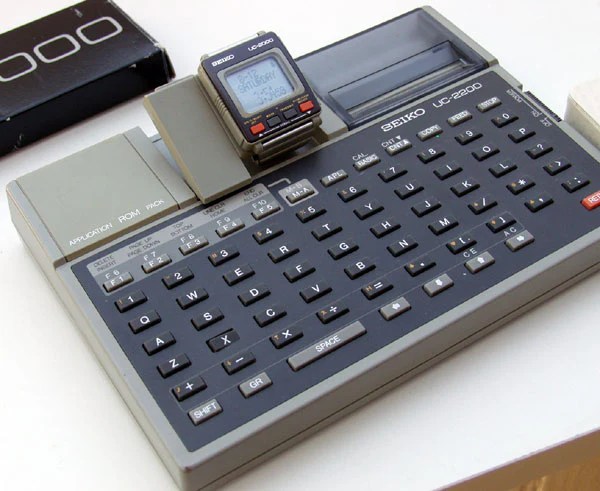
The UC-2000 very much looks cutting edge for its era, and absolutely ancient today. It featured a 4-bit CPU, 2 kilobytes of RAM, and 6 kilobytes of ROM. Display was via a simple 10×4 character LCD in a rectangular form factor, with four buttons along the bottom. Branded as a “personal information processor,” it was intended for use with the UC-2100 dock. This added a full physical QWERTY keyboard that interacted with the UC-2000 when the two were combined together. Alternatively, you could go for the UC-2200, which not only had a keyboard but also a thermal printer to boot. Oh, and ROM packs for Microsoft Basic, games, or an English-to-Japanese translator.
 What could you do on this thing? Well, it had basic watch functions, so it told the time, acted as a stop watch, and an alarm, of course. But you could also use it to store two memos of up to 1000 characters each, schedule appointments, and do basic calculations.
The one thing this smartwatch was missing? Connectivity. It couldn’t get on the Internet, nor could it snatch data from the ether via radio or any other method. By today’s measures, it wouldn’t qualify as much of a smartwatch at all. Moreso a personal organizer that fit on the wrist. Still, for its day, this thing really was a whole computer that fit on your wrist.
Would you believe we’ve seen the UC-2000 before? In fact, we’ve even seen it hacked to play Tetris! Video of that wonderful feat after the break.
Continue reading “Seiko Had A Smartwatch In 1984”


