The trend in video games is toward not being able to differentiate them from live-action theatrical releases, and games studios are getting hard to tell from movie studios. But quality graphics don’t always translate into quality gameplay, and a lot can be accomplished with minimalist graphics. Turn the clock back a few decades and think about the quarters sucked up by classics like Pac-Man, Space Invaders, and even Pong if you have any doubts about that.
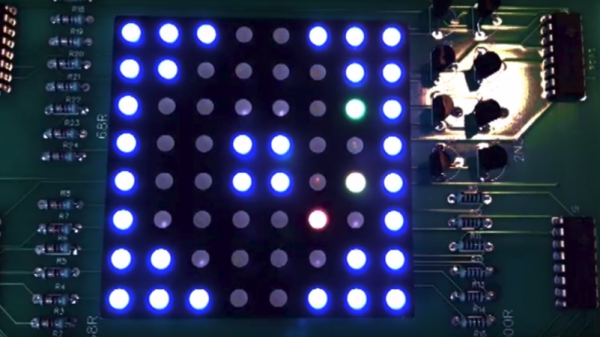
But even Pong had more than 64 pixels to work with, which is why this dungeon-crawler game on an 8×8 RGB matrix is so intriguing. You might think [Stolistic]’s game would be as simple as possible but think again. The video below shows it in action, and while new users will need a little help figuring out what the various colors mean, the game is remarkably engaging. The structure of the dungeon is random with multiple levels to unlock via the contents of power-up chests, and there are mobs to battle in a zoomed-in display. The game runs on an Arduino Uno and the matrix is driven by a bunch of 74HC595 shift registers.
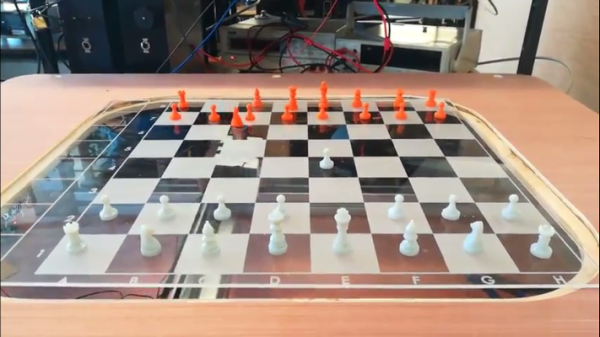
While chess had long been a domain where humans were superior to computers, the balance has shifted quite substantially in the computers’ favor. But the one thing that humans still have control over is the pieces themselves. That is, until now. A group has built a robot that both uses a challenging chess engine, and can move its own pieces.
The robot, from creators [Tim], [Alex S], and [Alex A], is able to manipulate pieces on a game board using a robotic arm under the table with an electromagnet. It is controlled with a Raspberry Pi, which also runs an instance of the Stockfish chess engine to play the game of chess itself. One of the obvious hurdles was how to keep the robot from crashing pieces into one another, which was solved by using small pieces on a large board, and always moving the pieces on the edges of the squares.
This is a pretty interesting project, especially considering it was built using a shoestring budget. And, if you aren’t familiar with Stockfish, it is one of the most powerful chess engines and also happens to be free and open-source. We’ve seen it used in some other chess boards before, although those couldn’t move their own pieces.
Nostalgia is a funny thing. That desire we all get to relive past memories can make you do things that in any other scenario would be out of the question. The effect seems even stronger when it comes to old video games. How else can you explain buying the same games over and over every time they get “remastered” for the next generation of consoles? But what if those remasters aren’t good enough?
If you have a burning desire to play a 100% accurate version of certain old arcade games, you might have your work cut out for you. Getting precise ROMs from some of these machines is exceptionally difficult, and as explained on the [CAPS0ff] blog, sometimes requires nearly superhuman feats of engineering.
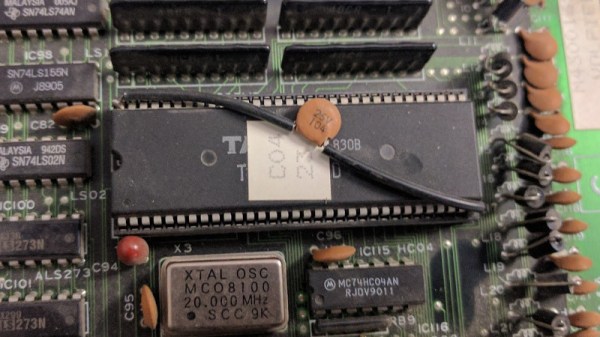
As explained in the blog post, less invasive methods of getting inside the Taito C-Chip had already been examined and come up lacking. Despite best efforts, sending the unlock command to the chip didn’t yield the desired effect. If you can’t read the ROM the usual way, you need to get a little creative.
The process starts by milling down the case of the chip until the integrated circuit is just starting to become visible. Then acid is used to fully expose the traces. The traces are then tinned, and some very fine soldering is done to get the chip wired up to the reader. All told it takes about three hours from start to finish to pull a ROM using this method. But it’s all worth it in the end when you can play that 100% accurate version of Rainbow Islands. Or so we’ve been told.
You can’t search for “retro gaming” without hitting a plethora of single board computers attached to all manner of controls, batteries, etc. Often these projects have an emphasis on functionality above all else but [Kite]’s Circuit-Sword is different. The Circuit-Sword is the heart of a RaspberryPi-based retro gaming machine with an enviable level of fit and finish.
Fundamentally the Circuit-Sword is a single board computer built around a Raspberry Pi Compute Module 3. We don’t see many projects which use a Compute Module instead of the full Pi, but here it is a perfect choice allowing [Kite] to useful peripherals without carrying the baggage of those that don’t make sense for a portable handheld (we’re looking at you, Ethernet). The Circuit-Sword adds USB-C to quickly charge an onboard LiPo (rates up to 1.5A available) and the appropriate headers to connect a specific LCD. The Compute Module omits wireless connectivity so [Kite] added an SDIO WiFi/Bluetooth module. And if you look closely, you may notice an external ATMega mediating a familiar looking set of button and switches.
Optional Drill Holes
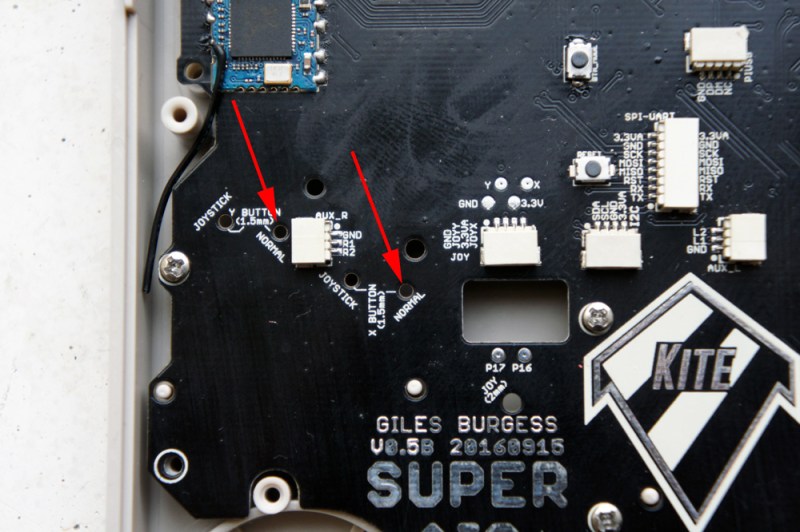
We think those buttons and switches are the most interesting thing going on here, because the whole board is designed to fit into an original GameBoy enclosure. It turns out replacement enclosures are available from China in surprising variety (try searching for “gameboy housing”) as are a variety of parts to facilitate the installation of different screen options and more. One layer deeper in the wiki there are instructions for case mods you may want to perform to make everything work optimally. The number of possible options the user can mod-in are wide. Extra X/Y buttons? Shoulder buttons on the back? Play Station Portable-style slide joysticks? All detailed. For even more examples, try searching the SudoMod forums. For example, here’s a very visual build log by user [DarrylUK].
The case mod instructions are worth a glance even if you have no intent to build a device. There are some clever techniques to facilitate careful alignment of buttons and accurate hole drilling. Predicting their buyers might want a variety of options, [Kite] added reference drill holes in the PCB for the builder to re-drill for mounting buttons or joysticks. To facilitate adding status LEDs externally there is a tiny PCB jig included. There are even instructions for adding a faux game cartridge for the complete look.
If you want to buy one (we certainly do!) [Kite] does group buys periodically. Check out the wiki for links to the right interest form.
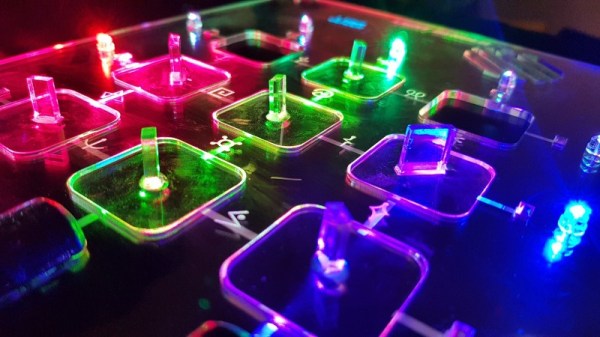
Who would have thought you could make a game out of an optical bench? [Chris Mitchell] did, and while we were skeptical at first, his laser Light Bender game has some potential. Just watch your eyes.
The premise is simple: direct the beam of a colored laser to the correct target before time runs out. [Chris] used laser-cut acrylic for his playfield, which has nine square cutouts arranged in a grid. Red, green, and blue laser pointers line the bottom of the grid, with photosensors and RGB LEDs lining the grid on the other three sides. Play starts with a random LED lighting up in one of the three colors, acting as a target. The corresponding color laser comes on, and the player has to insert mirrors or pass-through blocks in the grid to create a path to the target. The faster you hit the CdS cell, the higher your score. It’s simple, but it looks really engaging. We can imagine all sorts of upgrades, like lighting up two different targets at once, or adding a beamsplitter block to hit two targets with the same color. Filters and polarizers could add to the optical fun too.
We like builds that are just for fun, especially when they’re well-crafted and have a slight air of danger. The balloon-busting killbots project we featured recently comes to mind.
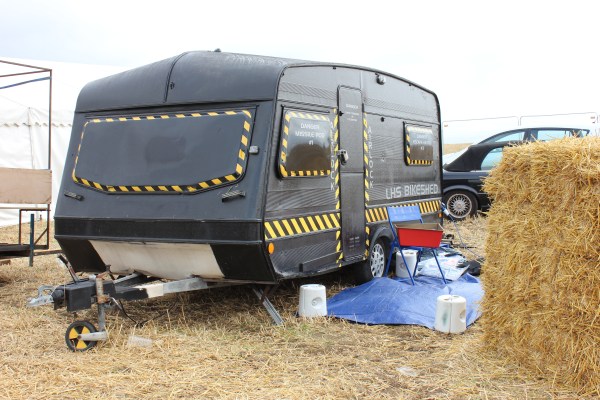
Hackerspaces always breed innovative projects. The outlandish ideas that come out of these areas typically push the boundaries of what is possible. This giant spaceship simulator is no exception, which is normally housed at the London Hackspace.
It was created by a team of DIY hackers that wanted an immersive experience that didn’t involve virtual reality goggles. Instead, they chose more of a holodeck-type game that literally would shake the people inside the sci-fi styled caravan as they traveled through virtual space fighting aliens along the way.
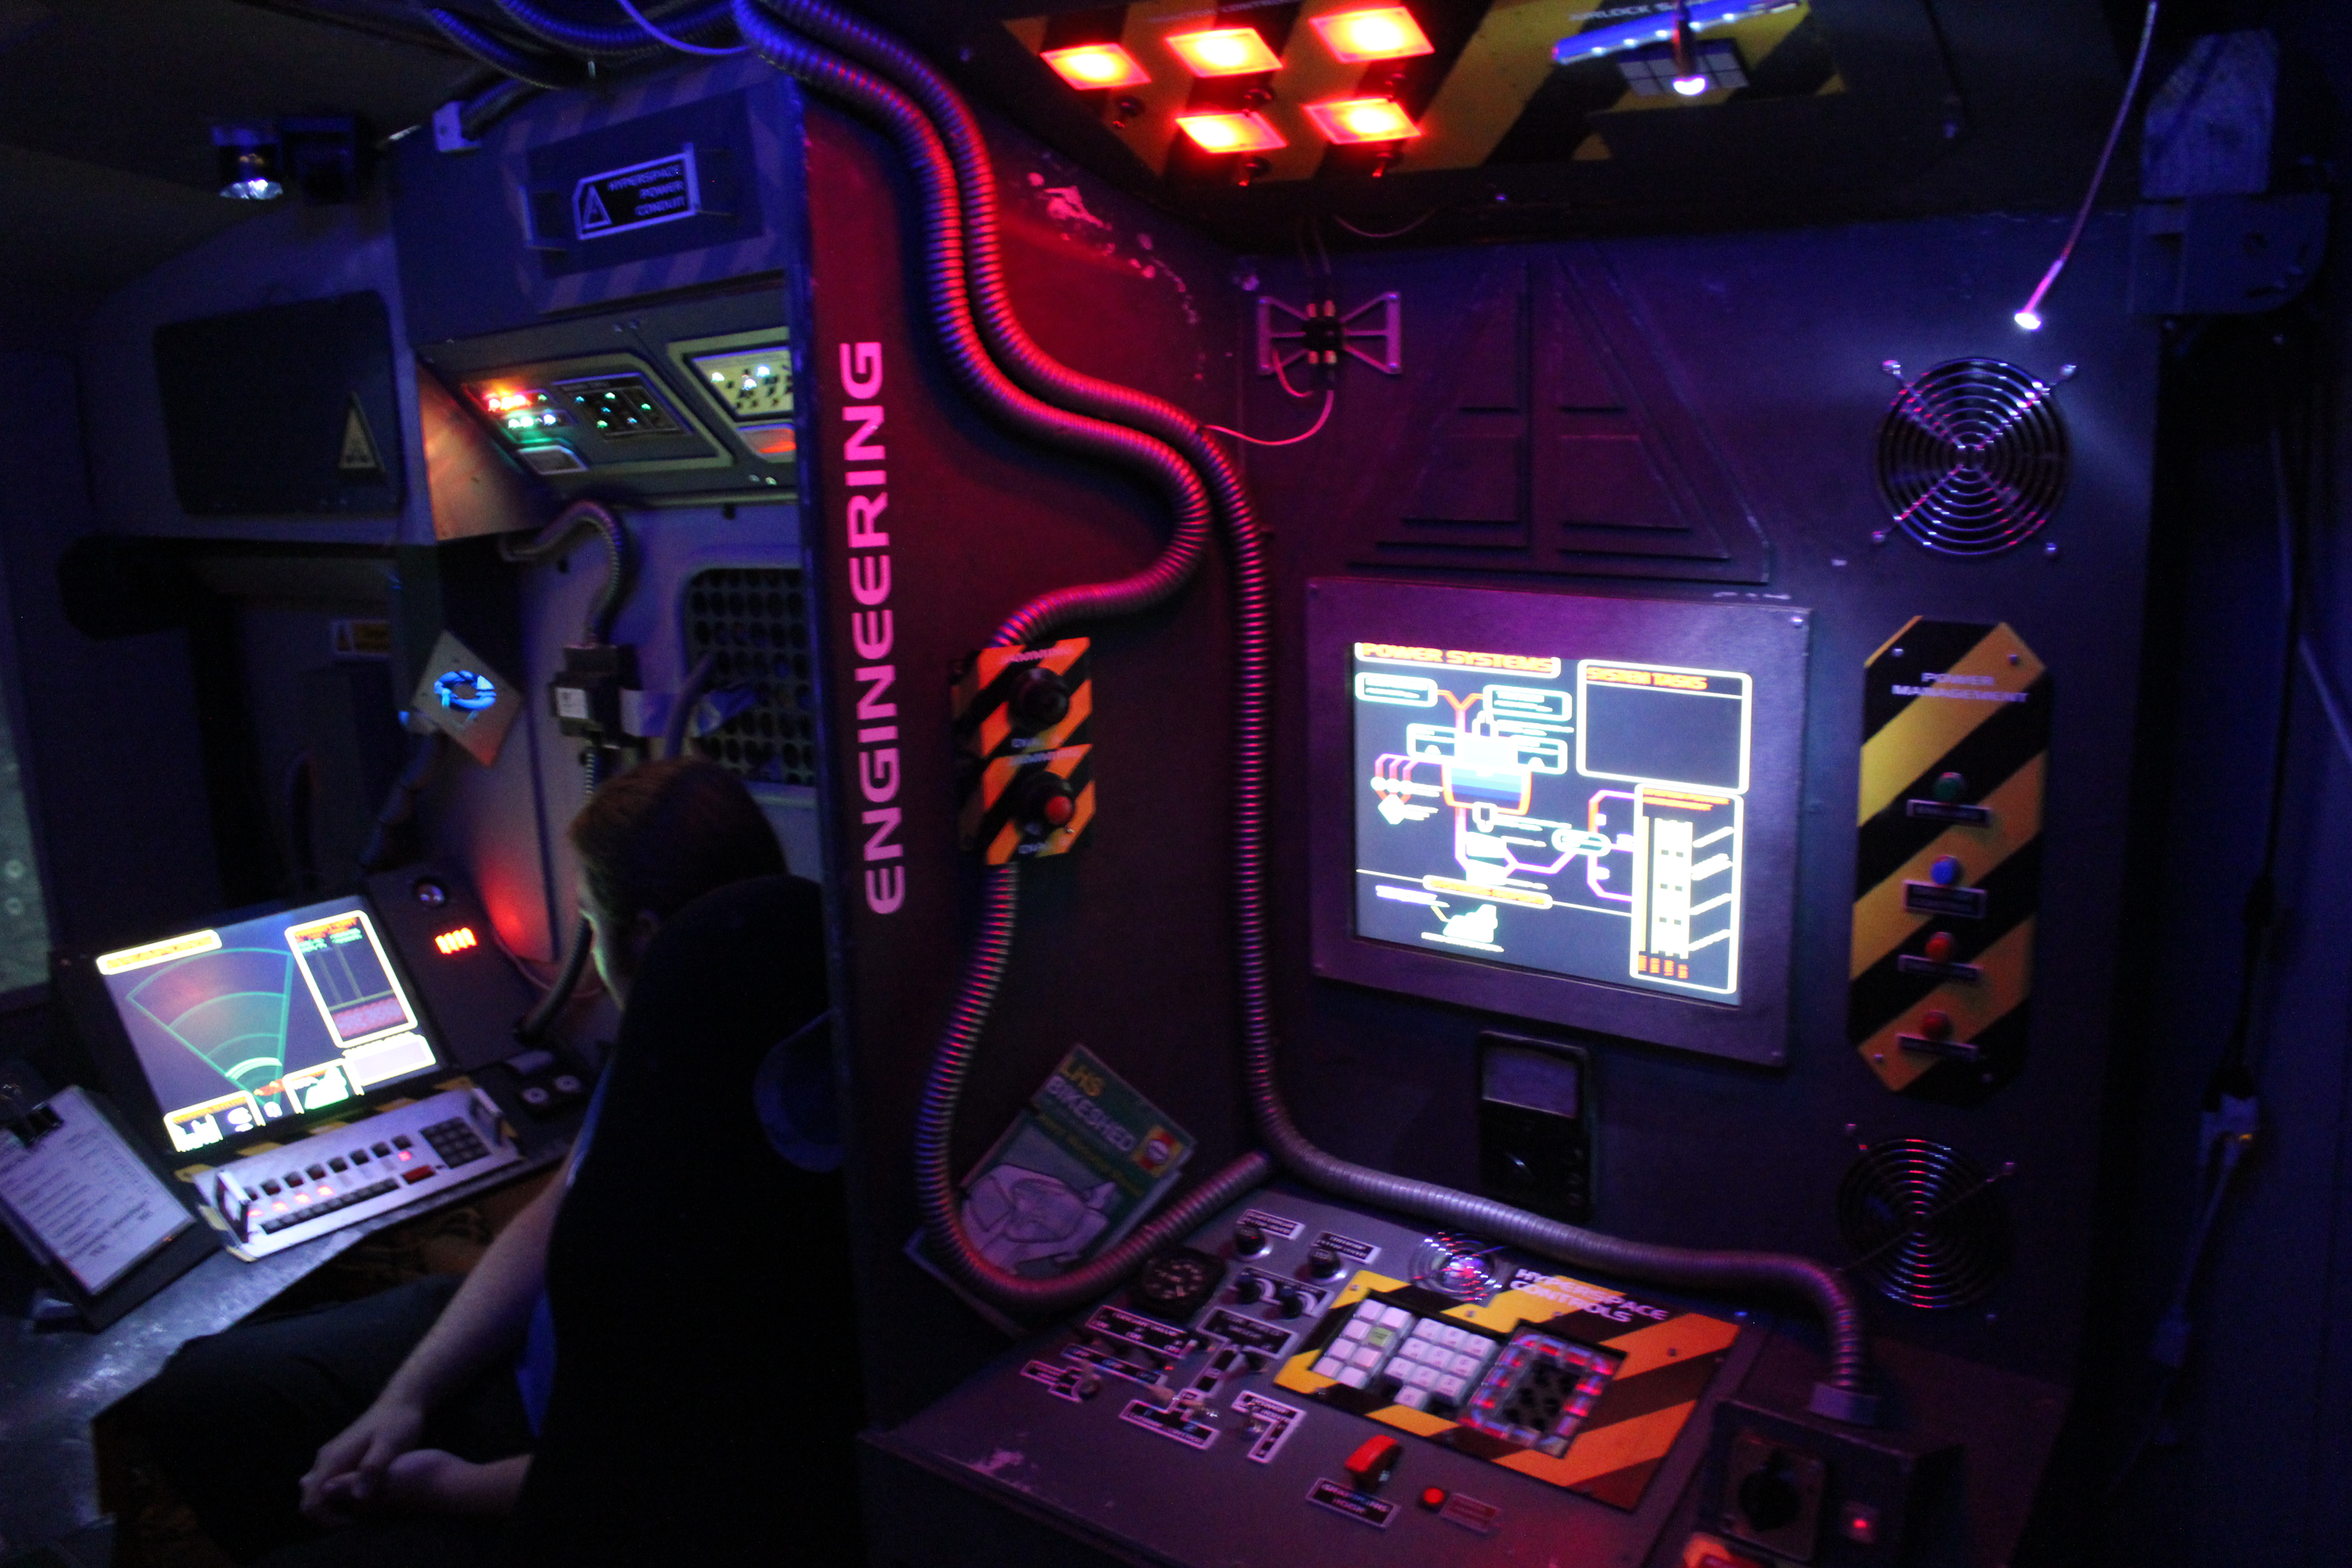
The cockpit consisted of three seats: one for a pilot, one for a tactical officer, and one an engineer. Countless amounts of computer monitors, joysticks, switches, and a wide variety of arcade-like buttons line the walls inside. The main radar screen was modeled off of the 1984 space trading video game named Elite, which has been a game geared toward virtual reality from its early beginnings.
The difference here is that the caravan acts more like a ride rather than a virtual reality game. Interaction with this simulated experience is hands-on the entire way through. The whole game is run by another member of the team who controls the experience with two Android tablets in a back room, and can trigger an unidentified space creature (a friend with an inflatable tentacle arm) to attack the unsuspecting space travelers.
If any readers decide to fashion together a large-scale simulator of their own, be sure to send in photos of the progression of the project and put it up on Hackaday.io!
i’m really liking this one. A game modder who’s not even very good at programming (he keeps mentioning this) decided to make his own game out of the Super Mario Brothers (SMB) NES cartridge. He wrote the assembly (god help us all) to basically make clouds scroll across the screen and just clouds. The process shows how the graphics are contained on one chip and the code is on another. Also shown, is how to rip the chip out, re-program it with your code, and then how to shove it back in and make it work. You can see the final result by clicking here. We’d also love to see someone take a shot at this and to see what they could come up with.