Mademoiselle Pinball Table Gets Rock ‘n Roll Makeover

Once upon a time, there was a music venue/artist collective/effects pedal company that helped redefine industry in Williamsburg, Brooklyn. That place was called Death By Audio. In 2014, it suffered a death by gentrification when Vice Media bought the building that DBA had worked so hard to transform. From the ashes rose the Death By Audio Arcade, which showcases DIY pinball cabinets made by indie artists.

Their most recent creation is called A Place To Bury Strangers (APTBS). It’s built on a 1959 Gottlieb Mademoiselle table and themed around a local noise/shoegaze band of the same name that was deeply connected to Death By Audio. According to [Mark Kleeb], this table is an homage to APTBS’s whiz-bang pinball-like performance style of total sensory overload. Hardly a sense is spared when playing this table, which features strobe lights, black lights, video and audio clips of APTBS, and a fog machine. Yeah.

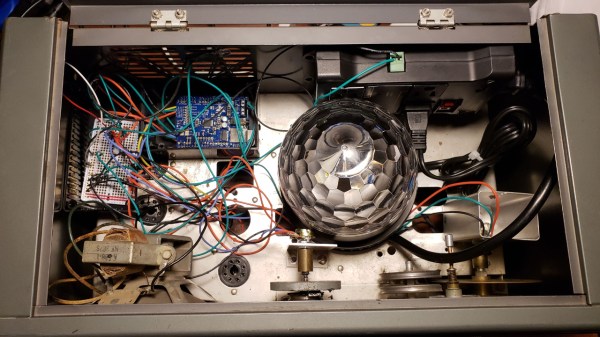
[Mark] picked up this project from a friend, who had already cut some wires and started hacking on it. Nearly every bit of the table’s guts had to be upgraded with OEM parts or else replaced entirely. Now there’s a Teensy running the bumpers, and another Teensy on the switches. An Arduino drives the NeoPixel strips that light up the playfield, and a second Uno displays the score on those sweet VFD tubes. All four micros are tied together with Python and a Raspi 3.

If you’re anywhere near NYC, you can play the glow-in-the-dark ball yourself on July 15th at Le Poisson Rouge. If not, don’t flip—just nudge that break to see her in action. Did we mention there’s a strobe light? Consider yourself warned.

Want to get into DIY pinball on a smaller scale? Build yourself a sandbox and start playing.

Continue reading “Mademoiselle Pinball Table Gets Rock ‘n Roll Makeover”

Supersize DIY R/C Servos From Windscreen Wipers

We’re all familiar with the experience of buying hobby servos. The market is awash with cheap clones which have inflated specs and poor performance. Even branded servos often fail to deliver, and sometimes you just can’t get the required torque or speed from the small form factor of the typical hobby servo.

Enter [James Bruton] and his DIY RC servo from a windscreen wiper motor. Windscreen wiper motors are cheap as chips, and a classic salvage. The motor shaft is connected to a potentiometer via a pulley and some string, providing the necessary closed-loop feedback. Instead of using the traditional analog circuitry found inside a servo, an Arduino provides the brains. This means PID control can be implemented on the ‘duino, and tuned to get the best response from different load characteristics. There’s also the choice of different interfacing options: though [James]’ Arduino code accepts PWM signals for a drop-in R/C servo replacement, the addition of a microcontroller means many other input signal types and protocols are available. In fact, we recently wrote about serial bus servos and their numerous advantages.

We particularly love this because of the price barrier of industrial servomotors; sure, this kind of solution doesn’t have the precision or torque that off-the-shelf products provide, but would be sufficient for many hacks. Incidentally, this is what inspired one of our favourite open source projects: ODrive, which focuses on harnessing the power of cheap brushless motors for industrial use.

Continue reading “Supersize DIY R/C Servos From Windscreen Wipers”

Dual Sensor Echo Locator Gives High Accuracy At Low Cost

Infrared certainly has its uses, but if you’re trying to locate objects, ultrasonic detection is far superior. It’s contact-less, undetectable to the human ear, and it isn’t affected by smoke, dust, ambient light, or Silly String.

If you have one ultrasonic sensor and a microcontroller, you can detect plenty of useful things, like the water level in a rain barrel or the distance traveled by a tablet along a rail. If you have two sensors and a microcontroller, you can pinpoint any object within a defined range using trigonometry.

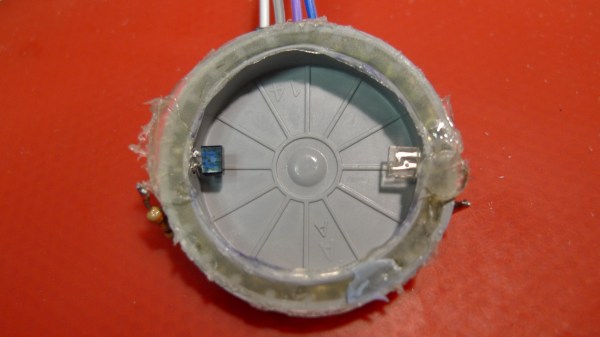
[lingib]’s dual sensor echo locator uses two HY-SRF05s, but the cheap and plentiful HC-SR04s will work, too. Both sensors are arranged for maximum beam overlap and wired up to an Arduino Uno. One sensor’s emitter is blocked with masking tape, so all it does is listen.

When the system registers the object, it shows up as a red dot on a grid inside a Processing sketch along with a bunch of details like the object’s coordinates, its distance from each sensor, and the area of the triangle formed by the two sensors and the object. [lingib] reports that the system is quite accurate and will work for much larger playgrounds than the 1 meter square in the demo after the break.

Don’t want to detect objects? Ultrasonic sensors are cheap enough to hack into other things, like this one-way data communications module.

Continue reading “Dual Sensor Echo Locator Gives High Accuracy At Low Cost”

3D Printed Arduino Bot Is Limbo Master

As if we didn’t have enough to worry about in regards to the coming robot uprising, [Ali Aslam] of Potent Printables has recently wrapped up work on a 3D printed robot that can flatten itself down to the point it can fit under doors and other tight spaces. Based on research done at UC Berkeley, this robot is built entirely from printed parts and off the shelf hardware, so anyone can have their own little slice of Skynet.

On display at East Coast RepRap Festival

The key to the design are the folding “wings” which allow the robot to raise and lower itself on command. This not only helps it navigate tight spaces, but also gives it considerable all-terrain capability when it’s riding high. Rather than wheels or tracks, the design uses six rotors which look more like propellers than something you’d expect to find on a ground vehicle. These rotors work at the extreme angles necessary when the robot has lowered itself, and allow it to “step” over obstructions when they’re vertical.

For the electronics, things are about what you’d expect. An Arduino Pro Mini combined with tiny Pololu motor controllers is enough to get the bot rolling, and a Flysky FS-X6B receiver is onboard so the whole thing can be operated with a standard RC transmitter. The design could easily be adapted for WiFi or Bluetooth control if you’d rather not use RC gear for whatever reason.

Want to build your own? All of the STL files, as well as a complete Bill of Materials, are available on the Thingiverse page. [Ali] even has a series of videos on YouTube videos walking through the design and construction of the bot to help you along. Outside of the electronics, you’ll need a handful of screws and rods to complement the 50+ printed parts. Better start warming up the printer now.

As an interesting aside, we got a chance to see this little critter first hand at the recent East Coast RepRap Festival in Maryland, along with a number of other engineering marvels.

Continue reading “3D Printed Arduino Bot Is Limbo Master”

Build Your Own Portable Arduino Soldering Iron

At this point you’ve almost certainly seen one of these low-cost portable soldering irons, perhaps best exemplified by the TS100, a pocket-sized temperature controlled iron that can be had for as little as $50 USD from the usual overseas suppliers. Whether or not you’re personally a fan of the portable irons compared to a soldering station, the fact remains that these small irons are becoming increasingly popular with hackers and makers that are operating on a budget or in a small workspace.

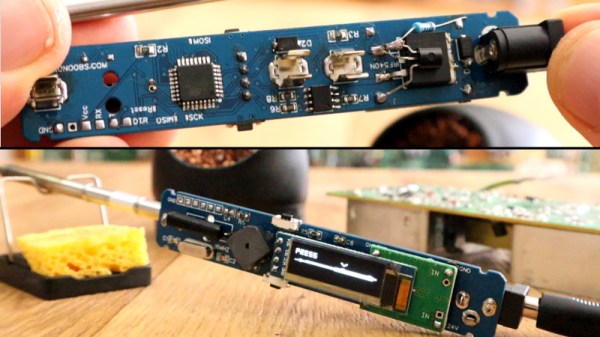
Believing that imitation is the most sincere form of flattery, [Electronoobs] has come up with a DIY portable soldering iron that the adventurous hacker can build themselves. Powered by an ATMega328p pulled out of an Arduino Nano, if offers the same software customization options of the TS100 but at a considerably lower price. Depending on where you source your components, you should be able to build one of these irons for as little as $15.

The iron features a custom PCB and MAX6675 thermocouple amplifier to measure tip temperature. A basic user interface is provided by two tactile buttons on the PCB as well as an 128×32 I2C OLED display. In a future version, [Electronoobs] says he will look into adding some kind of sensor to detect when the iron is actually being used and put it to sleep when inactive.

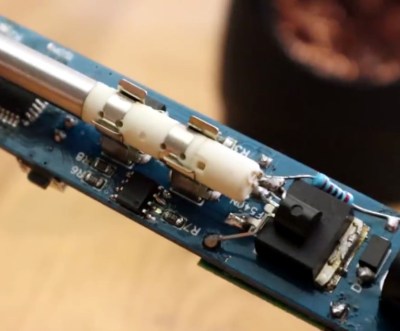
The tip is sourced from a cheap soldering station replacement iron, and according to [Electronoobs], is probably the weakest element of the entire build. He’s looking into using replacement TS100 tips, but says he’ll need to redesign his electronics to make it compatible. The case is a simple 3D printed affair, which looks solid enough, but seems likely to be streamlined in later versions.

We’ve seen a number of attempts at DIY soldering irons over the years, but we have to say, this one is probably the most professional we’ve ever seen. It will be interesting to see how future revisions improve on this already strong initial showing.

Continue reading “Build Your Own Portable Arduino Soldering Iron”

A Unique Microphone Preamp

We live in a world in which nearly any kind of gadget or tool you can imagine is just a few clicks away. In many respects, this has helped fuel the maker culture over the last decade or so; now that people aren’t limited to the hardware that’s available locally, they’re able to create bigger and better things than ever before. But it can also have a detrimental effect. One has to question, for instance, why they should go through the trouble of building something themselves when they could buy it, often for less than the cost of the individual components.

The critic could argue that many of the projects that grace the pages of Hackaday could be supplanted with commercially available counterparts. We don’t deny it. But the difference between buying a turn-key product and building an alternative yourself is that you can make it exactly how you want it. That is precisely why [Sam Izdat] created this truly one of a kind microphone preamplifier. Could he have bought one online for cheaper? Probably. Could he have saved himself an immense amount of time and effort? Undoubtedly. Do we care? Not in the slightest.

The amplifier is based on the Texas Instruments INA217 chip, with an Arduino Nano and 128×64 OLED display providing the visualization. [Sam] was able to find a bare PCB for a typical INA217 implementation on eBay for a few bucks (see what we mean?), which helped get him started and allowed him to spend more time on the software side of things. His visualization code offers a number of interesting display modes, uses Fast Hartley Transforms, and very nearly maxes out the Arduino.

But perhaps no element of this build is as unique as the case. The rationale behind the design is that [Sam] wanted to compartmentalize each section of the device (power supply, amplifier, visualization) to avoid any interference. The cylindrical shapes were an issue of practicality: the compartments were constructed by using a hole saw to make wooden discs, which were then glued together and hollowed out. The case was stained and coated with polyurethane, but due to some slightly overzealous use of glue and fillers, the coloring isn’t uniform. This gives the final piece a somewhat weathered look, in sharp contrast to the decidedly high-tech looking display.

Overall, this build reminds us of the modular 3D printed amplifier we saw earlier in the year combined with these speaker-integrated Arduino VU meters.

Continue reading “A Unique Microphone Preamp”

Driftwood Binary Clock Is No Hollow Achievement

It’s about time we had another awesome clock post around here. [Mattaw] has liked binary clocks since he was 0 and decided to make one in stunning fashion by using driftwood, nature’s drillable, fillable enclosure.

That beautiful wiring job on the RGB LEDs was done in 18g copper. To keep the LEDs aligned during soldering, he drilled a a grid of holes just deep enough to hold ’em face down. There’s an IR remote to set the time, the color, and choice of alarm file, which is currently set to modem_sound.mp3.

Under the wood, there are a pair of Arduino Nanos, an mp3 decoder board, and an RTC module. Why two Nanos, you ask? Well, the IR interrupts kept, uh, interrupting the LED timing. The remote feature was non-negotiable, so [mattaw] dedicated one Nano to receive remote commands, which it streams serially to the other. Here’s another nice touch: there’s an LDR in one of the nooks or crannies that monitors ambient light so the LEDs are never too bright. Don’t wait another second to check it out—we’ve got 10 videos of it after the break.

Believe it or not, this isn’t the first binary clock we’ve seen.  This honey of a clock uses RGB LEDs to tell the time analog style.

Continue reading “Driftwood Binary Clock Is No Hollow Achievement”