Aquarium Controller Starring Arduino Gets A Long Video Description

There’s an old saying that the cobbler’s children have no shoes. Sometimes we feel that way because we stay busy designing things for other people or for demos that we don’t have time to just build something we want. [Blue Blade Fish] wanted to build an Arduino-based aquarium controller. He’s detailed the system in (so far) 14 videos and it looks solid.

This isn’t just a simple controller, either. It is a modular design with an Arduino Mega and a lot of I/O for a serious fish tank. There are controls for heaters, fans, lights, wave makers and even top-off valves. The system can simulate moonlight at night and has an LCD display and keys. There’s also an Ethernet port and a Raspberry Pi component that creates a web interface, data storage, and configures the system. Even fail safes have been designed into the system, so you don’t boil or freeze expensive fishes. No wonder it took 14 videos!

Continue reading “Aquarium Controller Starring Arduino Gets A Long Video Description”

R/C Rocket-Beest Burns Up Fuses Out There Alone

We’re beginning to think the “S” in [Jeremy S Cook] stands for strandbeest. He’ll be the talk of the 4th of July picnic once he brings out his latest build—a weaponized, remote-controlled strandbeest that shoots bottle rockets. There are a bank of money shots up on Imgur.

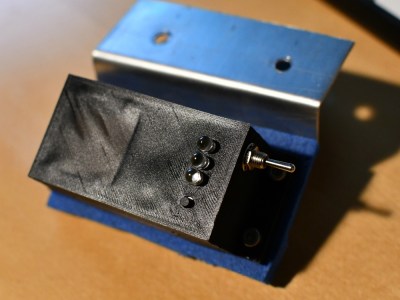
This ‘beest is the natural next step after his remote-controlled walker, which we featured a month or so ago. Like that one, the locomotion comes from a pair of micro gear motors that are controlled by an Arduino Nano over Bluetooth. The pyrotechnics begin when nitinol wire cleverly strung across two lever nuts is triggered. All the electronics are housed inside a 3D-printed box that [Jeremy] designed to sit in the middle of the legs. We love the face plate he added later in the build, because those gumdrop LED eyes are sweet.

Can you believe that this vehicle of destruction began as a pile of innocent, pasta-colored pieces of kit? We dig the camouflaged battleship paint job, ’cause it really toughens up the whole aesthetic. And really, that’s probably what you want if you’re driving around a spindly beast that can just shoot rockets whenever. Let’s light this candle after the break, shall we?

Continue reading “R/C Rocket-Beest Burns Up Fuses Out There Alone”

LoRa With The ESP32

If you are interested in deploying LoRa — the low power long-range wireless technology — you might enjoy [Rui Santos’] project and video about using the ESP32 with the Arduino IDE to implement LoRa. You can see the video below. He uses the RFM95 transceivers with a breakout board, so even if you want to use a different processor, you’ll still find a lot of good information.

In fact, the video is just background on LoRa that doesn’t change regardless of the host computer you are using. Once you have all the parts, getting it to work is fairly simple. There’s a LoRa library by [Sandeep Mistry] that knows how to do most of the work.

Although the project uses an RFM95, it can also work with similar modules such as the RFM96W or RFM98W. There are also ESP32 modules that have compatible transceivers onboard.

This is one of those projects that probably isn’t useful all by itself, but it can really help you get over that hump you always experience when you start using something new. Once you have the demo set up, it should be easy to mutate it into what you really need.

We’ve been talking about LoRa a lot lately. We’ve even seen it commanding drones.

Continue reading “LoRa With The ESP32”

Arduino And Pidgin C++

What do you program the Arduino in? C? Actually, the Arduino’s byzantine build processes uses C++. All the features you get from the normal libraries are actually C++ classes. The problem is many people write C and ignore the C++ features other than using object already made for them. Just like traders often used pidgin English as a simplified language to talk to non-English speakers, many Arduino coders use pidgin C++ to effectively code C in a C++ environment. [Bert Hubert] has a two-part post that isn’t about the Arduino in particular, but is about moving from C to a more modern C++.

Continue reading “Arduino And Pidgin C++”

TerraDome Gives Plants And Dinosaurs A New Home

Housing exotic plants or animals offer a great opportunity to get into the world of electronic automation. When temperature, light, and humidity ranges are crucial, sensors are your best friend. And if woodworking and other types of crafts are your thing on top, why not build it all from scratch. [MagicManu] did so with his Jurassic Park themed octagonal dome built from MDF and transparent polystyrene.

With the intention to house some exotic plants of his own, [MagicManu] equipped the dome with an Arduino powered control system that regulates the temperature and light, and displays the current sensor states on a LCD, including the humidity. For reasons of simplicity regarding wiring and isolation, the humidity itself is not automated for the time being. A fan salvaged from an old PC power supply provides proper ventilation, and in case the temperature inside the dome ever gets too high, a servo controlled set of doors that match the Jurassic Park theme, will automatically open up.

[MagicManu] documented the whole build process in a video, which you can watch after the break — in French only though. We’ve seen a similar DIY indoor gardening project earlier this year, and considering its simple yet practical application to learn about sensors, plus a growing interest in indoor gardening itself (pun fully intended), this certainly won’t be the last one.
Continue reading “TerraDome Gives Plants And Dinosaurs A New Home”

Your Own Sinclair Scientific Calculator

We’ve talked about the Sinclair scientific calculator before many times, and for some of us it was our first scientific calculator. If you can’t find yours or you never had one, now you can build your own using — what else — an Arduino thanks to [Arduino Enigma]. There’s a video, below and the project’s homepage on Hackaday.io describes it all perfectly:

The original chip inside the Sinclair Scientific Calculator was reverse engineered by Ken Shirriff, its 320 instruction program extracted and an online emulator written. This project ports that emulator, written in Javascript, to the Arduino Nano and interfaces it to a custom PCB. The result is an object that behaves like the original calculator, with its idiosyncrasies and problems. Calculating PI as arctan(1)*4 yields a value of 3.1440.

Special care was taken in the design of the emulator to match the execution speed of the
original calculator, which varies from acceptable to atrocious for trigonometric functions involving small angles.

Continue reading “Your Own Sinclair Scientific Calculator”

Wiping Robots And Floors: STM32duino Cleans Up

Ever find yourself with nineteen nameless robot vacuums lying around? No? Well, [Aaron Christophel] likes to live a different life, filled with zebra print robots (translated). After tearing a couple down, only ten vacuums remain — casualties are to be expected. Through their sacrifice, he found a STM32F101VBT6 processor acting as the brains for the survivors. Coincidentally, there’s a project called STM32duino designed to get those processors working with the Arduino IDE we either love or hate. [Aaron Christophel] quickly added a variant board through the project and buckled down.

Of course, he simply had to get BLINK up and running, using the back-light of the LCD screen on top of the robots. From there, the STM32 processors gave him a whole 80 GPIO pins to play with. With a considerable amount of tinkering, he had every sensor, motor, and light under his control. Considering how each of them came with a remote control, several infra-red sensors, and wheels, [Aaron Christophel] now has a small robotic fleet at his beck and call. His workshop must be immaculate by now. Maybe he’ll add a way for the vacuums to communicate with each other next. One robot gets the job done, but a whole team gets the job done in style, especially with a zebra print cleaner at the forefront.

If you want to see more of his work, he has quite a few videos on his website demonstrating the before and after of the project — just make sure to bring a translator. He even has a handy pinout for those looking to replicate his work. If you want to dive right in to STM32 programming, we have a nice article on how to get it up and debugged. Otherwise, enjoy [Aaron Christophel]’s demonstration of the eight infra-red range sensors and the custom firmware running them.