This Raspberry Pi Is A Stereo Camera And So Much More

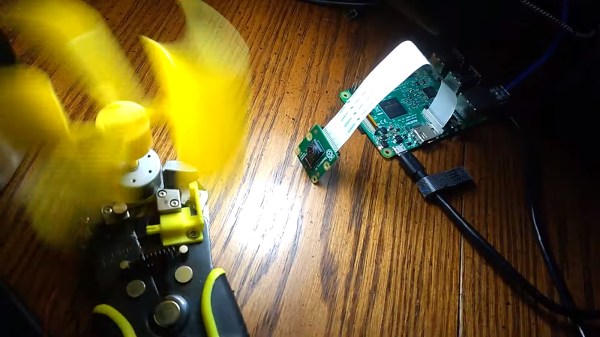
Over the years we have featured a huge array of projects featuring the Raspberry Pi, but among them there is something that has been missing in all but a few examples. The Raspberry P Compute Module is the essentials of a Pi on a form factor close to that of a SODIMM module, and it is intended as a way to embed a Pi inside a commercial product. It’s refreshing then to see [Eugene]’s StereoPi project, a PCB that accepts a Compute Module and provides interfaces for two Raspberry Pi cameras.

What makes this board a bit special is that as well as the two camera connectors at the required spacing for stereophotography it also brings out all the interfaces you’d expect on a regular Pi, so there is the familiar 40-pin expansion header as well as USB and Ethernet ports. It has a few extras such as a pin-based power connector, and an on-off switch.

Where are they going with this one? So far we’ve seen demonstrations of the rig used to create depth maps with ROS (Robot Operating System). But even more fun is seeing the 3rd-person-view rig shown in the video below. You strap on a backpack that holds the stereo camera above your head, then watch yourself through VR goggles. Essentially you become the video game. We’ve seen this demonstrated before and now it looks like it will be easy to give it a try yourself as StereoPi has announced they’re preparing to crowdfund.

So aside from the stereophotography why is this special? The answer comes in that it is as close as possible to a fresh interpretation of a Raspberry Pi board without being from the Pi Foundation themselves. The Pi processors are not available to third party manufacturers, so aside from the Odroid W (which was made in very limited numbers) we have never seen a significant alternative take on a compatible Raspberry Pi. The idea that this could be achieved through the Compute Module is one that we hope might be taken up by other designers, potentially opening a fresh avenue in the Raspberry Pi story.

The Raspberry Pi Compute Module has passed through two iterations since its launch in 2014, but probably due to the lower cost of a retail Raspberry Pi we haven’t seen it in many projects save for a few game consoles. If the advent of boards like this means we see more of it, that can be no bad thing.

Continue reading “This Raspberry Pi Is A Stereo Camera And So Much More”

Voice Controlled Camera For Journalist In Need

Before going into the journalism program at Centennial College in Toronto, [Carolyn Pioro] was a trapeze performer. Unfortunately a mishap in 2005 ended her career as an aerialist when she severed her spinal cord,  leaving her paralyzed from the shoulders down. There’s plenty of options in the realm of speech-to-text technology which enables her to write on the computer, but when she tried to find a commercial offering which would let her point and shoot a DSLR camera with her voice, she came up empty.

[Taras Slawnych] heard about [Carolyn’s] need for special camera equipment and figured he had the experience to do something about it. With an Arduino and a couple of servos to drive the pan-tilt mechanism, he came up with a small device which Carolyn can now use to control a Canon camera mounted to an arm on her wheelchair. There’s still some room for improvement (notably, the focus can’t be controlled via voice currently), but even in this early form the gadget has caught the attention of Canon’s Canadian division.

With a lavalier microphone on the operator’s shirt, simple voice commands like “right” and “left” are picked up and interpreted by the Arduino inside the device’s 3D printed case. The Arduino then moves the appropriate servo motor a set number of degrees. This doesn’t allow for particularly fine-tuned positioning, but when combined with movements of the wheelchair itself, gives the user an acceptable level of control. [Taras] says the whole setup is powered off of the electric wheelchair’s 24 VDC batteries, with a step-down converter to get it to a safe voltage for the Arduino and servos.

As we’ve seen over the years, assistive technology is one of those areas where hackers seem to have a knack for making serious contribution’s to the lives of others (and occasionally even themselves). The highly personalized nature of many physical disabilities, with specific issues and needs often unique to the individual, can make it difficult to develop devices like this commercially. But as long as hackers are willing to donate their time and knowledge to creating bespoke assistive hardware, there’s still hope.

Continue reading “Voice Controlled Camera For Journalist In Need”

Seeing Like Bees With Ultraviolet Photography

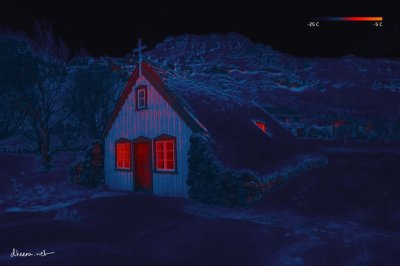
When it comes to seeing in strange spectrums, David Prutchi is the guy you want to talk to. He’s taken pictures of rocks under long, medium and short UV light, he’s added thermal imaging to consumer cameras, and he’s made cameras see polarization. There’s a lot more to the world than what the rods and cones on your retina can see, and David is one of the best at revealing it. For this year’s talk at the Hackaday Superconference, David is talking about DIY Ultraviolet Photography. It’s how bees see, and it’s the bees knees.

Continue reading “Seeing Like Bees With Ultraviolet Photography”

Arduino One Pixel Camera Sees All (Eventually)

Taking pictures in the 21st century is incredibly easy. So easy in fact that most people don’t even own a dedicated camera; from smartphones to door bells there are cameras built into nearly electronic device we own. So in this era of ubiquitous photography, you might think that a very slow and extremely low resolution camera wouldn’t be of interest. Under normal circumstances that’s probably true, but this single pixel camera built by [Tucker Shannon] is anything but normal.

Continue reading “Arduino One Pixel Camera Sees All (Eventually)”

Supercon: Alex Hornstein’s Adventures In Hacking The Lightfield

We are all familiar with the idea of a hologram, either from the monochromatic laser holographic images you’ll find on your bank card or from fictional depictions such as Princes Leia’s distress message from Star Wars. And we’ve probably read about how the laser holograms work with a split beam of coherent light recombined to fall upon a photographic plate. They require no special glasses or headsets and  possess both stereoscopic and spatial 3D rendering, in that you can view both the 3D Princess Leia and your bank’s logo or whatever is on your card as 3D objects from multiple angles. So we’re all familar with that holographic end product, but what we probably aren’t so familiar with is what they represent: the capture of a light field.

In his Hackaday Superconference talk, co-founder and CTO of holographic display startup Looking Glass Factory Alex Hornstein introduced us to the idea of the light field, and how its capture is key to  the understanding of the mechanics of a hologram.

Capturing the light field with a row of GoPro cameras.

His first point is an important one, he expands the definition of a hologram from its conventional form as one of those monochromatic laser-interference photographic images into any technology that captures a light field. This is, he concedes, a contentious barrier to overcome. To do that he first has to explain what a light field is.

When we take a 2D photograph, we capture all the rays of light that are incident upon something that is a good approximation to a single point, the lens of the camera involved. The scene before us has of course countless other rays that are incident upon other points or that are reflected from surfaces invisible from the single point position of the 2D camera. It is this complex array of light rays which makes up the light field of the image, and capturing it in its entirety is key to manipulating the result. This is true no matter the technology used to bring it to the viewer. A light field capture can be used to generate variable focus 2D images after the fact as is the case with the Lytro cameras, or it can be used to generate a hologram in the way that he describes.

One possible future use of the technology, a virtual holographic aquarium.

The point of his talk is that complex sorcery isn’t required to capture a light field, something he demonstrates in front of the audience with a volunteer and a standard webcam on a sliding rail. Multiple 2D images are taken at different points, which can be combined to form a light field. The fact that not every component of the light field has been captured doesn’t matter as much as that there is enough to create the holographic image from the point of view of the display. And since he happens to be head honcho at a holographic display company he can show us the result. Looking Glass Factory’s display panel uses a lenticular lens to combine the multiple images into a hologram, and is probably one of the most inexpensive ways to practically display this type of image.

Since the arrival of the Lytro cameras a year or two ago the concept of a light field is one that has been in the air, but has more often been surrounded by an air of proprietary marketing woo. This talk breaks through that to deliver a clear explanation of the subject, and is a fascinating watch. Alex leaves us with news of some of the first light field derived video content being put online and with some decidedly science-fiction possible futures for the technology. Even if you aren’t planning to work in this field, you will almost certainly encounter it over the next few years.

Continue reading “Supercon: Alex Hornstein’s Adventures In Hacking The Lightfield”

A 3D Printed Kinematic Camera Mount

[Enginoor] is on a quest. He wants to get into the world of 3D printing, but isn’t content to run off little toys and trinkets. If he’s going to print something, he wants it to be something practical and ideally be something he couldn’t have made quickly and easily with more traditional methods. Accordingly, he’s come out the gate with a fairly strong showing: a magnetic Maxwell kinematic coupling camera mount.

If you only recognized some of those terms, don’t feel bad. Named for its creator James Clerk Maxwell who came up with the design in 1871, the Maxwell kinematic coupling is self-orienting connection that lends itself to applications that need a positive connection while still being quick and easy to remove. Certainly that sounds like a good way to stick a camera on a tripod to us.

But the Maxwell design, which consists of three groves and matching hemispheres, is only half of the equation. It allows [enginoor] to accurately and repeatably line the camera up, but it doesn’t have any holding power of its own. That’s where the magnets come in. By designing pockets into both parts, he was able to install strong magnets in the mating faces. This gives the mount a satisfying “snap” when attaching that he trusts it enough to hold his Canon EOS 70D and lens.

[enginoor] says he could have made the holes a bit tighter for the magnets (thereby skipping the glue he’s using currently), but otherwise his first 3D printed design was a complete success. He sent this one off to Shapeways to be printed, but in the future he’s considering taking the reins himself if he can keep coming up with ideas worth committing to plastic.

Of course we’ve seen plenty of magnetic camera mounts in the past, but we really like the self-aligning aspect of this design. It definitely seems to fit the criterion for something that would otherwise have been difficult to fabricate if not for 3D printing.

ESP8266 Wi-Fi Instant Camera Is A Simple Shooter

If a camera that combines the immediate gratification of a Polaroid with cloud hosting sounds like something that tickles your fancy, look no farther than this ESP-powered point and shoot camera created by [Martin Fasani]. There’s no screen or complicated configuration on this camera; just press the button and the raw picture pops up on the online gallery. Somehow it’s simultaneously one of the most simplistic and complex implementations of the classic “instant camera” concept, and we love it.

The electronics in the camera itself, which [Martin] calls the FS2, is quite simple. At the core, it’s nothing more than the ESP board, an ArduCAM camera module, and a momentary button for the shutter. To make it portable he added a 2000 mAh Li-ion battery and an Adafruit Micro Micro USB charger. [Martin] added support for an optional 128×64 OLED display for user feedback. Everything is housed in a relatively spacious 3D printed enclosure, leaving some room for possible future hardware.

There are firmware versions for both the ESP8266 and ESP32, so fans of either generation of the popular microcontroller are invited to the party. Processing images is obviously a bit faster if you go with the more powerful 32-bit chip, but on the flip side the ESP8266 uses 3MB of SPI flash as a local buffer for the images during upload, which helps prevent lost images if there’s a problem pushing them to the cloud. The camera is intended to be as simple as possible so right now the only option other than taking still images is a time-lapse mode. [Martin] hopes to implement some additional filters and effects in the future. He’s also hoping others might lend a hand with his firmware. He’s specifically looking for assistance getting autofocus working and implementing more robust error correction for image uploads.

We’ve seen some impressive DIY camera builds using everything from a salvaged thermal sensor to film and molten aluminum. But the quaint simplicity of what [Martin] has put together here really puts his project in a whole new category.

Continue reading “ESP8266 Wi-Fi Instant Camera Is A Simple Shooter”