On February 1st, 2003 at eighteen seconds past 9:00 AM Eastern Standard Time, the Space Shuttle Columbia broke up during atmospheric entry over Texas. Still traveling at approximately Mach 18.3, the disintegration of Columbia was complete and nearly instantaneous. According to the official accident investigation, the crew had at most one minute from realizing they were in a desperate situation to complete destruction of the spacecraft. Due to the design of the Space Shuttle, no contingency plan or emergency procedure could have saved the crew at this point in the mission: all seven crew members were lost in this tragedy.
While the Space Shuttle, officially known as the Space Transportation System (STS) would fly again after the Columbia disaster, even the program’s most ardent supporters had to admit fundamental design of the Shuttle was flawed. Steps needed to be taken to ensure no future astronauts would be lost, and ultimately, the decision was made to retire the Shuttle fleet after primary construction of the International Space Station (ISS) was complete. There was simply too much invested in the ISS at this point to cancel the only spacecraft capable of helping to assemble it, so the STS had to continue despite the crushing loss of human life it had already incurred.
Between the loss of Challenger and Columbia, the STS program claimed fourteen lives in its thirty year run. Having only flown 135 missions in that time, the STS is far and away the most deadly spacecraft to ever fly. A grim record that, with any luck, is never to be broken.
The real tragedy was, like Challenger, the loss of Columbia could have been prevented. Ground Control knew that the Shuttle had sustained damage during launch, but no procedures were in place to investigate or repair damage to the spacecraft while in orbit. Changes to the standard Shuttle mission profile gave future crews a chance of survival that the men and women aboard Columbia never had.
Quantum computing (QC) is a big topic, and last time I was only able to walk you through the construction of a few logic gates, but you have to start somewhere. If you haven’t read that part, you probably should, because you’ll need to understand the simulator I’m using and some basic concepts.
I like to get right into practice, but with this topic, there’s no avoiding some theory. But don’t despair. We’ll have a little science fiction story you can try by the end of this installment, where we manage to pack two bits of information into a single physical qubit. Last time I mentioned that qubits have 1 and 0 states and I hinted that they were really |1> and |0> states. Why create new names for the two normal binary states? Turns out there is more to the story.
What’s the Vector, Victor?
In Dirac notation, |1> is a vector. So is |hackaday> and |123>. You can get into a lot of math with these, but I’m going to try to avoid most of that. This is also called ket notation (the last part of the word bracket) so you’ll hear people say “one ket” or “hackaday ket.” Either way, the vector can represent one or more qubits and there are several ways to represent them.
We recently looked at the origins of the integrated circuit (IC) and the calculator, which was the IC’s first killer app, but a surprise twist is that the calculator played a big part in the invention of the next world-changing marvel, the microprocessor.
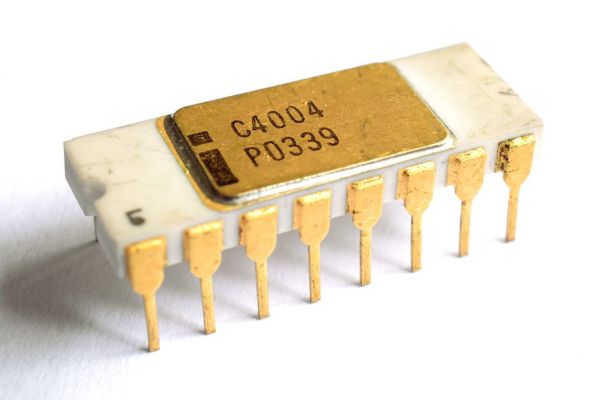
There is some dispute as to which company invented the microprocessor, and we’ll talk about that further down. But who invented the first commercially available microprocessor? That honor goes to Intel for the 4004.
Path To The 4004
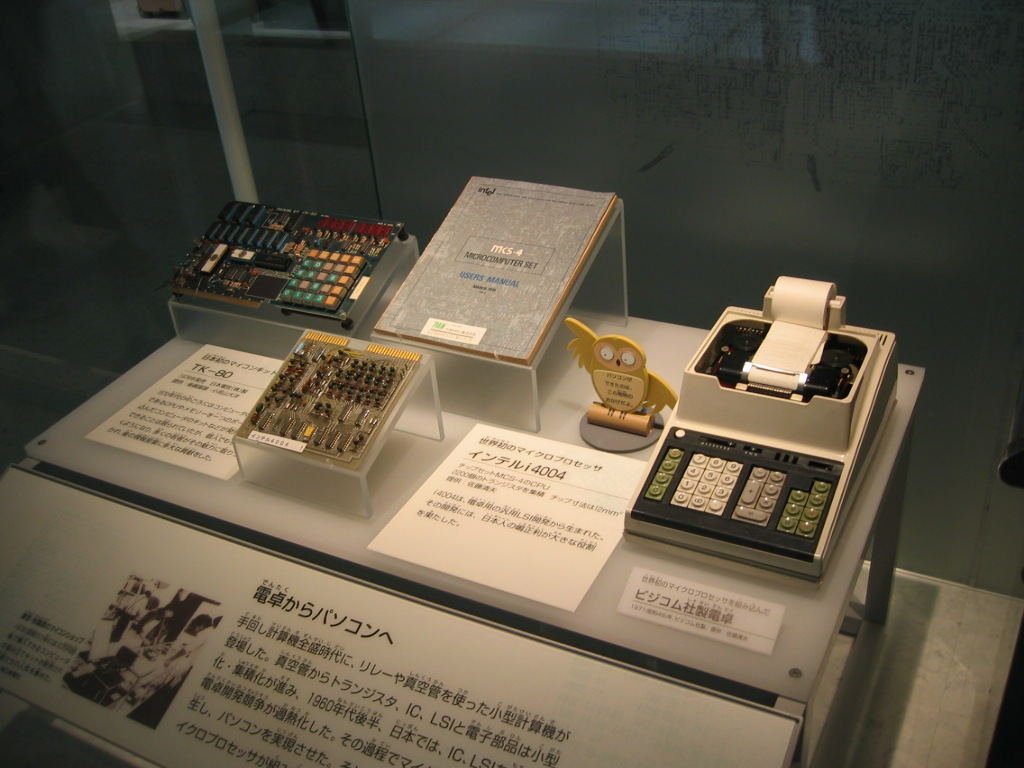
Busicom calculator motherboard based on 4004 (center) and the calculator (right)
We pick up the tale with Robert Noyce, who had co-invented the IC while at Fairchild Semiconductor. In July 1968 he left Fairchild to co-found Intel for the purpose of manufacturing semiconductor memory chips.
While Intel was still a new startup living off of their initial $3 million in financing, and before they had a semiconductor memory product, as many start-ups do to survive they took on custom work. In April 1969, Japanese company Busicom hired them to do LSI (Large-Scale Integration) work for a family of calculators.
Busicom’s design, consisting of twelve interlinked chips, was considered a complicated one. For example, it included shift-register memory, a serial type of memory which complicates the control logic. It also used Binary Coded Decimal (BCD) arithmetic. Marcian Edward Hoff Jr — known as “Ted”, head of the Intel’s Application Research Department, felt that the design was even more complicated than a general purpose computer like the PDP-8, which had a fairly simple architecture. He felt they may not be able to meet the cost targets and so Noyce gave Hoff the go-ahead to look for ways to simplify it.
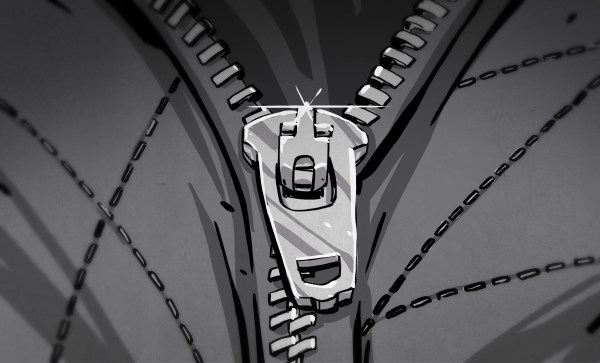
Look around yourself right now and chances are pretty good that you’ll quickly lay eyes on a zipper. Zippers are incredibly commonplace artifacts, a commodity item produced by the mile that we rarely give a second thought to until they break or get stuck. But zippers are a fairly modern convenience, and the story of their invention is one that shows even the best ideas can be delayed by overly complicated designs and lack of a practical method for manufacturing.
Try and Try Again
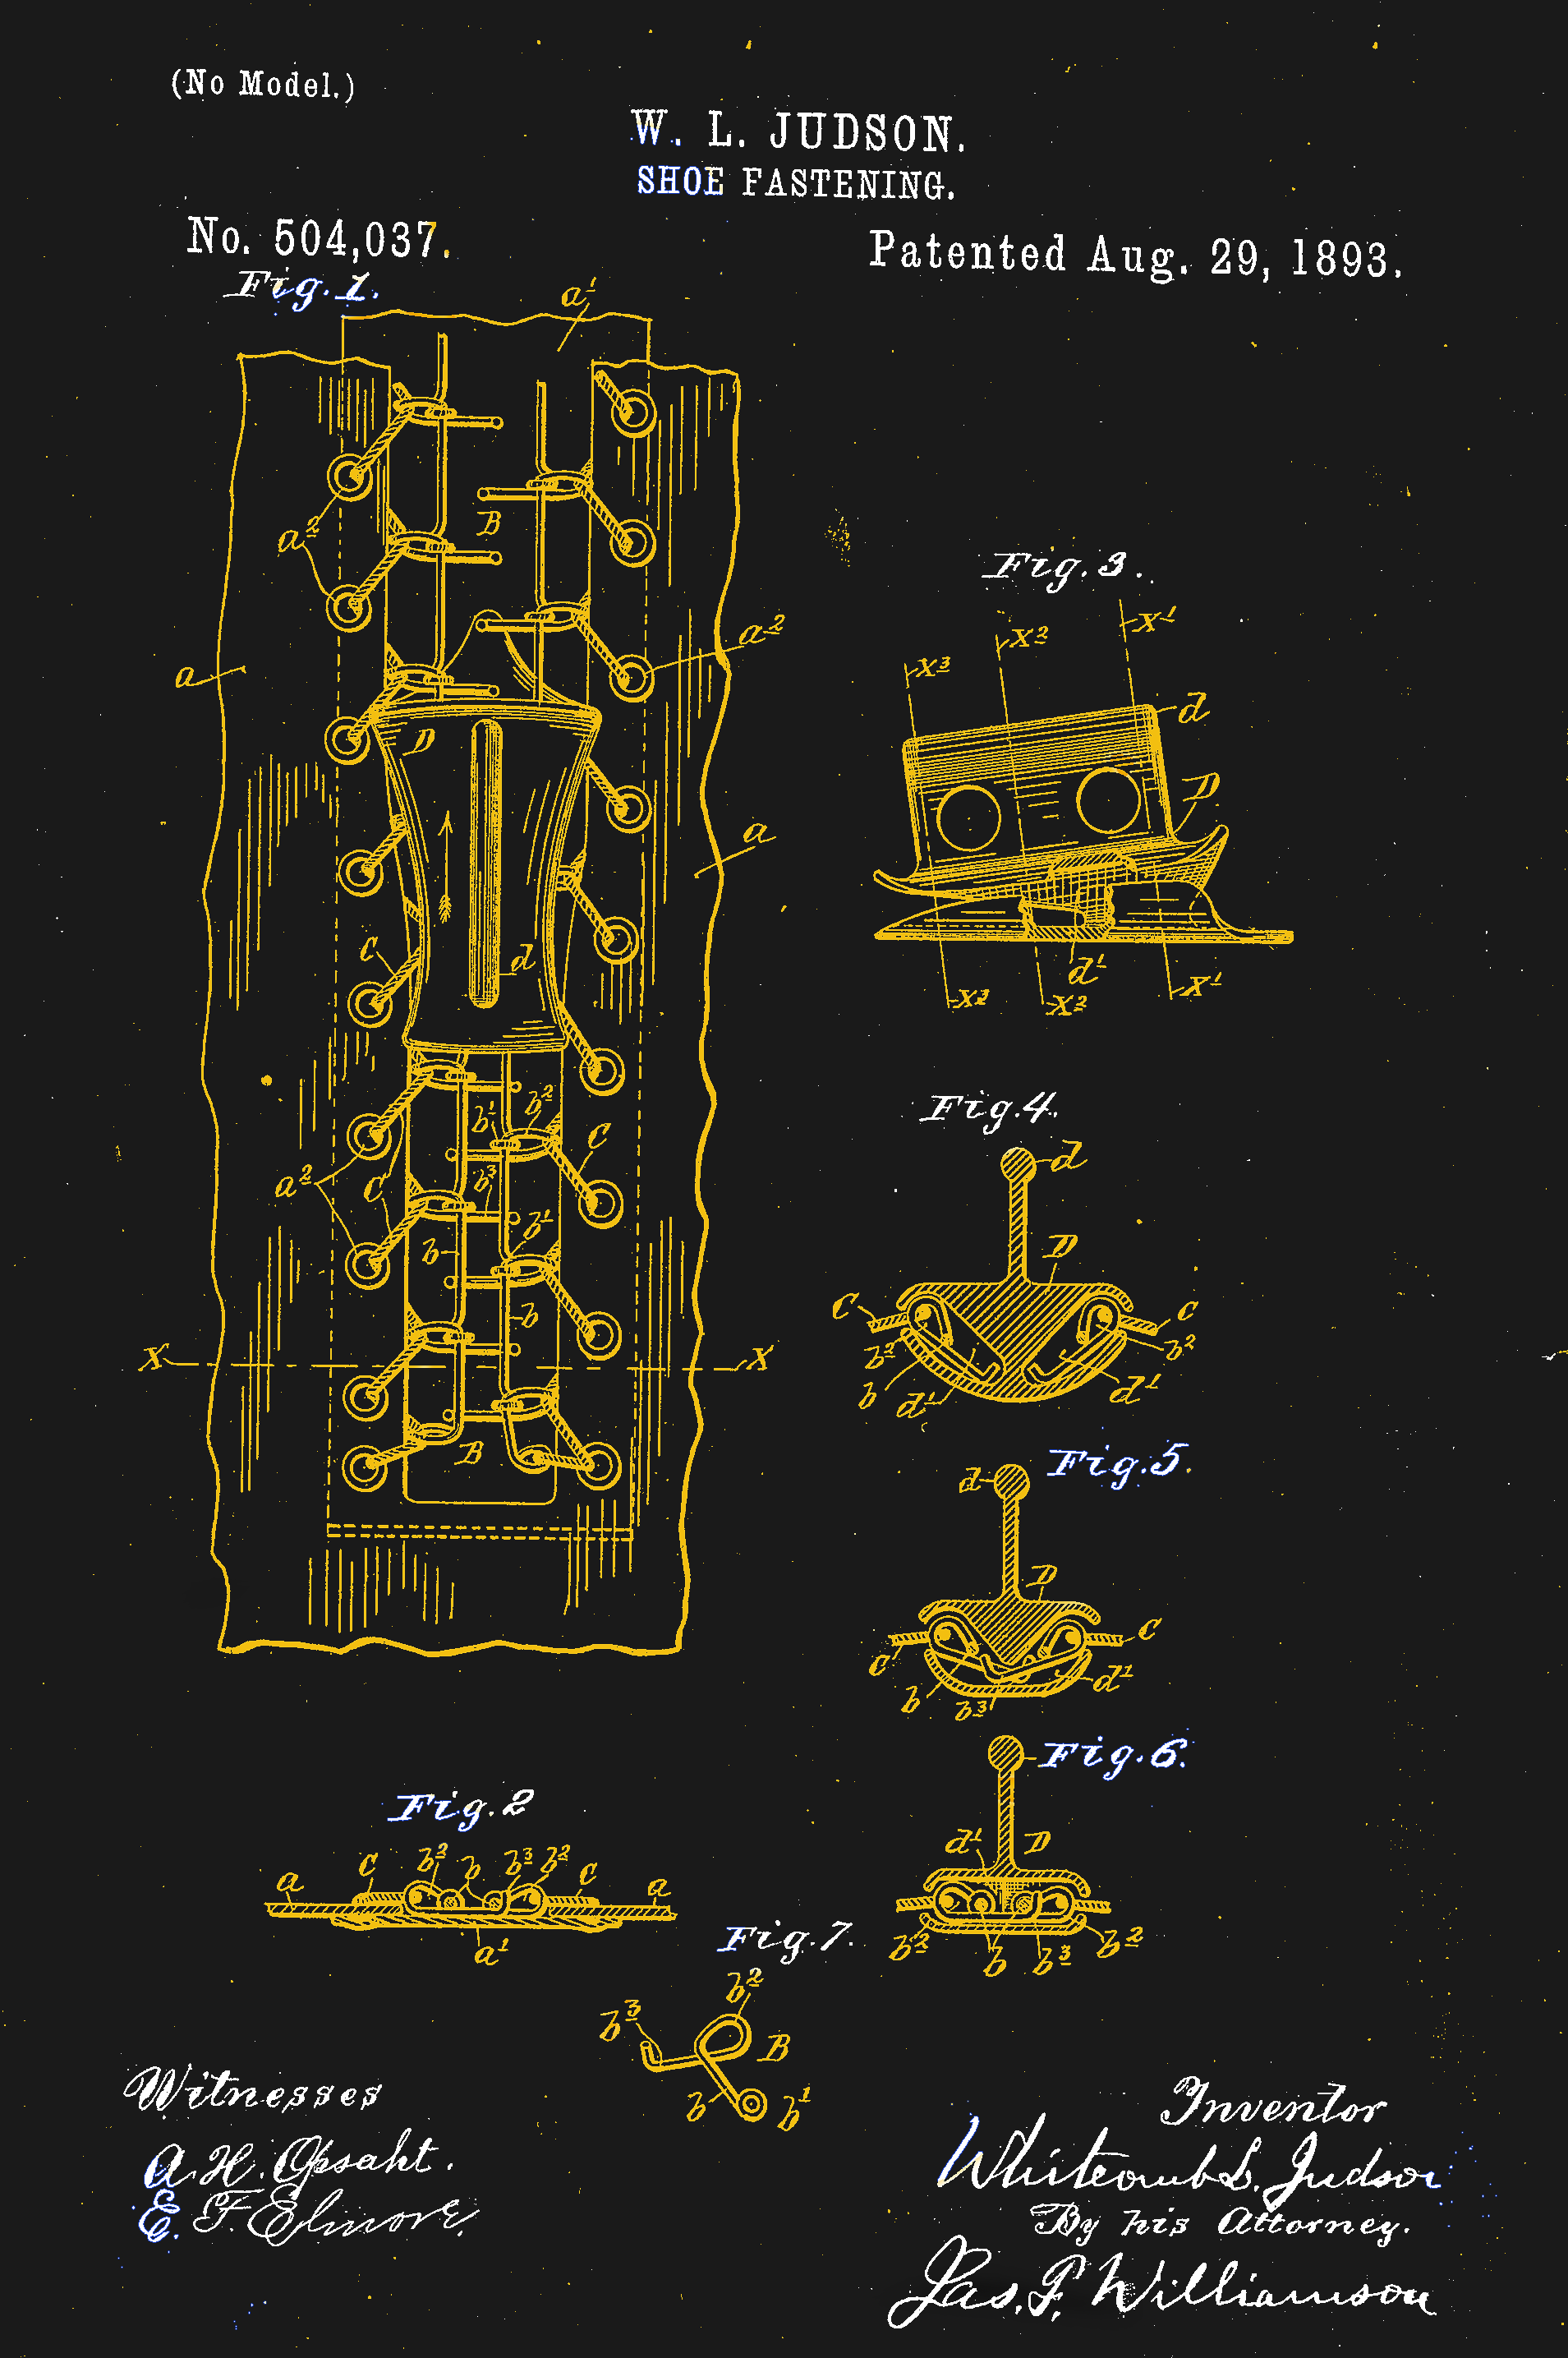
US Patent #504,307. One of the many iterations of Judson’s design. Like the others, it didn’t work.
Ideas for fasteners to replace buttons and laces have been kicking around since the mid-19th century. The first patent for a zipper-like fastener was issued to Elias Howe, inventor of the sewing machine. Though he was no slouch at engineering intricate mechanisms, Howe was never able to make his “Automatic, Continuous Clothing Closure” a workable product, and Howe shifted his inventive energies to other projects.
The world would wait another forty years for further development of a hookless fastener, when a Chicago-born inventor of little prior success named Whitcomb Judson began work on a “Clasp Locker or Unlocker.” Intended for the shoe and boot market, Judson’s device has all the recognizable parts of a modern zipper — rows of interlocking teeth with a slide mechanism to mesh and unmesh the two sides. The device was debuted at the Chicago World’s Fair in 1893 and was met with almost no commercial interest.
Judson went through several iterations of designs for his clasp locker, looking for the right combination of ideas that would result in a workable fastener that was easy enough to manufacture profitably. He lined up backers, formed a company, and marketed various versions of his improved products. But everything he tried seemed to have one or more serious drawbacks. When his fasteners were used in shoes, unexpected failure was a mere inconvenience. If a fastener on a lady’s dress opened unexpectedly, it could have been a social catastrophe. Coupled with a price tag that was exorbitantly high to cover the manual labor needed to assemble them, almost every version of Judson’s invention flopped.
It would take another decade, a change of company name, a cross-country move, and the hiring of a bright young engineer before the world would have what we would recognize as the first modern zipper. Judson hired Gideon Sundback in 1901, and by 1913 he was head designer at the Fastener Manufacturing and Machine Company, newly relocated to Meadville, Pennsylvania after a stop in Hoboken, New Jersey. Sundback’s design called for rows of identical teeth with cups on the underside and nibs on the upper, set on fabric tapes. A slide with a Y-shaped channel bent the tapes to open the gap between teeth, allowing the cups to nest on the nibs and mesh the teeth together strongly.
Sundback’s design had significant advantages over any of Judson’s attempts. First, it worked, and it was reliable enough to start quickly making inroads into fashionable apparel beyond its initial marketing toward more utilitarian products like tobacco pouches. Secondly, and perhaps more importantly, Sundback invented machinery that could make hundreds of feet of the fasteners in a day. This gave the invention an economy of scale that none of Judson’s fasteners could ever have achieved.
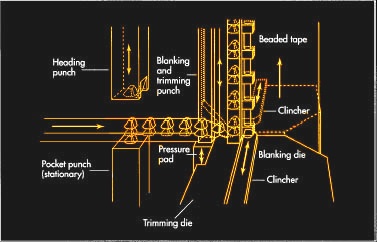
The machinery that Sundback invented to make his “Separable Fastener” has been much improved since the early 1900s, but the current process still looks similar, at least for metal zippers. Stringers, which are the fabric tapes with teeth attached, are formed in a continuous process by a multi-step punching and crimping machine. For metal stringers, a coil of flat metal is fed into a punch and die to form hollow scoops. The strip is then punched again to form a Y-shape around the scoop and cut it free from the web. The legs of the Y straddle the edge of the fabric tape, and a set of dies then crimps the legs to the tape. A modern zipper machine can make stringers at a rate of 2000 teeth per minute.
Plastic zippers are common these days, too, and manufacturing methods vary by zipper style. One method has the fabric tapes squeezed between the halves of a die while teeth are injection molded around the tape to form two parallel stringers. A sprue connected the stringers by the teeth breaks free after molding, and the completed stringers are assembled later.
Zippers have come a long way since Sundback’s first successful design, with manufacturing improvements that have eliminated many of the manual operations once required. Specialized zippers have made it from the depths of the oceans to the surface of the Moon, and chances are pretty good that if we ever get to Mars, one way or another, zippers will go with us.
Sometimes you need something to be utterly, totally, irredeemably black. Not just a little bit black, not just really really really dark blue, but as black as it is possible to get. It might be to trap light in a camera or a telescope, for artistic purposes, or even to make your warplane a more difficult target for enemy missiles. Either way, we’re here to help, not to judge. So what are your options?
Well, first of all, there’s the much-lauded Vantablack. The name itself is a clue as to its origin – Vertically Aligned Nano Tube Arrays. It works by coating an object with a forest of carbon nanotubes in a complicated vacuum deposition process. When light hits the surface, some of it is absorbed by the nanotubes, and any that is reflected tends to be absorbed by neighbouring nanotubes rather than escaping the surface coating of the object.
I’ll be brutally honest. When I set out to write this post, I was going to talk about IBM’s Q Experience — the website where you can run real code on some older IBM quantum computing hardware. I am going to get to that — I promise — but that’s going to have to wait for another time. It turns out that quantum computing is mindbending and — to make matters worse — there are a lot of oversimplifications floating around that make it even harder to understand than it ought to be. Because the IBM system matches up with real hardware, it is has a lot more limitations than a simulator — think of programming a microcontroller with on debugging versus using a software emulator. You can zoom into any level of detail with the emulator but with the bare micro you can toggle a line, use a scope, and hope things don’t go too far wrong.
So before we get to the real quantum hardware, I am going to show you a simulator written by [Craig Gidney]. He wrote it and promptly got a job with Google, who took over the project. Sort of. Even if you don’t like working in a browser, [Craig’s] simulator is easy enough, you don’t need an account, and a bookmark will save your work.
It isn’t the only available simulator, but as [Craig] immodestly (but correctly) points out, his simulator is much better than IBM’s. Starting with the simulator avoids tripping on the hardware limitations. For example, IBM’s devices are not fully connected, like a CPU where only some registers can get to other registers. In addition, real devices have to deal with noise and the quantum states not lasting very long. If your algorithm is too slow, your program will collapse and invalidate your results. These aren’t issues on a simulator. You can find a list of other simulators, but I’m focusing on Quirk.
What Quantum Computing Is
As I mentioned, there is a lot of misinformation about quantum computing (QC) floating around. I think part of it revolves around the word computing. If you are old enough to remember analog computers, QC is much more like that. You build “circuits” to create results. There’s also a lot of difficult math — mostly linear algebra — that I’m going to try to avoid as much as possible. However, if you can dig into the math, it is worth your time to do so. However, just like you can design a resonant circuit without solving differential equations about inductors, I think you can do QC without some of the bigger math by just using results. We’ll see how well that holds up in practice.
There’s a lot of mysticism around coffee roasting, but in the end it couldn’t be simpler. Take a bunch of beans, heat them up evenly, and stop before they get burned. The rest is details.
And the same goes for coffee roasters. The most primitive roasting technique involves stirring the beans in a pan or wok to keep them from scorching on the bottom. This works great, but it doesn’t scale. Industrial drum roasters heat a rotating drum with ridges on the inside like a cement mixer to keep the beans in constant motion while they pass over a gas fire. Fluidized-bed roasters use a strong stream of heated air to whirl the beans around while roasting them evenly. But the bottom line is that a coffee roaster needs to agitate the beans over a controllable heat source so that they roast as evenly as possible.
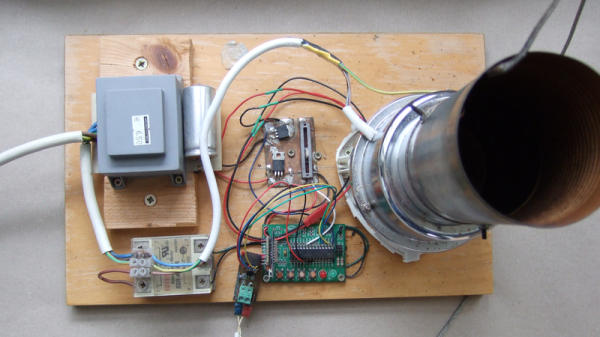
My DIY coffee roaster gave up the ghost a few days ago and I immediately ordered the essential replacement part, a hot air popcorn popper, to avert a true crisis: no coffee! While I was rebuilding, I thought I’d take some pictures and share what I know about the subject. So if you’re interested in roasting coffee, making a popcorn popper into a roaster, or even just taking an inside look at a thoroughly value-engineered kitchen machine, read on!