This excellent content from the Hackaday writing crew highlights recurring topics and popular series like Linux-Fu, 3D-Printering, Hackaday Links, This Week in Security, Inputs of Interest, Profiles in Science, Retrotechtacular, Ask Hackaday, Teardowns, Reviews, and many more.
It’s the Hack ‘O Lantern edition! First up, Slic3r is about to get awesome. Second, Halloween is just around the corner, and that means a few Hackaday-branded pumpkins are already carved. Here’s a few of them, from [Mike] and [yeltrow]:
[Mike]’s Hack ‘O Lantern
[yeltrow]’s Hack ‘O Lantern
The latest edition of PoC||GTFO has been released. Holds Stones From The Ivory Tower, But Only As Ballast (PDF and steganography warning). This edition has a reverse engineering of Atari’s Star Raiders, [Micah Elisabeth Scott]’s recent efforts on USB glitching and Wacom tablets, info on the LoRa PHY, and other good stuff. Thanks go to Pastor Manul Laphroaig.
Oh cool, we can be outraged about something. The Freetronics Experimenters Kit is a neat little Arduino-based ‘Getting Started In Microcontrollers’ kit. This kit was sold by Jaycar. Recently, Jaycar ripped off the kit and sold it under the Duiniotech name. The box was copied, the instruction manual was copied, and there’s a lot of IP being violated here. Can Freetronix do anything? Legally, yes, but it’s not worth it.
Pobody’s Nerfect in Australia so here’s a 3D printed didgeridoo. What’s a didgeridoo? It’s an ancient instrument only slightly less annoying than bagpipes. It’s just a tube, really, and easily manufactured on any 3D printer. The real trick is the technique that requires circular breathing. That’s a little harder to master than throwing some Gcode at a printer.
[Chris Downing] is the master of mashed up, condensed, and handheld game consoles. His latest is another N64 portable, and it’s a masterpiece. It incorporates full multiplayer capability, uses an HDMI connector for charging and to connect the external breakout box/battery, and has RCA output for full-size TV gameplay. Of note is the breakout board for the custom N64 chip that puts pads for the memory card and a controller on a tiny board.
Hi all, and welcome to the first installment of Hackenings, our review/preview of the week in global hackerspaces. If you’d like to get the news out about upcoming events at your space, get us an e-mail before Thursday to get it published on Saturday. If you’d just like to brag, any time is fine. Drop us a line at tips@hackaday.com and put [Hackenings] in the subject to make sure that we see it.
This week we’ve got two stories of hackerspaces on the move, but they couldn’t be more different. The Burbank Makerspace has upgraded to fancier new digs, while Cairo Makerspace‘s building collapsed, and now they’re taking their show on the road with a hackerspace-in-a-van.
You don’t need any fancy tools. A CNC machine is nice. A 3D printer can help. Laser cutters are just great. However, when it comes to actually making something, none of this is exactly necessary. With a basic set of hand tools and a few simple power tools, most of which can be picked up for a pittance, many things of surprising complexity, precision, and quality can be made.
Not as pretty, but worked just the same.
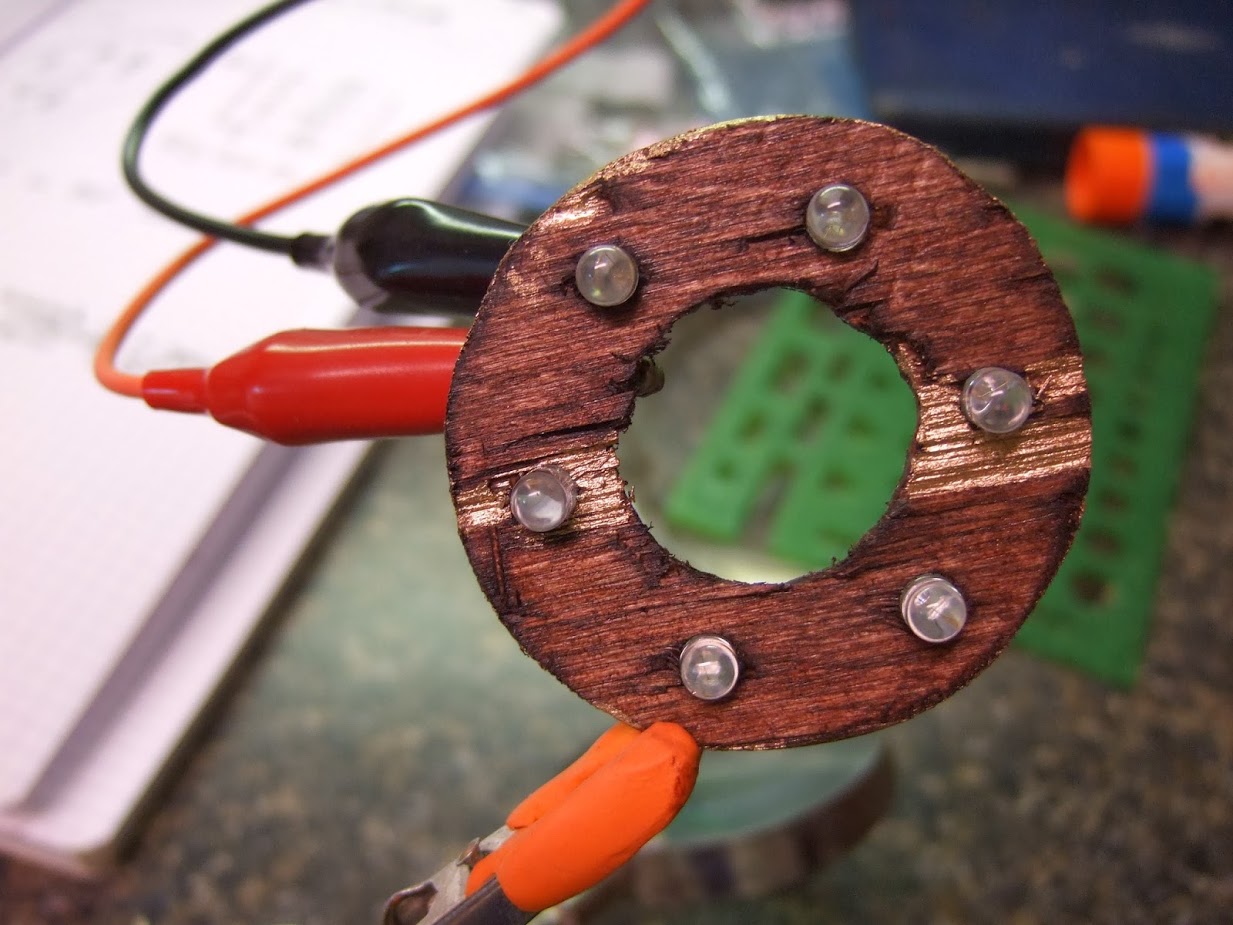
A while back I was working on a ring light for my 3D printer. I already had a collection of LEDs, as all hackers are weak for a five-dollar assortment box. So I got on my CAD software of choice and modeled out a ring that I was going to laser cut out of plywood. It would have holes for each of the LEDs. To get a file ready for laser cutting ook around ten minutes. I started to get ready to leave the house and do the ten minute drive to the hackerspace, the ten minutes firing up and using the laser cutter (assuming it wasn’t occupied) and the drive back. It suddenly occurred to me that I was being very silly. I pulled out a sheet of plywood. Drew three circles on it with a compass and subdivided the circle. Under ten minutes of work with basic layout tools, a power drill, and a coping saw and I had the part. This was versus the 40 minutes it would have taken me to fire up the laser cutter.
Looking at the ingredient list of some popular processed foods will produce a puzzled look on the typical hacker’s face. Tricalcium phosphate, thiamine mononitrate, zinc proteinate, pyridoxine hydrocloride… just who the hell comes up with these names anyway? It turns out that there is a method to the madness of chemical name structures. Some of them are well known, such as sodium chloride (NaCl) and hydrogen peroxide (H2O2). Others… not so much. In the early years of chemistry, chemical substances were named after their appearance, affects and uses. Baking soda, laughing gas and formic acid (formic is Latin for ant, and responsible for the sting in an ant bite) to name a few. As more and more chemical substances were discovered over time, a more structured naming convention was needed. Today, the above are known as sodium bicarbonate (NaHCO3), nitrous oxide (N2O) and a type of carboxylic acid (R – COOH, think of the “R” as a variable) respectively.
In today’s article, we’re going to talk about this naming structure, so that next time you admire the back of soup can, you won’t look so puzzled. We’ll also cover several common definitions that every novice biohacker should be familiar with as well.
[NightHawkInLight] wants what may be the impossible – a dirt cheap replacement for a laser cutter or a water jet. He’s got this crazy idea about using electrolysis to etch sheet steel parts, but he just can’t get the process to work. Sounds like a job for the Hackaday community.
In theory, electrolytic cutting of metal is pretty simple to understand. Anyone who lives in the northeast of the USA knows all about how road salt can cut holes in steel given enough time – say, one winter into payments on that new car. Adding a few electrons to the mix can accelerate the process of removing metal, but doing so in a controlled manner seems to be the crux of [NightHawkInLight]’s problem.
In his research into the method, he found a 2010 video by [InterestingProducts] of etching reed valves for DIY pulse jet engines from spring steel that makes it look easy. [NightHawkInLight] deviated from the reed valve process by substituting baking soda for salt to avoid the production of chlorine gas and changed up the masking technique by using different coatings. We applaud the empirical approach and hope he achieves his goal, but we tend to agree with frequent-Hackaday-tipline-project notable [AvE]’s assessment in the YouTube comments – the steel is just too darn thick. Once the etching starts, a third dimension is created at 90° to the surface and is then available to electrolyze, causing the corrosion to extend under the masking.
What does the Hackaday hive mind think? Is there any way to fix this process for thicker steel stock? Narrower traces, perhaps? Somehow modulating the current in the tank? Perhaps using the Hackaday logo would have helped? Chime in down below in the comments, and maybe we can all throw out our laser cutters.
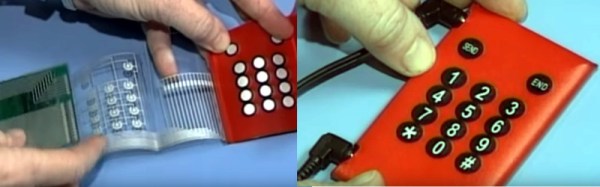
It was one of the more interesting consumer tech stories floating around at the turn of the century, a disposable cell phone manufactured using a multi-layer folded paper circuit board with tracks printed in conductive ink. Its feature set was basic even by the standards of the day in that it had no display and its only function was to make calls, but with a target price of only $10 that didn’t matter. It was the brainchild of a prolific New Jersey based inventor, and it was intended to be the first in a series of paper electronic devices using the same technology including phones with built-in credit card payment ability and a basic laptop model.
The idea of a $10 mobile phone does not seem remarkable today, it’s possible that sum might now secure you something with features far in excess of the Nokias and similar that were the order of the day at that time. But when you consider that those Nokias could have prices well into three figures without a contract, and that the new features people considered exciting were things like integrated antennas or swappable coloured plastic covers rather than the multicore processors or high-res cameras we’re used to today, a phone so cheap as to be disposable promised to be very disruptive.
The web site publicity shot for the disposable paper phone.
The product’s wonderfully dated website (Wayback Machine link, we’ve skipped the Flash intro for you) has pictures of the device, and the video below the break features shots of it in use as its inventor is interviewed. But by the end of 2002 the Wayback Machine was retrieving 404 errors from the server, and little more was heard of the product. No sign of one ever came our way; did any make it to market, and did you have one?
With the benefit of fifteen years hindsight, why did we not have paper mobile phones as part of the ephemera of the early years of the last decade? It was not a product without promise; a ten-dollar phone might have been a great success. And the description of a cheap laptop that talks to a remote server for its software sounds not unlike today’s Chromebooks.
Some of you might claim the product was vapourware, but given that they demonstrated a working prototype we’d hesitate to go that far. The likelihood is that it did not find the required combination of component price and manufacturing ease to exploit its intended market segment before its competition improved to the point that it could no longer compete. If you have ever taken apart a typical mobile phone of the period you’ll have some idea of why they were not cheap devices, for example the RF filter modules of the day were individually adjusted precision components. And paper-and-ink printed circuit boards are still a technology with a way to go even now, perhaps the idea was simply too far ahead of its time. Meanwhile within a relatively short period of time the price of simple candybar phones dropped to the point at which they would tempt the $10 buyer to spend more for a better product, so the window of opportunity had passed.
We’ve all taken apart a small toy and pulled out one of those little can motors. “With this! I can do anything!” we proclaim as we hold it aloft. Ten minutes later, after we’ve made it spin a few times, it goes into the drawer never to be seen again.
It’s all their fault
It always seems like they are in everything but getting them to function usefully in a project is a fool’s errand. What the heck are they for? Where do people learn the black magic needed to make them function? It’s easy enough to pull out the specification sheet for them. Most of them are made by or are made to imitate motors from the Mabuchi Motor Corporation of Japan. That company alone is responsible for over 1.5 billion tiny motors a year.
More than Just the Specs
In the specs, you’ll find things like running speed, voltage, stall current, and stall torque. But they offer anything but a convincing application guide, or a basic set of assumptions an engineer should make before using one. This is by no means a complete list, and a skip over the electrics nearly completely as that aspect of DC motors in unreasonably well documented.
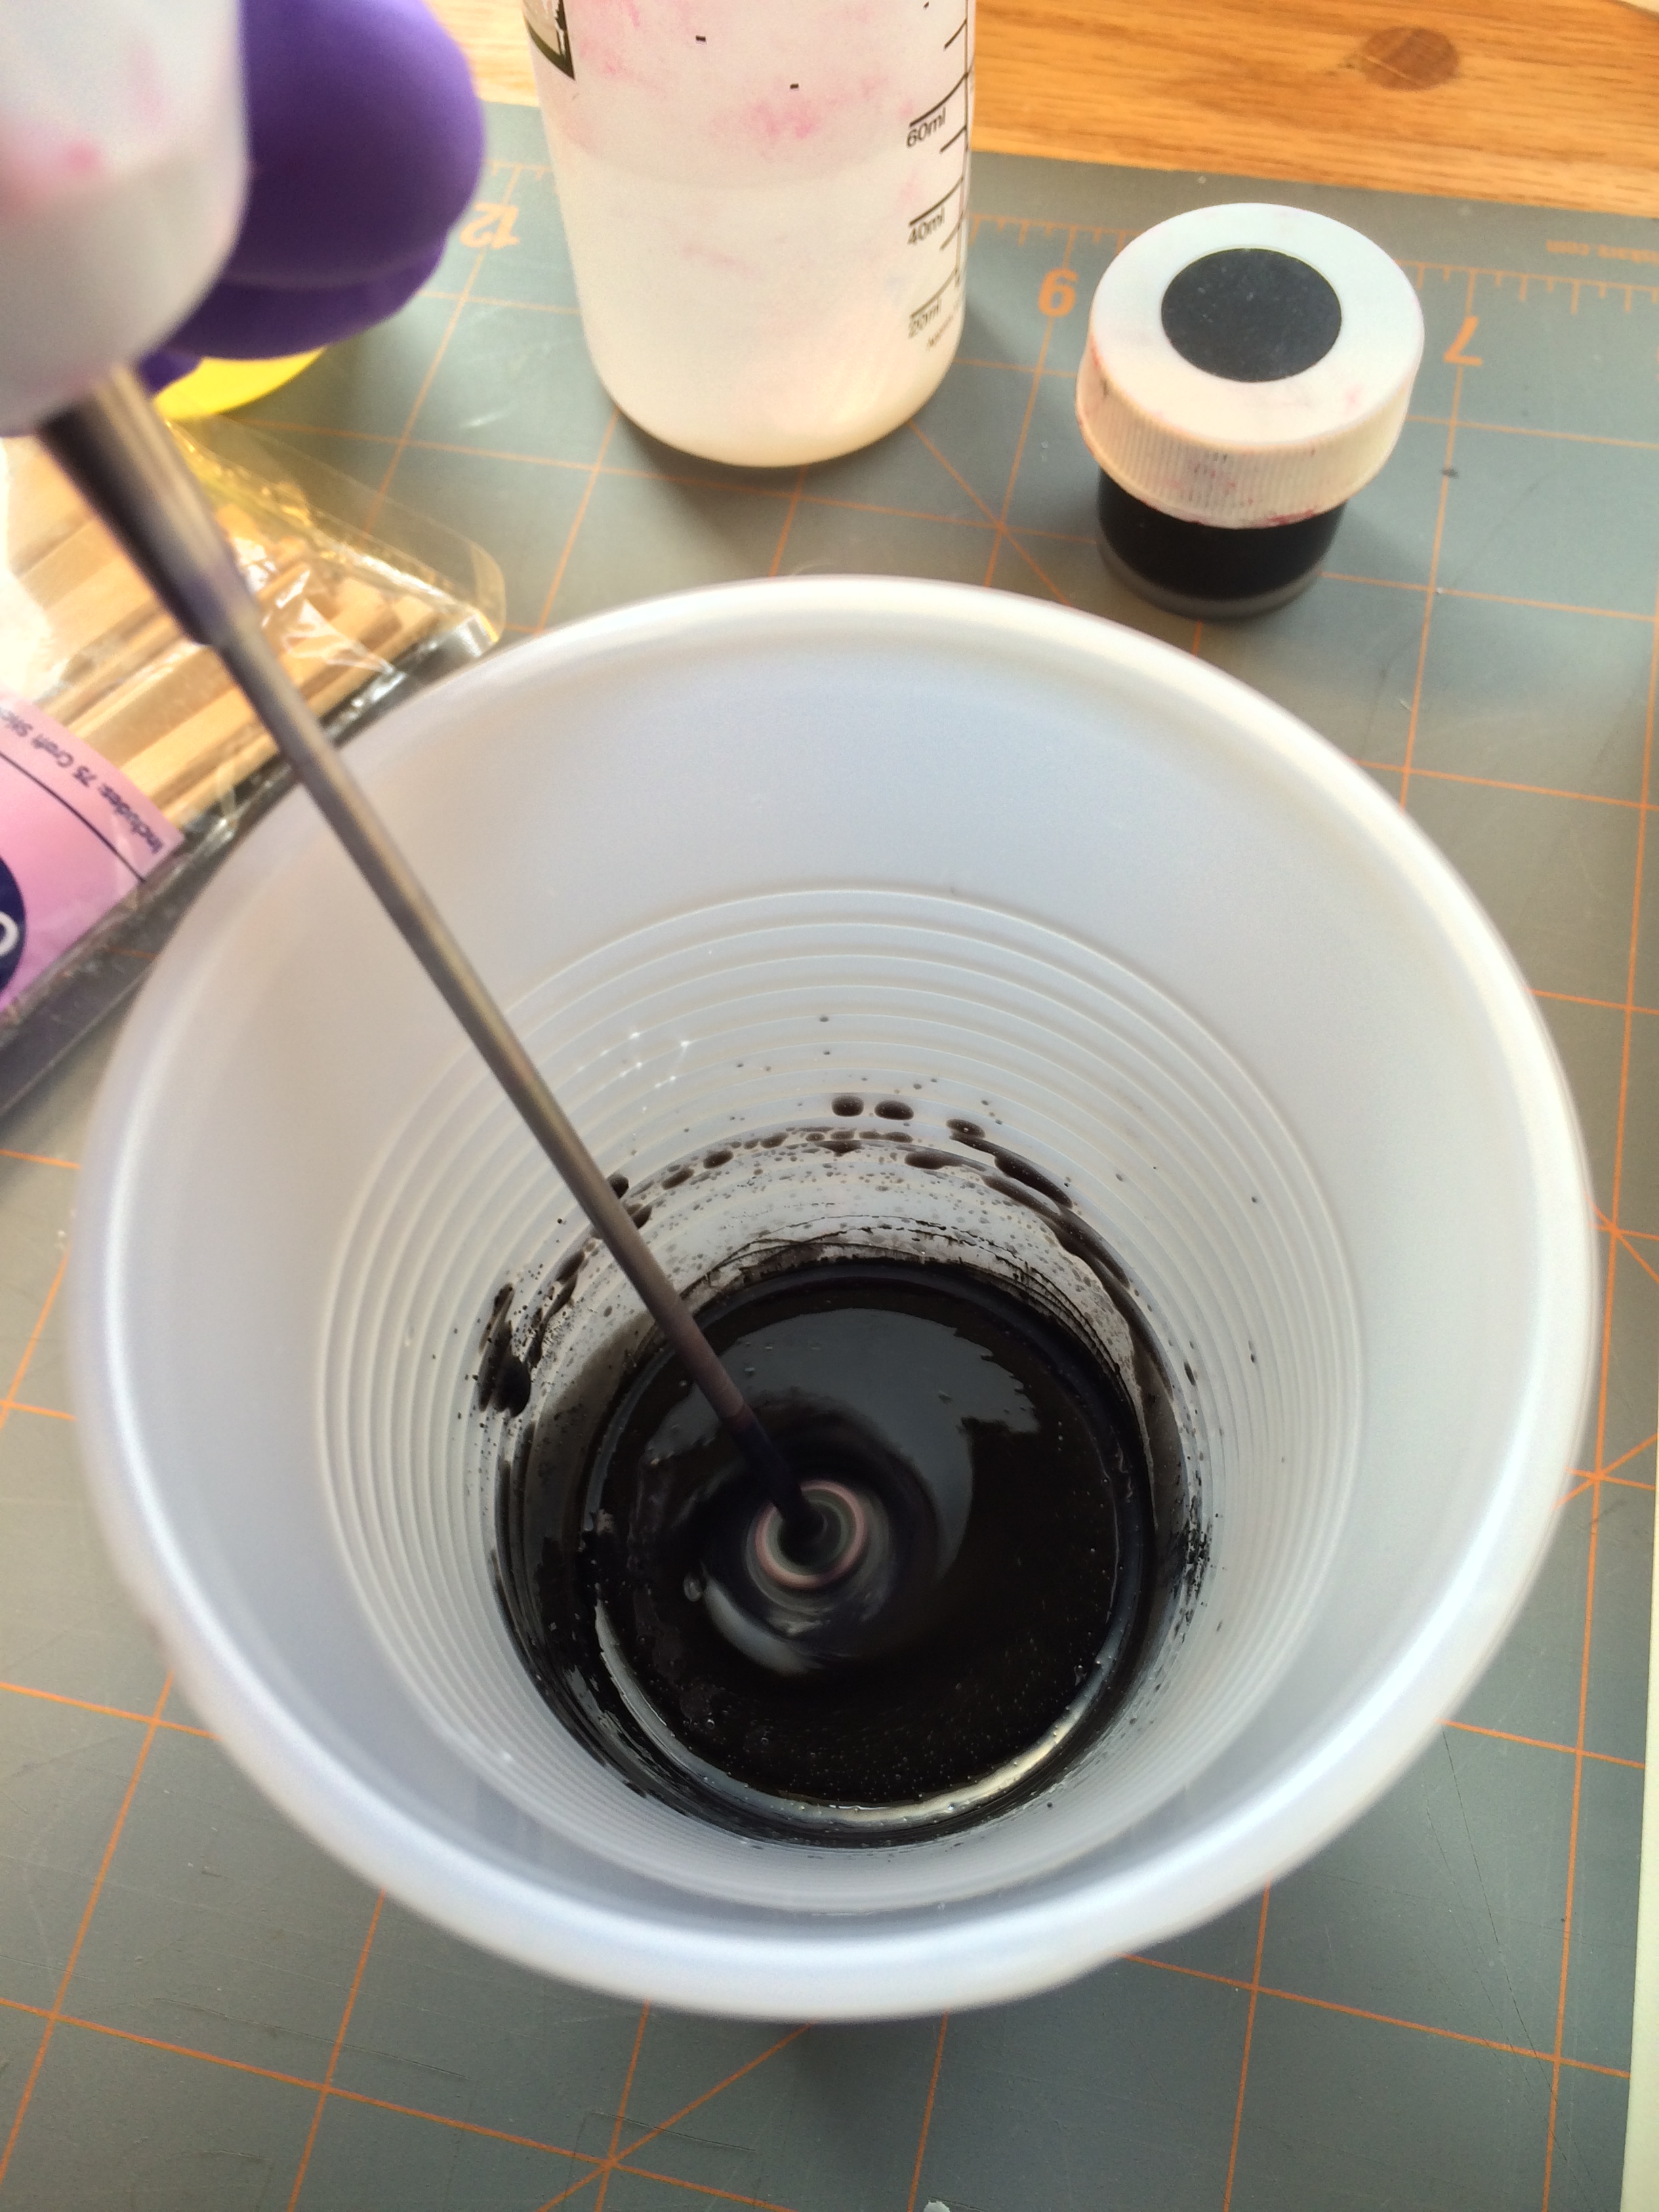
The paint mixers high running speed and infrequent use make it a decent candidate for hooking directly to the motor.
The first thing to note is that they really aren’t meant to drive anything directly. They are meant to be isolated from the actual driving by a gear train. This is for a lot of reasons. The first is that they typically spin very fast, 6,000 – 15,000 rpm is not atypical for even the tiniest motor. So even though the datasheet may throw out something impressive like it being a 3 watt motor, it’s not exactly true. Rather, it’s 3 N*m/s per 15,000 rotations per minute motor. Or a mere 1.2 milliwatt per rotation, which is an odd sort of unit that I’m just using for demonstration, but it gives you the feeling that there’s not a ton of “oomph” available. However, if you start to combine lots of rotations together using a gear train, you can start to get some real power out of it, even with the friction losses.
The only consumer items I can think of that regularly break this rule are very cheap children’s toys, which aren’t designed to last long anyway, and those powered erasers and coffee stirrers. Both of these are taking for granted that their torque needs are low and their speed needs are high, or that the motor burning out is no real loss for the world (at least in the short term).
This is because the motors derate nearly instantly. Most of these motors are hundreds of loops of very thin enameled wire wrapped around some silicon steel plates spot welded or otherwise coerced together. This means that even a small heat event of a few milliseconds could be enough to burn through the 10 micrometer thick coating insulating the coils from each other. Practically speaking, if you stall a little motor a few times in a row you might as well throw it away, because there’s no guessing what its actual performance rating is anymore. Likewise, consistently difficult start-ups, over voltage, over current, and other abuse can quickly ruin the motor. Because the energy it produces is meant to spread over lots of rotations, the motor is simply not designed (nor could it be reasonably built) to produce it all in one dramatic push.
Making Contact
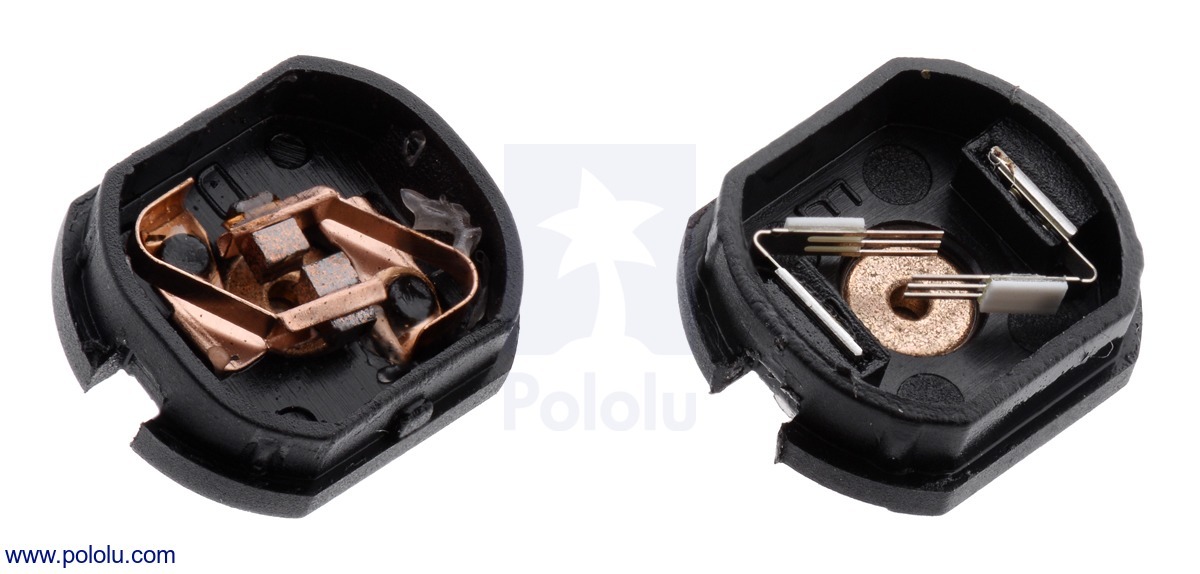
Pololu has the clearest picture of the different kind of brushes inside these small motors.
This brings me to another small note about these tiny motors. Most of them don’t have the carbon brushes one begins to expect from the more powerful motors. Mostly they have a strip of copper that’s been stamped to have a few fingers pressing against the commutator. There’s lots of pros to these metal contacts and it’s not all cost cutting, but unless you have managed to read “Electrical Contacts” by Ragnar Holm and actually understood it, they’re hard to explain. There’s all sorts of magic. For example, just forming the right kind of oxide film on the surface of the commutator is a battle all on its own.
It’s a weird trade off. You can make the motor cheaper with the metal contacts, for one. Metal contacts also have much lower friction than carbon or graphite brushes. They’re quieter, and they also transfer less current, which may seem like a bad thing, but if you have a stalled motor with hairlike strands transferring the pixies around the last thing you’d want to do is transfer as much current as possible through them. However, a paper thin sheet of copper is not going to last very long either.
So it comes down to this, at least as I understand it: if bursts of very fast, low energy, high efficiency motion is all that’s required of the motor over its operational life then the metal strip brushes are perfect. If you need to run the motor for a long stretches at a time and noise isn’t an issue then the carbon brush version will work, just don’t stall it. It will cost a little bit more.
Take Care of Your Tiny Motors
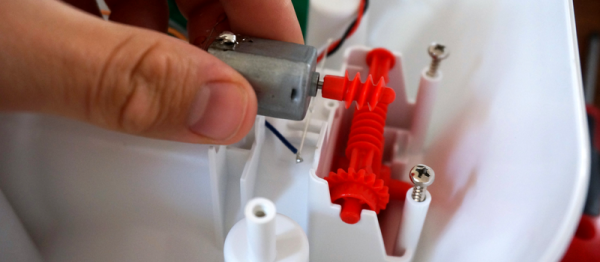
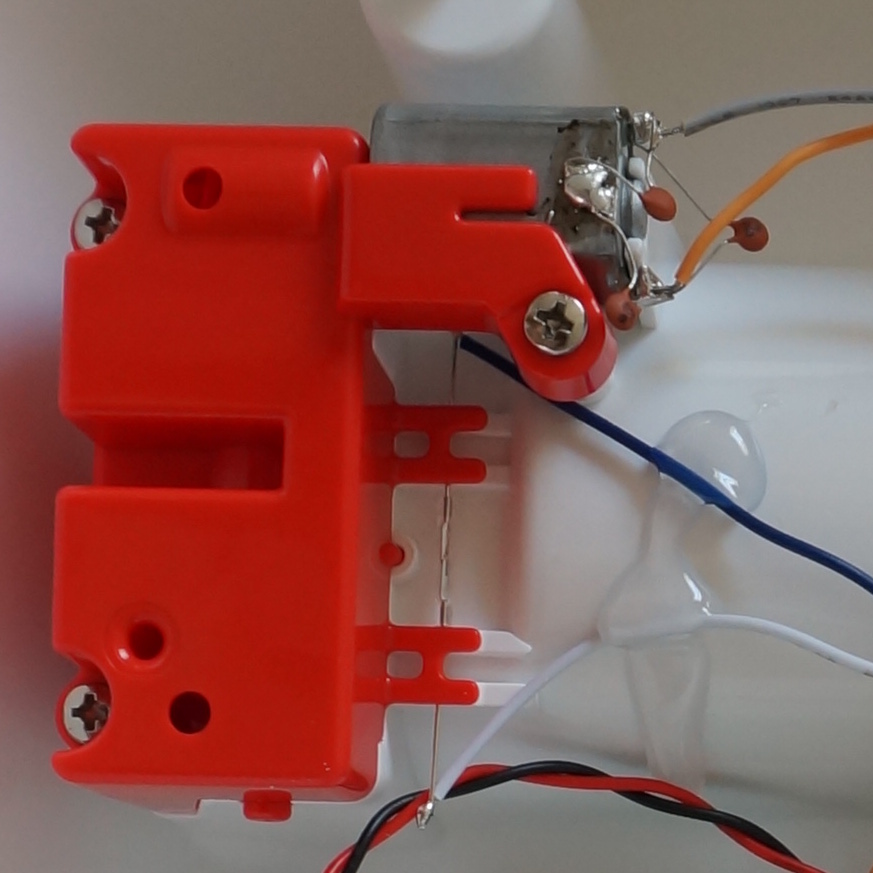
Here is one of these motors being restrained properly. Only torque on the case is restrained. The motor is otherwise free to move.
To touch one other small mechanical consideration. They are not designed to take any axial load at all, or really even any radial load either. Most of them have a plastic or aluminum bronze bushing, press-fit into a simple stamped steel body. So if you design a gearbox for one of these be sure to put as little force as possible on the bearing surfaces. If you’ve ever taken apart a small toy you’ve likely noticed that the motor can slide back and forth a bit in its mounting. This is why.
Lastly, because most of these motors are just not intended to run anywhere near their written maximum specifications it is best to assume that their specifications are a well intentioned but complete lie. Most designs work with the bottom 25% of the max number written on the spreadsheet. Running the motor anywhere near the top is usually guaranteed to brick it over time.
These are useful and ubiquitous motors, but unlike their more powerful cousins they have their own set of challenges to work with. However, considering you can buy them by the pound for cheaper than candy, there’s a good reason to get familiar with them.