Internet Of Things Opens Possibilities

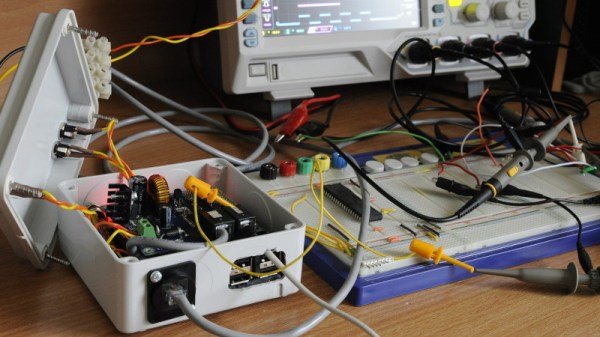
While a lot of hardware gets put on the “Internet of Things” with only marginal or questionable benefits (or with hilariously poor security), every now and then a project makes use of this new platform in a way that illustrates the strengths of IoT. [ThingEngineer] turned to this platform as a cost-effective solution for an automatic gate, since new keyfobs were too expensive and a keypad was not an option.

Using an Electric IMP, [ThingEngineer] began by installing his IoT patch into the LiftMaster gate control box. This particular gate has easily accessible points that the controller can access to determine the gate’s status, so from there, an API was written to do the heavy lifting. A web server was deployed as well, so anyone with access can use a smartphone or other device to open the gate.

For anyone else looking to deploy a similar IoT solution, [ThingEngineer] has put all of the project code, schematics, and a thorough write-up about the project on his GitHub page. There are many useful ways to get on board the Internet of Things, though; so many that it’s been possible to win a substantial prize for using it in a creative way.

Build Your Own Digital Panel Meter

A popular purchase from the usual stockists of imported electronic modules is a digital panel meter. A very small amount of money secures a module with a seven-segment display that you can stick on the front of your power supply or project for an easy readout. Even before the advent of these ultra-cheap Chinese products there have been readily available digital meters, in a line stretching back to the 1970s with chips such as the Intersil 7106.

[Marcus Taciuc] is eschewing the off-the-shelf parts, and creating his own digital panel meter. He’s using an MSP430 microprocessor as the brain of his device, and a Hitachi HD44780 compatible LCD display at the front end. The appropriate combinations of resistors and op-amps feeding the MSP’s ADC inputs allow his meter to be used to measure up to 40 VDV, and up to 10A.

He’s put up a video which we’ve included below the break, showing the use to which this meter has been put: replacing the moving-coil meter in what looks like a classic piece of Heathkit equipment. A 3D printed bracket allows the new meter to fit the circular hole of the original meter, with the LCD on the front. You might still order a prefab meter module, but you can’t deny this looks good.

Continue reading “Build Your Own Digital Panel Meter”

Is Your Wireless Charger Working?

It’s that time of year at which the Christmas lights are coming out of storage, isn’t it. Some modern seasonal rituals: untangling half a mile of fairy lights, and replacing a pile of CR2032 cells in LED candles.

[RobBest] had a solution to the latter, owning a set of nifty rechargeable LED candles that came with their own wireless charger. Sadly the charger wasn’t working quite as intended, as the indicator light to show when it had finished its cycle was always on. How could he indicate that the induction system was in operation?

His answer was to take a non-functioning candle and strip it down to expose its induction pick-up coil. He could have simply hooked it up to an LED for a quick result, but since the device in question was a candle it made sense to give it a candle effect. A PIC microcontroller was therefore pressed into service to drive the LED with its PWM output, giving a pleasing flickering effect.

You don’t have to own a set of electronic candles to have a go at wireless charging. Instead you could try a trip to IKEA.

Stepper Driver Module With Swappable Heatsinks

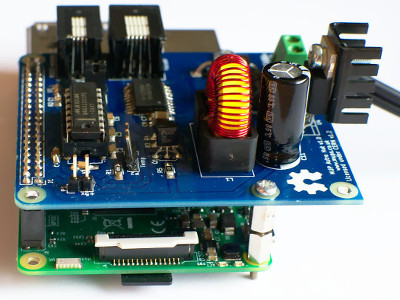
At first glance, [Dean Gouramanis]’s stepper driver module for 3D printers looks like just another RAMPS-compatible stepper board. Except, what could that gold-plated copper peg sticking out of the PCB possibly be? That would be [Dean]’s PowerPeg Thermal Management System that he built and entered in the Hackaday Prize competition for 2015, where it rocked its way into the Finals. It’s a thermal connector peg that attaches to a variety of heatsinks so you can swap in whatever sink fits the bill.

In the case of this project, [Dean] created a custom PCB that accommodates the PowerPeg connector, onto which the heat sink screws. Needless to say, he machined his own heatsinks to go with the pegs, though it looks like you could use any sink with enough surface contact that can be secured by the same #0-80 screw.

You shouldn’t be surprised that hackers obsess over heatsinks. This heatsink tester project we published helps determine which sink  to use. Another post gives all the ins and outs of ordering a custom heatsink.

Racing Simulator Built From Scrapheap Finds

Paradise means something different for everyone, it could be a sitting by a fire on a rainy night or lying on a sun-kissed beach. But for us, and makers like [liltreat4you], it’s a well stocked scrap pile out behind the house. After buying a racing wheel and pedals for his Xbox, he took a trip out to his little slice of paradise and found nearly all the hardware he needed to build a professional looking race simulator. According to his breakdown, most of the money he spent on this build ended up going into that sweet red paint job and the speed-enhancing stickers.

Everything the light touches is our kingdom.

Not all of us are as lucky as [liltreat4you], and we probably won’t just happen upon a driver’s seat out of a Mazda, or a bunch of perfectly bent metal pipes from an old trampoline out on the back forty. But trolling Craigslist or cruising around for flea markets can still get you parts like these for cheap, so try not to be too discouraged if your backyard isn’t quite as well stocked.

Once he had the metal pipes and seat from the car, the rest of the build came together pretty quickly. After building an oval out of his salvaged pipes, he attached the seat and the arms that would eventually hold the steering wheel and display. A plate was also added at the bottom for the pedals to sit on. By using long bolts, [liltreat4you] was even able to add a degree of adjustment to the wheel position. Being that he got his seat out of a real car, there’s the usual adjustment you’d expect there as well.

Speaking of which, [liltreat4you] casually mentions that you should disconnect the battery of the donor vehicle before taking out the seat, as it’s possible that the removal of the seat or the disconnection of the seat harness can cause the airbags to deploy. We can neither confirm nor deny this, but it’s probably safe advice to follow.

The purists out there may claim that what [liltreat4you] has put together doesn’t quite meet the definition of simulator in its current form. But with the addition of some instrumentation and just a bit of physical feedback, he’ll be well on his way to the complete driving experience.

Precision Voltage Reference Source

[barbouri] found a few old (vintage?) parts from the early ’80’s while rummaging through his parts bin, and quickly spun out a small PCB to build a 10.000 V reference using these old ICs. Throwing together a small number of parts, he was able to build a source which might be good enough to use as a reference for another circuit or provide a quick calibration check for some of his bench instruments that have a resolution of 1 mV or maybe even 100 μV.

The AD584* pin programmable precision voltage references have been available since the ’80’s and offer four programmable output voltages of 10.000 V, 7.500 V, 5.000 V, and 2.500 V. The chip is laser-trimmed to ensure high accuracy and low temperature coefficient and requires just a few external components to function. It is available in TO-99 hermetically sealed metal can and 8-pin DIP variants. The “S” version of the device that [barbouri] used provides a temperature coefficient of 30 ppm/°C max over a -55 °C to +125 °C temperature range but other versions of the chip offer a better stability. Analog Devices seem to have discontinued the “L” version (pdf), since it is no longer listed in the current data sheet, but you can still get them from a few sources. The “L” version has a temperature coefficient of just 5 ppm/°C.

Using quality parts such as high stability resistors and TO-99 PTFE socket with gold-plated contacts, his observations confirm that the unit is stable within 30 μV, with a very slow voltage increase of a few microvolts every 6 hours. A 15 V linear regulator powers the device with input power coming from an external wall wart. A small aluminum enclosure houses the device, with two gold-plated 4 mm sockets for the output. If you would like to build your own, his board design is hosted on OSH park, or you can download the Eagle CAD design files. He’s posted all links on his blog post, and provides part numbers for all of the parts used. [barbouri] has been doing a good job of building handy devices for his work bench – check out his well-built milli Ohm Meter that we had featured earlier.

Trinket Chills Your Drinks

Who wants warm drinks? Well, coffee drinkers, we guess. Other than them, who wants warm drinks? Tea drinkers, sure. How about room temperature drinks? No one, that’s who. It’s silly to buy a refrigerator to cool down a single drink, so what option are you left with? Ice cubes? They’ll dilute your drink. Ice packs and a cooler? Sure, they’ll keep your drinks cold, but they’re hardly cool are they? No, if you want a cold drink the cool way, you build a thermoelectric cooler. And if you want to build one, you’re in luck, because [John Park] has a tutorial to do just that up on AdaFruit.

The parts list includes an AdaFruit Trinket M0, a more powerful version of AdaFruit’s Trinket line. The Trinket is used to control the main part in this build, a Peltier thermoelectric cooler, as well as the temperature display and switches. The other part controlled by the microcontroller is a peristaltic pump, which is used to do the dispensing of the liquid. The code to control everything is written in Python as the Trinket M0 comes with AdaFruit’s CircuitPython by default. Also included in the tutorial are the files for the stand, should you want to 3D print it or cut it with a CNC or laser cutter.

After the break, you can watch as [John] goes over the project and builds it, or go to the AdaFruit website and follow the instructions to build your own. As [John] says, there might be better ways to chill your drinks, but this is “definitely one of the more science-y and interesting ones.” For more projects using the Peltier Effect, try this one that uses the effect in sous-vide cooking, or this one, a Peltier cooled micro-fridge!

Continue reading “Trinket Chills Your Drinks”