Using Lasagna To Make Cost-Saving Molds

Building a one-off prototype is usually pretty straightforward. Find some perfboard and start soldering, weld up some scrap metal, or break out the 3D printer. But if you’re going to do a production run of a product then things need to have a little more polish. In [Eric Strebel]’s case this means saving on weight and material by converting a solid molded part into something that is hollow, with the help of some lasagna.

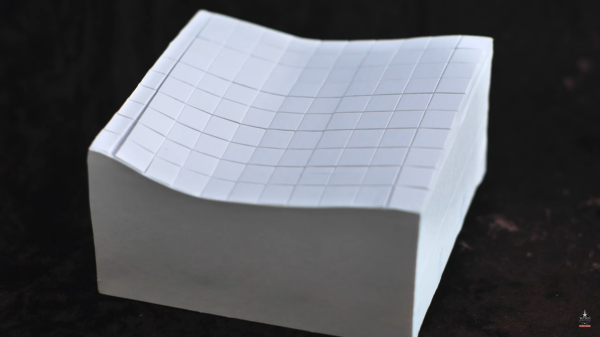
What [Eric] walks us through in this video is how to build a weep mold. First, the solid part is cast in silicone. Using the cast, some “sheet clay” is applied to the inside which will eventually form the void for the new part’s walls. The clay needs to be flush with the top of the mold, though, and a trick to accomplish this task is to freeze the mold (next to the lasagna) which allows the clay to be scraped without deforming.

From there, the second half of the mold is poured in, using special channels that allow the resin to “weep” out of the mold (hence the name). This two-part process creates a much more efficient part with thin walls, rather than the expensive solid prototype part.

[Eric] is no stranger around these parts, either. He’s an industrial designer with many tips and tricks of the profession, including a method for building a machining tool out of a drill press and a vise as well as some tips for how to get the most out of a low-volume production run of a product you might be producing.

Continue reading “Using Lasagna To Make Cost-Saving Molds”

DIY Dungeon Crawler Game Plays On Single LED Strip

A delightful version of a clever one-dimensional game has been made by [Critters] which he calls TWANG! because the joystick is made from a spring doorstop with an accelerometer in the tip. The game itself is played out on an RGB LED strip. As a result, the game world, the player, goal, and enemies are all represented on a single line of LEDs.

How can a dungeon crawler game be represented in 1D, and how is this unusual game played? The goal is for the player (a green dot) to reach the goal (a blue dot) to advance to the next level. Making this more difficult are enemies (red dots) which move in different ways. The joystick is moved left or right to advance the player’s blue dot left or right, and the player can attack with a “twang” motion of the joystick, which eliminates nearby enemies. By playing with brightness and color, a surprising amount of gameplay can be jammed into a one-dimensional display!

Code for TWANG! is on github and models for 3D printing the physical pieces are on Thingiverse. The video (embedded below) focuses mainly on the development process, but does have the gameplay elements explained as well and demonstrates some slick animations and sharp feedback.

Continue reading “DIY Dungeon Crawler Game Plays On Single LED Strip”

The (Unnecessary?) Art Of Connector Crimping

The “Completion Backwards Principle” is a method of reasoning through a problem by visualizing the end result and then working your way backwards from that point. The blog post that [Alan Hawse] has recently written about the intricacies of crimping wires for plug connectors is a perfect example of this principle. The end result of his work is the realization that you probably shouldn’t bother crimping your own connectors, but watching him work backwards from that point is still fascinating. It’s also the name of a rock album from the 80’s by The Tubes, but this is not a useful piece of information in regards to electrical wiring.

Of course, sometimes people do silly things. Even though there are pre-crimped wires available online for a pittance, you might still want to do your own. With this in mind, [Alan] has put together an exceptionally detailed and well-research post that gives you all the information you could possibly want to know about crimping what is often erroneously referred to as the “JST connector”.

He starts by showing off some common examples of this connector, which if you’ve ever opened a piece of consumer electronics will be like looking through a High School yearbook. You might not know their names without reading them, but you definitely remember what they look like.

We’re then treated to an array of macro shots showing the scale of the pieces involved. If getting up close and personal with metal bits that are only a few millimeters long is your kind of thing, then you’re really going to love this part.

Finally, the post is wrapped up with a few words about the kind of crimping tools that are available on the market, and then a demonstration of his personal crimping method. While some tools would have you crimp both sets of “wings” at the same time, [Alan] tells us he finds taking them on individually leads to better results in his experience.

If this this little taste has left you hungry for a true feast of hyper-specialized knowledge, be sure to check out the Superconference talk by [Bradley Gawthrop].

Continue reading “The (Unnecessary?) Art Of Connector Crimping”

DIY Spray Booth Is Both Light And Lit

Industrial designer [Eric Strebel] has access to big, walk-in spray booths, but bigger isn’t always better. For small jobs, it’s overkill, and he wanted his own spray booth anyway. If you’re ready to upgrade from that ratty old cardboard box in the garage, look no further than [Eric]’s spray booth how-to after the break.

If you don’t already know, [Eric] is something of a foam core legend. He has several videos about model building techniques that produce really slick results, so it’s no surprise to see these skills transfer to a larger build. The booth is built from a single 40″ x 60″ sheet of 1/2″ foam core board, a furnace filter, and a vent fan modified to fit his shop’s system. The whole thing cost less than $200, most of which goes toward the fan.

[Eric] modified an existing spray booth plan to fit his needs and added some really nice touches along the way. All the edges are beveled and the unfinished faces are taped, so at first glance it looks like it’s made out of painted wood or melamine board. The furnace filter slides out one side for easy replacement and is braced with foam scraps so it won’t fall forward. The best part of this booth is the LED strips—they make for way better working conditions than the dim recesses of a cardboard box.

If you’d rather build a walk-in spray booth, why not make your own sliding barn doors, too?

Continue reading “DIY Spray Booth Is Both Light And Lit”

LED Tree Brings Gravity To Christmas

Here’s a fun entry into our coin cell challenge. The power source is the actuating force in [Frank]’s blinky LED Christmas tree, which takes advantage of the physical structure of coin cells and our old pal gravity to roll out some holiday cheer. Talk about forward voltage!

We love the concept, and the circuit couldn’t be more simple. A coin cell is released at the top of the tree and rolls down a series of angled foam board railings covered with 1/4″ copper tape. As the coin cell travels, the negative terminal shimmies along the face of the tree, which has corresponding ground rail tapes. There’s no microcontroller here—all that’s needed for blinks are breaks in the negative rail tape.

The challenging part of a project like this is the execution. Getting a coin cell to ride the rails without falling off required angle experimentation prior to and during the build. Now that it’s done, keeping the tree tilted back against the wall is key. [Frank] explored several options for returning the coin cell to the top using a camera motor and the gear assembly from an old inkjet, but for now, his six-year-old does the job without complaint. Check out his work ethic after the break.

Continue reading “LED Tree Brings Gravity To Christmas”

Bring Up A PCB With Fewer Headaches

What’s the first thing you do when a new set of boards from the fab house hits the doorstep? Apply solder paste, populate the components, and stick it in the reflow oven? That’s one way to do it. But a lot of non-obvious things can go wrong at the fab house, like shorts and undrilled vias. One tiny mistake can mean hours of frustration and sanity questioning as you troubleshoot some problem that’s now buried under solder paste and 0603s.

Over on IO, [Bhavesh] tries to nip these problems in the bud with a comprehensive and explanatory guide to properly bringing up a PCB. Though it’s based on fab house boards, this soup-to-nuts plan is good for any project from kit building to custom stripboard circuits. When new boards arrive, [Bhavesh] does several continuity checks and visually inspects them with a microscope. In the case of a stripboard layout, it’s a good idea to verify there’s no continuity across cut traces. He goes on to cover solder paste, touching on proper handling and storage, application, and problem correction.

Our favorite part of this guide is the component sheets. Making these is a great preventive measure, like lining up all your ingredients on the counter before you bake a cake. If you know what you need, why not have it all ready?  [Bhavesh] uses a sheet for each component type, lists all the relevant values in ascending order, and lays out component reels next to them.

The guide covers solder paste, too—his stencils were late to arrive, so the guide deals with applying paste by hand. He suggests a plan for populating the board by starting in one corner and working in circle, placing small components first. Then it’s on to reflow and those all-important post-reflow checks for bridges and bad joints before letting the magic smoke out.

A great time to catch mistakes is before you send the order to the fab house. Hackaday’s own [Joshua Vasquez] has you more than covered there.

Afroman Teaches Intro To Servos, Builds Laser Turret

After a longish hiatus, we were pleased to see a new video from [Afroman], one of the most accessible and well-spoken teachers the internet has to offer. If you’re new to electronics, see the previous sentence and resolve to check out his excellent videos. The new one is all about servos, and it culminates in a simple build that provides a foundation for exploring robotics.

[Afroman] leaves no gear unturned in his tour de servo, which is embedded after the break. He explains the differences between open vs. closed loop motor systems, discusses the different sizes and types of servos available, and walks through the horns and pigtails of using them in projects. Finally, he puts this knowledge to use by building a laser turret based on a pan-tilt platform.

The Arduino-driven turret uses two micro servos controlled with pots to move by degrees in X/Y space. Interestingly, [Afroman] doesn’t program the board in the Arduino IDE using wiring. Instead, he uses an open-source microcontroller language/IDE called XOD that lets you code by building a smart sort of schematic from drag-and-drop components and logic nodes. Draw the connections, assign your I/O pin numbers, and XOD will compile the code and upload it directly to the board.

Continue reading “Afroman Teaches Intro To Servos, Builds Laser Turret”