This Machine Teaches Sign Language

Sign language can like any language be difficult to learn if you’re not immersed in it, or at least learning from someone who is fluent. It’s not easy to know when you’re making minor mistakes or missing nuances. It’s a medium with its own unique issues when learning, so if you want to learn and don’t have access to someone who knows the language you might want to reach for the next best thing: a machine that can teach you.

This project comes from three of [Bruce Land]’s senior electrical and computer engineering students, [Alicia], [Raul], and [Kerry], as part of their final design class at Cornell University. Someone who wishes to learn the sign language alphabet slips on a glove outfitted with position sensors for each finger. A computer inside the device shows each letter’s proper sign on a screen, and then checks the sensors from the glove to ensure that the hand is in the proper position. Two letters include making a gesture as well, and the device is able to track this by use of a gyroscope and compass to ensure that the letter has been properly signed. It appears to only cover the alphabet and not a wider vocabulary, but as a proof of concept it is very effective.

The students show that it is entirely possible to learn the alphabet reliably using the machine as a teaching tool. This type of technology could be useful for other applications as well, such as gesture recognition for a human interface device. If you want to see more of these interesting and well-referenced senior design builds we’ve featured quite a few, from polygraph machines to a sonar system for a bicycle.

Continue reading “This Machine Teaches Sign Language”

Add A Trackpoint To A Mechanical Keyboard

People love their tech, and feel like something’s missing when it’s not there. This is the story of one person’s desire to have the venerable trackpoint in their new keyboard.

[Klapse] loves a Lenovo old-style non-chicklet keyboard, so, despite the cost, five were ordered. They very quickly ended up with keys that didn’t work, although the trackpoints still did. After buying a sixth which ended up the same, [Klapse] decided that maybe giving up on the Lenovo keyboards was the best idea. A quick stop at a local store scored a fill-in mechanical keyboard, but in the back of [klapse]’s mind the need for a trackpoint remained. Maybe one could be frankensteined in to the keyboard that was just purchased?

Underside of the trackpoint, fitted to the keyboard PCB

The keyboard’s circuit board had traces everywhere, with nowhere to drill through between the correct keys, typically between the G, H and Y keys. But there was a hole used for mounting the PCB nearby. between the H, J, U and Y keys. The trackpoint needed to be extended to reach all the way through the key caps, so [klapse] searched the house looking for something that might do. Turns out that a knitting needle fits perfectly.

At this point a side-hack emerged. [Klapse] found a drill bit small enough to make the necessary hole in the trackpoint shaft to fit the needle. But the bit was too small for the drill chuck. In true hacking style, the bit was wrapped with duct tape and held in the drill. Sure, it wobbled a lot and it was really difficult to get it to drill in the center of the shaft, but it worked, eventually. The needle was cut off and glued into the hole, the key caps were modified a bit to allow the trackpoint through and the rubber tip put back on.

They say, “desire to cram old tech into new is the mother of invention.” Or something similar, anyway. Check out how a Teensy liberated a Lenovo laptop keyboard trackpoint and all. Also, check out this custom keyboard with integrated trackpoint, of course.

Behold The WT-220: A ‘Clever’ VT-220 Terminal

[John Whittington] failed to win a bid for an old VT-220 serial terminal on eBay, so he decided to make his own version and improve it along the way. The result is the Whitterm-220 (or WT-220) which has at its core a Raspberry Pi and is therefore capable of more than just acting as a ‘dumb’ serial terminal.

Rear of the WT-220 with paint-filled laser engraving and all necessary connectors.

The enclosure is made from stacked panels of laser-cut plywood with an acrylic plate on the back for labels and connectors, where [John] worked paint into the label engravings before peeling off the acrylic’s protective film. By applying paint after laser-engraving but before peeling off the film, it acts as a fill and really makes the text pop.

Near the front, one layer of clear acrylic among the plywood layers acts as a light guide and serves as a power indicator, also doing double duty as TX/RX activity lights. When power is on, that layer glows, serving as an attractive indicator that doesn’t interfere with looking at the screen. When data is sent or received, a simple buffer circuit tied to the serial lines lights up LEDs to show TX or RX activity, with the ability to enable or disable this functionality by toggling a GPIO pin. A video overview is embedded below, where you can see the unit in action.

Continue reading “Behold The WT-220: A ‘Clever’ VT-220 Terminal”

Every Computer Deserves A Rotary Encoder

In the era of touch screens and capacitive buttons, we’d be lying if we said we didn’t have the occasional pang of nostalgia for the good old days when interfacing with devices had a bit more heft to it. The physical clunk and snap of switches never seems to get old, and while you can always pick up a mechanical keyboard for your computer if you want to hear that beautiful staccato sound while firing off your angry Tweets, there’s a definite dearth of mechanical interface devices otherwise.

[Jeremy Cook] decided to take matters into his own hands (literally and figuratively) by designing his own multipurpose USB rotary input device. It’s not a replacement for the mouse or keyboard, but a third pillar of the desktop which offers a unique way of controlling software. It’s naturally suited to controlling things like volume or any other variable which would benefit from some fine tuning, but as demonstrated in the video after the break even has some gaming applications. No doubt the good readers of Hackaday could think of even more potential applications for a gadget like this.

The device is built around the diminutive Arduino-compatible PICO board by MellBell, which features a ATmega32u4 and native USB. This allowed him to very rapidly spin up a USB Human Interface Device (HID) with minimal headaches, all he had to do was hang his buttons and rotary encoder on the PICO’s digital pins. To that end, he [Jeremy] used the fantastic I2C rotary encoder designed by [fattore.saimon], which readers may remember as a finalist in the Open Hardware Design Challenge phase of the 2018 Hackaday Prize. He also added a NeoPixel ring around the encoder to use for some visual feedback and because, well, it just looks cool.

Since all of the core components are digital, there’s not a whole lot required in the way of wiring or passive components. This let [Jeremy] put the whole thing together on a piece of perfboard, freeing him up to spend time designing the 3D printed enclosure complete with translucent lid so he can see the NeoPixel blinkenlights. He got the tolerances tight enough that the whole device can be neatly press-fit together, and even thought to add holes in the bottom of the case so he could push the perfboard back out if he needed to down the line.

[Jeremy] spends a good chunk of the video going over the software setup and development of the firmware, and details some of the nuances he had to wrap his head around when working with the I2C encoder. He also explains the math involved in getting his encoder to emulate a mouse cursor moving in a circle, which he thinks could be useful when emulating games that originally used an encoder such as Tempest or Pong.

We’ve seen similar USB “knobs” in the past for controlling volume, but the additional inputs that [Jeremy] built into his version definitely makes it a bit more practical. Of course we’re suckers for interesting USB input devices to begin with.

Continue reading “Every Computer Deserves A Rotary Encoder”

Weaponized Networked Printing Is Now A Thing

It’s a fairly safe bet that a Venn diagram of Hackaday readers and those who closely follow the careers of YouTube megastars doesn’t have a whole lot of overlap, so you’re perhaps blissfully unaware of the man who calls himself [PewDiePie]. As such, you might not know that a battle between himself and another YouTube channel which uploads Bollywood music videos has reached such a fever pitch that his fans have resorted to guerrilla hacking to try to sway public opinion towards their side. It’s perhaps not the dystopian future we imagined, but it just might be the one we deserve.

To briefly summarize the situation, a hacker known only by the handle [TheHackerGiraffe] decided to help out Dear Leader by launching an automated attack against 50,000 Internet connected printers. When the hack was successful, the printer would spit out a page of digital propaganda, complete with fist ASCII art, that urged the recipient to go on YouTube and pledge their support for [PewDiePie]. There’s some debate about how many of the printers [TheHackerGiraffe] targeted actually delivered their payload, but judging by reactions throughout social media, it was enough to get the message out.

While the stunt itself may have come as a surprise, the methodology wasn’t. In fact, the only surprising element to the security researchers who’ve weighed in on the situation is that this hasn’t happened more often. It certainly isn’t the first time somebody’s done it, but the fact that this time its been connected to such a high profile Internet celebrity is putting more eyes on the problem then there have been in the past. Now that the proverbial cat is out of the bag, there are even websites springing up which claim to be purveyors of “Printer Advertising”. Odds are good this won’t be the last time somebody’s printer starts running off more than TPS reports.

We here at Hackaday don’t have much interest in the battle for YouTube supremacy. We’re just pulling for Dave Jones’s EEVBlog channel to join [AvE] in breaking a million subscribers. But we’re very interested in the technology which made this attack possible, how likely it is we’re going to see more people exploit it, and what are we supposed to do now that even our own printers can be turned against us?

Continue reading “Weaponized Networked Printing Is Now A Thing”

High-End Headphones Get Flexible Boom Upgrade

It seems a reasonable assumption that anyone who’d be willing to spend a few hundred dollars on a pair of headphones is probably the type of person who has a passion for high quality audio. That, or they work for the government. We’re fairly sure [Daniel Harari] falls into that former category though, given how much thought he gave to adding a decent microphone to his Sennheiser HD650 headphones.

Not happy with the results he got from microphones clipped to his shirt or mounted on a stand, [Daniel] realized what he really wanted was a sensitive boom microphone. This would be close enough to his mouth that it wouldn’t pick up stray noises, but at the same time not obstruct his field of view or otherwise get in the way.

He found a few options on the market which would allow him to mount a boom microphone to his HD650’s, but he didn’t want to stick anything to them and risk scratching the finish so those weren’t really an option. [Daniel] decided to go the DIY route, and eventually settled on a microphone that would mount to the headphone’s existing connector which plugs in at the bottom of the cup.

To make his mount, he 3D printed a two piece clamp that could be screwed together and securely attach to the connector without making any permanent changes. Once he had that base component printed, he salvaged the flexible metallic neck from a cheap USB light and used that to hold the female 3.5mm connector. Into that he’s plugged in a small commercially available microphone that is usually used on voice recorders, which [Daniel] said sounds much better than even the larger mics he had tested.

Finally, he used Sugru to encapsulate the wires and create a flexible strain relief. The whole assembly is very light, easily movable, and perhaps most importantly, didn’t require any modifications or damage to a pair of headphones which have a retail price that could double as a car payment.

It’s been a few years since we’ve seen anyone brave enough to hack their pricey Sennheiser headphones. But in the past we covered a modification which gave them an infusion of Bluetooth and even one that reversed a sneaky manufacturer hardware limitation.

Teensy Liberates The ThinkPad Keyboard

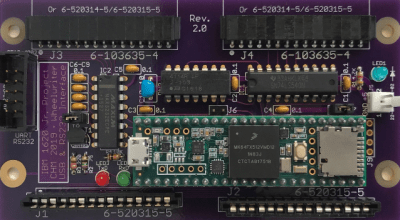
[Frank Adams] liked the keyboard on his Lenovo ThinkPad T61 so much that he decided to design an adapter so he could use it over USB with the Teensy microcontroller. He got the Trackpoint working, and along the way managed to add support for a number of other laptop boards as well. Before you know it, he had a full-blown open source project on his hands. Those projects can sneak up on you when you least expect it…

The first step of the process is getting your laptop keyboard of choice connected up to the Teensy, but as you might expect, that’s often easier said than done. They generally use a flexible printed circuit (FPC) “ribbon cable” of some type, but may also be terminated in any number of weirdo connectors. [Frank] goes over the finer points of getting these various keyboards connected to his PCB, from searching the usual suspects such as Aliexpress and Digikey for the proper connector to throwing caution to the wind and cutting off problematic nubs and tabs to make it fit.

You might be on your own for figuring out the best way to connect your liberated keyboard up, but [Frank] has done his part by designing a few PCBs which handle routing the appropriate connections to the Teensy LC or 3.2 microcontroller. He’s such a swell guy he’s even written the firmware for you. As of right now there’s currently a dozen keyboards supported by his software and hardware setup, but he also gives tips on how to get the firmware modified for your own board if you need to.

It should come as no surprise that it was a Thinkpad keyboard that got [Frank] going down this path; as we’ve documented over the years, hackers love their Thinkpads. From fitting them with more modern motherboards to going full on matryoshka and putting a second computer inside of one, it’s truly the laptop that launched a thousand hacks.

Continue reading “Teensy Liberates The ThinkPad Keyboard”