Chris playing his tiny pinball machine

Tiny Pinball Is As Cute As Pi

Pinball machines are large, complex, and heavy boxes of joy and delight. However, when you don’t have the money or space for one, you have to make your own mini Raspberry Pi-powered one.

With access to a local makerspace and a bit of extra free time, [Chris Dalke] had plans to capture the flavor of a full-scale pinball machine in a small package. Laser-cut Baltic birch forms the enclosure, and a screen makes up the playing field rather than a physical ball. An Arduino Uno handles the three buttons, the four LED matrixes, and a solenoid for haptic feedback, communicating

with the Pi via serial. Unfortunately, even with a relatively decent

volume inside, it is still a tight squeeze.

Rather than use an off-the-shelf pinball game, [Chris] wrote his own in C using raylib and raygui, two handy libraries that can be included in the project quickly. SQLLite3 writes high scores out to disk. All in all, an inspiring project that has a very high level of polish.

If you’re looking for a tiny pinball machine but want more of the classic pinball feel, why not look at this scale pinball machine?

Continue reading “Tiny Pinball Is As Cute As Pi”

A Macintosh-inspired desk ornament, next to a sceenshot of a classic Macintosh computer desktop

‘Desk Accessory’ Pays Homage To Macintosh

The retrocomputing community are experts at keeping vintage Apple iron running, but if you’re looking for a simpler way to pay homage to the original Mac, check out this Raspberry Pi powered ‘desk accessory’ by [John Calhoun], fittingly called ‘SystemSix’.

Housed inside a delightfully Mac-shaped piece of laser-cut acrylic, SystemSix is powered by as Raspberry Pi 3, with the graphics displayed on a sizeable 5.83″ e-ink panel. While it resembles a kind of retro-futuristic take on the ‘classic’ Macintosh, SystemSix is the illusion of a fully interactive computer. While non-interactive, the fake desktop is every bit as charming as a real Macintosh display, albeit scaled down. The desktop updates automatically with new information, and presently includes a calendar, dithered lunar phase graphic, and a local weather report.

Clearly calling it a ‘desk accessory’ is a neat play on words. The original Macintosh implemented simple desk accessory programs, such as the calculator and alarm clock, that could run alongside the main application in memory. This was the only way to run more than one application on the Macintosh, before MultiFinder added rudimentary cooperative multitasking in 1987. As such, SystemSix is a functional, stylish and quite literal ‘desk accessory’.

[John] has the full project write-up over on GitHub, and goes into great detail about maintaining the Macintosh aesthetic. For example, the lunar phase graphic uses ‘Atkinson’ dithering. This technique was pioneered by Apple programmer Bill Atkinson, the author of MacPaint and the QuickDraw toolbox on the original Macintosh (and later, Hypercard).

And in case you were wondering – yes, this is the [John Calhoun], who programmed Glider for Macintosh. Now recently retired from Apple, we’re really excited to see what other Macintosh-inspired creations he comes up with. Maybe he will come back around to his Mac-powered MAME cabinets that we covered all the way back in 2005. Or perhaps a sleeper battlestation, like the iMac G4 lampshade that was upgraded with an M1 processor.


Cluster Your Pi Zeros In Style With 3D Printed Cray-1

From a performance standpoint we know building a homebrew Raspberry Pi cluster doesn’t make a lot of sense, as even a fairly run of the mill desktop x86 machine is sure to run circles around it. That said, there’s an argument to be made that rigging up a dozen little Linux boards gives you a compact and affordable playground to experiment with things like parallel computing and load balancing. Is it a perfect argument? Not really. But if you’re anything like us, the whole thing starts making a lot more sense when you realize your cluster of Pi Zeros can be built to look like the iconic Cray-1 supercomputer.

This clever 3D printed enclosure comes from [Kevin McAleer], who says he was looking to learn more about deploying software using Ansible, Docker, Flask, and other modern frameworks with fancy sounding names. After somehow managing to purchase a dozen Raspberry Pi Zero 2s, he needed a way to keep them all in a tidy package. Beyond looking fantastically cool, the symmetrical design of the Cray-1 allowed him to design his miniature version in such a way that each individual wedge is made up of the same identical  set of 3D printed parts.

In the video after the break, [Kevin] explains some of the variations the design went through. We appreciate his initial goal of making it so you didn’t need any additional hardware to assemble the thing, but in the end you’ll need to pick up some M2.5 standoffs and matching screws if you want to build one yourself. We particularly like how you can hide all the USB power cables inside the lower “cushion” area with the help of some 90-degree cables, leaving the center core open.

This isn’t the first time we’ve seen somebody build their own tiny Cray-1. A particularly dedicated hacker built his own 1/10th scale replica of the 1970s supercomputer powered by an FPGA back in 2010, and eventually got to the point of trying to boot original software on it.

Continue reading “Cluster Your Pi Zeros In Style With 3D Printed Cray-1”

ApocaPi Now Is A Cyberdeck For What Comes After

The end of the world seems closer now than ever before, even in the 1980s. But you, dear Hackaday reader, will want more than just a bug-out bag full of C-rations and waterproof matches. You will need the technological version of a bug-out bag — a mil-spec-esque cyberdeck, which is exactly what [hammerandhandmi] is in the middle of perfecting.

That’s not some kind of fancy cake pan — it’s a Pelican 1170 case lined with conductive foil tape. You see, [hammerandhandmi] has various reasons not elaborated upon for doing this, including EMP protection. Inside is an 8 GB Raspberry Pi 4B donning a Pi Juice UPS HAT and sipping from a fancy power supply. The main charging source for the old Mac book battery is solar via a large panel that’s external to cyberdeck. A smaller, secondary panel lives inside for backup purposes. There’s also an MPPT charge controller for to support the different battery chemistries. [hammerandhandmi] chose the Pelican 1170 because they need to mount it to the back of an LC2 Alice rucksack frame. The 1170 is wider than the popular 1150, and is in fact almost the exact width of the LC2 frame.

The point of this build is to maintain power for the purpose of preserving knowledge — all that stuff we’ll need to rebuild humanity. There will be much information available up via FOSS offline browser Kiwix, plus an atlas, some military field manuals, a lot of survival info, all of the books Project Gutenberg has to offer, plus a handful of movies and a few game ROMs so [hammerandhandmi] can live out the rest of their days in what is hopefully some kind of solar punk utopia.

Provided there’s enough time to implement it all, [hammerandhandmi] plans to add an SDR with antenna hookup, GPS unit, 12 V port, a couple of SSDs, a powered USB hub, and maybe an RFID reader. But the coolest part is that they ultimately want to connect everything up to a HUD mounted in a ballistic helmet. See? The apocalypse could be awesome. It’s up to us!

We often see cyberdecks with mechanical keyboards, like this cherry Pi number. But the salvaged keeb from a 1989 Compaq laptop might be just as future-proof.

Rugged Cyberdeck Makes The Case For Keeping Things Water-Tight

Many people build cyberdecks just for the heck of it, and there’s nothing wrong with that at all. On the other hand, [cyzoonic]’s rugged ‘deck is a bit more purpose-built. In this instance, the purpose is software-defined radio.

Underneath those sweet custom-cut panels lies a Raspberry Pi 3B and a BOM full of parts that can be had on Ali Express. There’s also an ESP32 that takes input from the keypad plus the 5 buttons that control the display, and the two potentiometers. [cyzoonic] can dial in frequencies with the knobs, or by punching in digits on the keypad.

One of the problems with using a Pelican case is this — how do you install any type of panel without compromising the case’s water-tightness? [cyzoonic] mentions in the comments that Pelican makes a bracket that allows for panels and things to be screwed down without breaching the case. But in this case, [cyzoonic] made their own brackets in a similar fashion.

Another problem with Pelican cases (and cyberdecks in general that are built into hinged boxen) is something that doesn’t get enough attention: typing ergonomics. Personally, we take comfortable and ergonomic typing fairly seriously, and would love to see a cyberdeck that speaks to this issue.

In the meantime, we’ll have to take [cyzoonic]’s word that while it’s not terribly comfortable to type with the ‘deck on a tabletop, sitting on the floor hunched over the thing like a true hacker is much better. This is a work in progress (at least the IO project anyway), so we’ll be tuning back in occasionally to see if any more instructions appear.

Speaking of ergonomic cyberdecks, here’s the one that drew the line in the sand for us — [Tinfoil_Haberdashery]’s lovely ErgoDox-based NUC machine.

Modular Pockit Computer Is More Than Meets The Eye

“Modular” and “Computer” have historically been on the opposite ends of a rather awkward spectrum. One could argue that a hobbyist grade PC is modular, but only to a point. Re-configuring it on the fly is not readily possible. Modular laptops are slowly happening, but what about handheld devices, where our needs might change on a regular basis?

Enter the Pockit: a fully modular IoT/edge computing device that can be reconfigured on the fly without having to reprogram it. Don’t browse away from this page without watching the demonstration video below the break. It just might be the “mother of all demos” for the current decade.

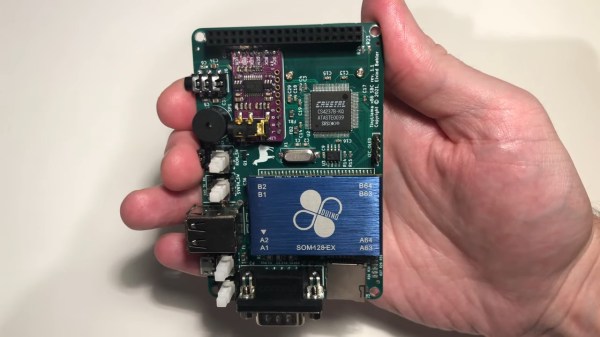
A modular base provides basic computing power in the form of a Raspberry Pi, like many other projects. The base has twelve magnetic connectors, each with twenty I/O and power pins. When a module is added, the operating system detects the new module and loads an appropriate program on the fly. When more modules are loaded, it automatically configures itself so that all modules have a purpose. This allows the Pockit to be an integrated IoT device, an edge computing powerhouse, a desktop computer, a Blackberry-esque handheld, or a touch screen tablet, and so many more things.

For example, if a camera is added, it displays an image on a screen — if there’s  a screen. If a button is added, it automatically takes a picture when the button is pressed. If you want the camera to be motion activated, just add a motion sensor. Done. External devices can be controlled with relays and home automation integrates almost seamlessly.

There are a great number of features that we’re glossing over for the sake of getting to the point: Go watch the video and when you’re done, perhaps you’ll be as astonished as we are. We’ve expressed our love of modular hardware like the Pockit in the past, and after watching this demo, we can only hope that this is what the future of computing and electronics looks like!

Continue reading “Modular Pockit Computer Is More Than Meets The Eye”

Raspberry Pi And The Story Of SD Card Corruption

Tales of Raspberry Pi SD card corruption are available online by the fistful, and are definitely a constant in Pi-adjacent communities. It’s apparent that some kind of problems tend to arise when a Raspberry Pi meets an SD card – which sounds quite ironic, since an SD card is the official and recommended way of booting a Pi. What is up with all of that?

I can start with a history lesson. Back when Raspberry Pi launched in 2012 – which is now 10 years ago – there were SD card controller driver problems, which makes sense given the wide variety of SD cards available out there. They were verifiably fixed one by one at some point in time, as debugging goes, their impact decreased and bugs with individual cards got smoothed over. This is how the “Pi SD card corruption” meme was originally born; however, if the problems were to end there, so would the meme. Yet, tales of broken SD cards plague us to this day – way less severe than they were in the beginning, but pronounced enough that you’ll see people encounter them every now and then.

Over the years, a devoted base of Pi SD card haters has grown. Their demand has been simple – Raspberry Pi has to get an ability to boot from something else, in large part because of corruption reasons, but also undeniably because of speed and capacity/cost limitations of SD cards. Thanks to their demands and work, we’ve seen a series of projects grow from unofficial efforts and hacks into officially supported Raspberry Pi abilities – USB boot being initially more of a workaround but now something you can enable out of the box, SSD-equipped Pi enclosures becoming more of a norm, and now, NVMe boot appearing on the horizon. Every few years, we get a new way to boot a Pi. Continue reading “Raspberry Pi And The Story Of SD Card Corruption”