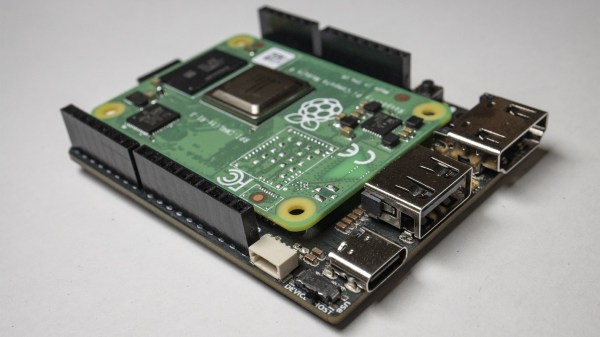
A Complete Raspberry Pi Power Monitoring System

As the world has become more environmentally conscious, we’ve seen an uptick in projects that monitor or control home energy use. At a minimum one of these setups involves a microcontroller and some kind of clamp-on current sensor, but if you’re looking for resources to take things a bit farther, this Raspberry Pi energy monitoring system created by [David00] would be a great place to start.

This project includes provides software and hardware to be used in conjunction with the Raspberry Pi to keep tabs on not just home energy consumption, but also production if your home has a solar array or other method of generating its own power. Data is pulled every 0.5 seconds from a MCP3008 ADC connected to up to five six current sensors to provide real-time utilization statistics, and visualized with Grafana so you can see all of the information at a glance.

While [David00] has already done the community a great service by releasing the hardware and software under an open source license, he’s also produced some absolutely phenomenal documentation for the project that’s really a valuable resource for anyone who wants to roll their own monitoring system. He’s even offering hardware kits for anyone who’s more interested in experimenting with the software side of things than building the PCB.

Home energy monitoring projects are certainly nothing new, but the incredible advances we’ve seen in the type of hardware and software available for DIY projects over the last decade has really pushed the state-of-the-art forward. With so many fantastic resources available now, the only thing standing between you and your own home energy monitoring dashboard is desire and a long weekend.

TinyPilot Provides KVM-over-IP, With Low Cost And Even Lower Latency

Remote access is great, but if the machine stops booting, ceases to connect to the network, or needs low-level interaction like BIOS settings or boot management, remote access is worthless because it’s only available once the host computer is up and running. The usual solution is to drag a keyboard and monitor to the machine in question for physical access.

Ubuntu laptop (right) being accessed over IP, via web browser on the left.

For most people, swapping cables in this way is an infrequent task at best. But for those who work more closely with managing hardware or developing software, the need to plug and unplug a keyboard and monitor into machines that otherwise run headless can get tiresome. The modern solution is KVM (keyboard, video, mouse) over IP, but commercial options are expensive. [Michael Lynch]’s TinyPilot on the other hand clocks in at roughly $100 of parts, including a Raspberry Pi and USB HDMI capture device. It does have to drop the ‘M’ from KVM (meaning it does not support a mouse yet) but the rest of it hits all the bases, and does it all from a web browser.

What exactly does TinyPilot do? It provides remote access via web browser, but the device is an independent piece of hardware that — from the host computer’s point of view — is no different from a physical keyboard and monitor. That means keyboard and video access works before the host machine even boots, so even changing something like BIOS settings is no problem.

[Michael] demonstrates his design in the video embedded below, but we encourage you to check out the project page for a fascinating exploration of all the challenges that were part of TinyPilot’s development.

Continue reading “TinyPilot Provides KVM-over-IP, With Low Cost And Even Lower Latency”

Let’s Take A Closer Look At This Robotic Airship

It’s not a balloon, however shiny its exterior may seem. This miniature indoor robotic airship created by the University of Auckland mechanical engineering research group [New Dexterity] is an asymmetric system experimenting with the possibilities of an open-source helium-based airship.

Why a helium airship, as opposed to a fixed wing aircraft? The group wanted to experiment with the advantages of lighter-than-air (LTA) travel, namely the higher mobility and looser path planning constraints. Furthermore, LTA airships have a less obstructed field of vision and fewer locomotion issues. While unmanned aerial vehicles (UAV) may be capable of hovering in one place, their lift is generated by rotor thrust, which drains their batteries quickly in the order of minutes. LTA airships can hover for longer periods of time.

The design was created for educational and research purposes, focusing on the financial feasibility of manufacturing the platform, the environmental impact of the materials, and the helium loss through the balloon-like envelope. By measuring these parameters, the researchers are able to study the effects of circumstances such as the cost of indoor commercial balloons and the mechanical properties of balloon materials.

The airship gondola was designed and 3D printed in a modular fashion, then attached to the envelope with Velcro. The placement with respect to the horizontal symmetry of the gondola was done for flight stability, with several configurations tested for the side rotor angle.

The group open-sourced their CAD files and ROS interface for controlling the airship. They primarily use off-the-shelf components such as Raspberry Pi boards, propellers, a DC single brushed motor driver carrier, and LiPo batteries for a total cost of $90 for the platform, with an addition $20 for the balloon and initial helium filling. The price is comparable to the cost of indoor blimps like the Blimpduino 2.0.

You can check out the completed airship below, where the team demonstrates its path following capabilities based on a carrot chasing path finding algorithm. And if you’re interested in learning more about the gotchas of building lighter-than-air vehicles, check out [Sophi Kravitz’s] blimp talk from Hackaday Belgrade.

Continue reading “Let’s Take A Closer Look At This Robotic Airship”

Bringing The Pi Camera Into Focus With LEGO

Ever since the high-quality camera for the Raspberry Pi was released a few months back it has been the center of attention for many hacks. In this quick build [Martin Mander] shows us how to make a servo-powered focusing mechanism entirely from LEGO.

The inspiration for this project came to him while he was working on his 1979 Merlin Pi Camera and found that setting the focus just right is vital in order to get good quality pictures. So he set himself the goal to build a mechanism that allows him to focus the camera precisely and remotely.

It is the plethora of LEGO-compatible parts that are available off-the-shelf that make such a project possible without the use of any 3D printed components. He not only found a LEGO-compatible continuous rotating servo but also a LEGO-compatible case for the Pi, and a LEGO cogwheel which almost fits exactly onto the camera lens. He also added a tripod mount to the case that allows him to set up the camera anywhere. The camera and focussing mechanism are controlled with a custom GUI based on guizero Python 3 library and the camera can be accessed remotely via VNCViewer.

If you prefer 3D printing over LEGO there are also other stylish Raspi HQ camera builds.

Video after the break.

Continue reading “Bringing The Pi Camera Into Focus With LEGO”

A Stylish Raspberry Pi Camera

The Raspberry Pi HQ camera module is an exciting product that for the first time puts something close to a decent quality interchangeable lens camera into the hands of hardware hackers. It’s already attracted the attention of those who have a wish to explore the boundaries of camera form factors. Our latest entrant in this field comes courtesy of [BBまどーし], who has opted for a very good 3D-printed analog of a conventional compact camera.

On the front as you might expect is the module, concealed behind a smart plastic ring. Behind that is a battery compartment, concealing not the brace of 18650s or the bare LiPo pouch that you might expect, but a 10,400 mAH USB power bank. Behind that is something approaching a conventional Raspberry Pi case, designed to take a Hyperpixel screen. The battery might seem an unadventurous choice, but it serves to highlight just how much bang for your buck can now be found in compact power banks. It may not have a hacker aesthetic, but you can’t argue with its cost and simplicity.

The details are the interesting part of this design, for instance it has a standard accessory shoe printed into its top. There is also a shutter button, but they admit to not being a software wizard enough to get it working. Perhaps a quick look at this Pi Camera in a 1970s Merlin game would be in order.

Raspberry Pi Shuffler Is Computerized Card Shark

If you’re playing Texas Hold’em or other card games with a small group, you may get tired of shuffling over and over again. [3dprintedLife] was in just such a position, and realized there were no good automatic card shufflers in his budget. Instead, he elected to build one, and put in some extra functionality to corrupt the game to his whims.

The mechanicals of the machine took much development, as accurately handling and dispensing cards is a challenge, particularly with the loose tolerances of 3D printed parts. After developing a reliable transport mechanism, it was more than capable of shuffling a deck well with some basic commands.

However, the real magic comes from installing a camera and Raspberry Pi running OpenCV. This is capable of reading the value and suit of each card, and then stacking the deck in a particular order to suit the dealer’s wishes. It’s all controlled through a web interface and is capable of creating guaranteed wins in Blackjack and Texas Hold’em. Files are on Github for those eager to delve deeper into how the machine works.

The mechanism does such a beautiful job of shuffling, that your friends may not even notice the ruse. It goes to show that you should always have your wits about you when gambling with the aid of machines. Of course, if you wish only to create havoc, this Lego card machine gun may be more your speed. Video after the break.

[via Reddit]

Continue reading “Raspberry Pi Shuffler Is Computerized Card Shark”

Speech To Morse Code, Courtesy Of Google

Google has been responsible for unleashing some pretty incredible hardware and software on the world, but they can only take partial credit for the voice to Morse code gadget that [WhiskeyTangoHotel] recently completed.

With the Google AIY Voice Bonnet, [WhiskeyTangoHotel] had everything he needed to pick up on human speech and turn that into text the Raspberry Pi can parse and act on. Usually this would get passed to some kind of virtual assistant software, but in this case, a Python script breaks the speech down into individual characters and looks up their Morse representations. All those “dits” and “dahs” are then sent to one of the Pi’s GPIO pins, to which a relay has been connected.

At this point, you’ve got an interesting little toy that can sit on your desk and turn your speech into audible Morse code as the relay clicks and clacks its way through the message. In fact, if you don’t have a ham radio license, this is probably where you should stop. But if you’ve done the appropriate paperwork to transmit over the air, the relay can be connected to a radio to actually transmit messages.

If you think giving Google access to the content of your Morse code messages is a step too far, you’ll just have to learn it yourself. It might not be necessary to get your amateur license anymore, but that doesn’t mean it’s not worth knowing.

Continue reading “Speech To Morse Code, Courtesy Of Google”