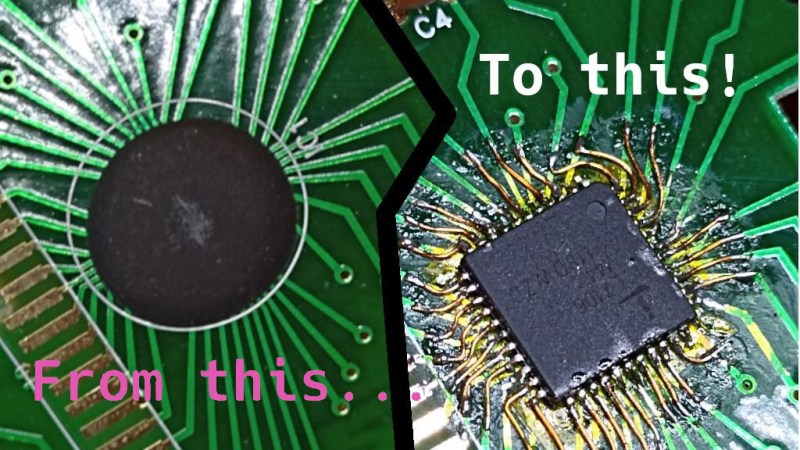
Sometimes, you know where the data you need is stored, you just don’t have a way to access it. In this case, [GetHypoxic] needed to rip data off an eMMC chip, salvaged out of a camera. With no desire to wait for an adapter to show up, it was time to bust out the bodge!
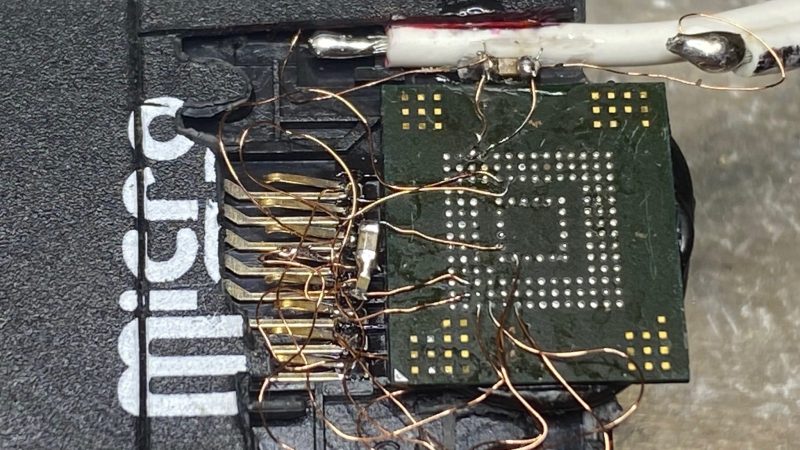
Once removed from the PCB, bodge wires were attached to the ball-grid array contacts on the bottom of the chip. Incredibly fine soldering was the order of the day to get these hooked up to the tiny pads, and we count 11 or 12 bodge wires in total. 1.8 volts was manually supplied to the eMMC chip, and it was directly wired up to the contacts of a built-in card reader out of an old laptop for reading.
Despite the rats-nest look of it all, and the yellow polyimide tape holding it together, [GetHypoxic] reported that it mounted successfully and got the job done. We’ve seen similar hacks before, too, wiring eMMC chips up to SD card adapters. It might look messy, but hey – it sure beats waiting for shipping!