Customisable Micro-Coded Controller Helps With In-Circuit Debugging

Over on Hackaday.io, [Zoltan Pekic] has been busy building a stack of tools for assisting with verifying and debugging retro computing applications. He presents his take on using Intel hex files for customised in-circuit testing, which is based upon simple microcoded sequencers, which are generated automatically from a high level description.

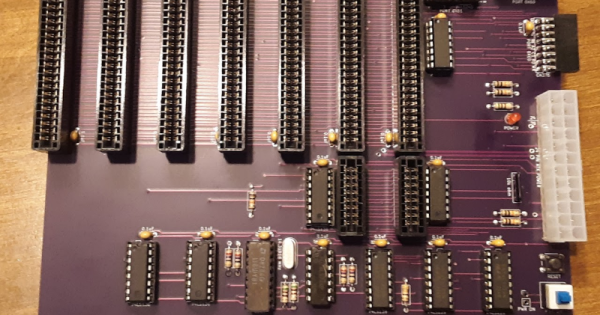
The idea is that it is very useful to be able to use an FPGA development board to emulate the memory bus component of the CPU, allowing direct memory access for design validation purposes. This approach will also allow the production of a test rig to perform board level verification. The microcode compiler (MCC) generates all the VHDL, and support files needed to target a Xilinx FPGA based dev board, but is generic enough to enable targeting other platforms with a little adaptation.

Another interesting use case enables in-circuit tracing of buggy memory accesses, with the microcode sequencer decoding the accesses and dumping the relevant information out to either a serial port, or even direct to an embedded VGA controller, hardware allowing.

This automated approach to generating customisable microcoded hardware is a very nice trick to have in your bag, and even if it only helps in certain circumstances, [Zoltan] notes that it at least serves as an interesting example of the architecture of computers from history, if not much else.

Source for the example 8085 project can be found on the project GitHub, and the toolchain source can found here also.

For an interesting practical use of microding to implement emulations of historical hardware, checkout this neat switchable reproduction calculator project.

The insides of a vacuum tube computer

1950s Vacuum Tube Computer Replica Communicates Through USB

When we talk about a “computer” today, we generally picture an electronic machine that can perform various kinds of mathematical operations, manage its program flow, move data from one place to another, and string all these functions together to perform some useful task. But once upon a time there were machines that could perform only a subset of these functions; these might be classified somewhere between computers and calculators.

One such machine was the Elektronensaldierer ES 24, built in 1955 by German computer pioneer Heinz Nixdorf. Its name translates as “electronic balancer”, with “balance” in the accounting sense meaning the difference of assets and liabilities. Designed to interface with a punch card machine from French manufacturer Bull, it contained several hundred vacuum tubes and could be used to add and subtract numbers stored on those punch cards.

[Henry Westphal] decided to make a modern copy of the ES 24 (translated), based on Nixdorf’s original schematics, for display in the HNF computer museum in Paderborn. The result is a huge display containing 204 tubes as well as a massive power supply. Like the 1955 original it can add incoming numbers and output the result as a twelve-digit decimal number. To make its inner workings visible, [Henry] also added a status light to each tube, showing whether it is storing a “0” or a “1”. This makes for a beautiful Blinkenlights display that shows the bits moving through the machine’s inner circuits.

Continue reading “1950s Vacuum Tube Computer Replica Communicates Through USB”

DIY Infrared Calculator Printer

[Ziggurat29] had been playing around with infrared protocols, and realized he had a spare point-of-sale printer kicking around in his junk box. So he decided to whip up his own calculator infrared printer by bolting on an STM32 Blue Pill module and an IR receiver. [Ziggurat29] initially thought such a homemade printer would be cheaper than a commercial HP 82240 IR printer, even a used one. In hindsight, these point-of-sale printers can be pricey. If you don’t have one laying around, it may be cheaper to buy one, but not as fun as building it yourself.

It used to be commonplace for calculators to have a printing mechanism — even entirely mechanical adding machines often had them. As electronic calculators became the norm, the printer began to fade away. Back in 1987, HP introduced a portable calculator printer, the HP 82240A (see HP Journal Oct 1987). The calculator could print using a one-way infrared protocol which came to be known as Redeye. This made good sense, since not every one needs a printing calculator. As well, if you had one of these printers, it could be used with multiple calculators. Later in 1991, HP added a bi-directional infrared link called SIR beginning with the HP 48SX calculator (see HP Journal Jun 1991), allowing calculators to communicate with each other or with an IR-equipped PC. Finally HP and other companies teamed up in 1995 to create the IrDA standards you are probably more familiar with. But a bunch of Redeye and SIR devices are still floating around, and even some modern calculators like SwissMicros offerings can still output to these printers.

If you want to make your own IR printer, be sure to check out [ziggurat29]’s Hackaday.io project. Also [Martin Hepperle] has an excellent writeup on an Arduino-based project on his site. We also covered a reverse project way back in 2011, an adaptor that prints over IR from wired serial signals. Have you found a printing calculator, or a standalone printer like this, to be useful in your workflow? Let us know in the comments below.

Turing Ring Is Compact

One of the problems with a classic Turing machine is the tape must be infinitely long. [Mark’s] Turing Ring still doesn’t have an infinite tape, but it does make it circular to save space. That along with a very clever and capable UI makes this one of the most usable Turing machines we’ve seen. You can see a demo in the video below.

The device uses an Arduino Nano, a Neopixel ring, an encoder, and a laser-cut enclosure that looks great. The minimal UI has several modes and the video below takes you through all of them.

Continue reading “Turing Ring Is Compact”

Single Bit Computer From Vacuum Tubes

Culminating a year-long project, [Usagi Electric] aka [David] has just wrapped up his single-bit vacuum tube computer. It is based on the Motorola MC14500 1-bit industrial controller, but since [David] changed the basic logic unit into an arithmetic-logic unit, he’s dubbing it the UE14500. Built on a wooden panel about 2.5 x 3 rabbit lengths excluding power supply. [David] admits he has cheated a little bit, in that he’s using two silicon diodes instead of a 6AL5 dual diode tube in his universal NOR gate on which the computer is based — but in his defense he notes that plenty of vacuum tube computers of the era used silicon diodes.

The tube he uses in the NOR gates is the 6AU6 miniature pentode, which he selected because of its availability, price, and suitability for low voltage. [David] runs this computer with two power supplies of +24 and -12 VDC, rather than the hundreds of volts typically used in vacuum tube designs. The modules are constructed on single-sided copper-clad PCB panels etched using a milling machine. The video below the break wraps up the 22-part series, where he fixes a few power supply issues and builds a remote front panel for I/O, and gives a demo of the computer in operation. Alas, this only completes one fourth of the project, as there are three more building blocks to build before the whole system is complete — Program Control (magnetic tape), RAM Memory bank, and a serial input/output module. We look forward to seeing the whole system up and running in the future.

We just wrote about the MC14500 a few days ago, and we’ve also covered [David]’s vacuum tube implementation of a 555 timer among other of his vacuum tube projects, several of which are featured on his Hackaday.io page.

Continue reading “Single Bit Computer From Vacuum Tubes”

6502 Goes FPGA (Again)

While there has been no shortage of FPGA-based recreations of classic processors, we always enjoy seeing a new approach. Last month [Some Assembly Required] took on the challenge to recreate a classic computer from the ground up and started with a 6502 implementation in Verilog. You can see in the second video below that he’s made good progress and there are apparently more videos to come.

The ROL instruction is the subject of the second video. We liked the approach of looking at what the instruction does and how many cycles it takes on different variants It is always good to make sure you know exactly what you are trying to accomplish before you get started.

Continue reading “6502 Goes FPGA (Again)”

WS2812s On A 6502

We can still remember when the WS2812 LED first came into our consciousness, way back in the mists of time. The timing diagrams in the datasheet-of-questionable-veracity made it sound quite tricky, with tight timing tolerances and essentially a high-speed two-bit PWM data protocol at 500 kHz. It was a challenge to bit-bang with an ATtiny85 back then, but there’s no way something as old and crusty as an Apple II would be up to snuff, right?

[Anders Nielsen] took up the challenge of getting the venerable 6502 processor to drive Neopixels and won! After all, if the chip is good enough for Bender and the Terminator T-800, it should be able to blink some colored LEDs, right? The secret sauce is shift registers!

Specifically, [Anders] abuses the 74LS165 parallel-in, serial-out shift register for his dirty work. Instead of bit-banging the WS2812’s “long high is a 1, short high is a 0” signal directly, the first few bits of the shift register are hard-wired to VCC and the last few to GND.

The bits in the middle determine if the pulse shifted out is long or short, and they’re set by the 6502, through a 6522 VIA chip, just like the Apple II would have. Clocking the data out of the shift register handles the timing-critical stuff. Very clever!

Video below the break.

Continue reading “WS2812s On A 6502”