We love taking a look at fake components and [BigClive] has put together something really special in this category. When he saw he could buy suspiciously cheap Omron relays on eBay, he knew something must be fishy so he put in an order.
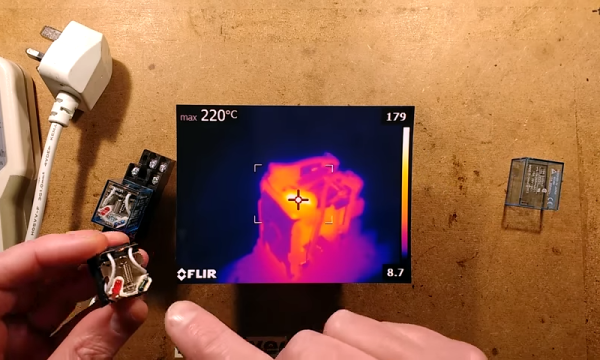
Some of the fakes he received are even marked Omrch instead of Omron, and your ear can detect the counterfeits by the varying sounds they make during operation. But of course [Clive’s] investigation goes much deeper than that. He started driving the relays to their rated voltages and taking temperatures with a FLIR camera.
The results were not surprising. At lower voltages the relays seemed to do okay, but closer to the maximums it’s obvious the components in the fakes are not rated for enough power to work. You can even see some charring of a resistor and its plastic holder from having too much power for the component’s rating. [Clive] actually replaced the errant resistor with a higher value resistor that reduces the current consumption and power dissipated.
He was also suspicious of the metal content of the contacts. You may think that doesn’t matter, but actually, the composition of relay contacts is critical to making reliable relay circuits. Depending on how much current flows and if the switching is dry (that is, made without current flowing) or not dictates use of different material.
The conclusion was that these relays might work for light duty projects, but for commercial projects or operating near the edge of the ratings, you want to give these a pass. If you do need a lot of low-power relays on the cheap — to compute a square root, or to build the whole computer — [Clive’s] process of testing and characterizing these fakes may come in handy for you.
Continue reading “Fake Omron Relays Are Worth What You Pay For Them”