Move Aside Mercury: Measuring Temperature Accurately With An RTD

Temperature is one of the most frequently measured physical quantities, and features prominently in many of our projects, from weather stations to 3D printers. Most commonly we’ll see thermistors, thermocouples, infrared sensors, or a dedicated IC used to measure temperature. It’s even possible to use only an ordinary diode, leading to some interesting techniques.

Often we only need to know the temperature within a degree Celsius or two, and any of these tools are fine. Until fairly recently, when we needed to know the temperature precisely, reliably, and over a wide range we used mercury thermometers. The devices themselves were marvels of instrumentation, but mercury is a hazardous substance, and since 2011 NIST will no longer calibrate mercury thermometers.
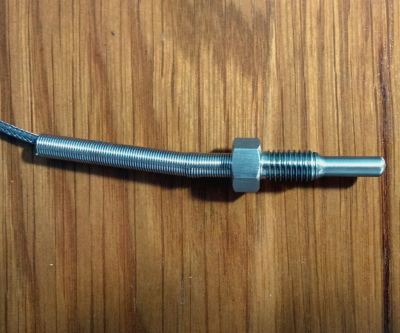
A typical Pt100 RTD probe

Luckily, resistance temperature detectors (RTDs) are an excellent alternative. These usually consist of very thin wires of pure platinum, and are identified by their resistance at 0 °C. For example, a Pt100 RTD has a resistance of 100 Ω at 0 °C.

An accuracy of +/- 0.15 °C at 0 °C is typical, but accuracies down to +/- 0.03 °C are available. The functional temperature range is typically quite high, with -70 °C to 200 °C being common, with some specialized probes working well over 900 °C.

It’s not uncommon for the lead wires on these probes to be a meter or more in length, and this can be a significant source of error. To account for this, you will see that RTD probes are sold in two, three, and four wire configurations. Two-wire configurations do not account for lead wire resistance, three-wire probes account for lead resistance but assume all lead wires have the same resistance, and four-wire configurations are most effective at eliminating this error.

In this article we’ll be using a 3-wire probe as it’s a good balance between cost, space, and accuracy. I found this detailed treatment of the differences between probe types useful in making this decision.

Continue reading “Move Aside Mercury: Measuring Temperature Accurately With An RTD”

A Sneak Peek At The TS100 Soldering Iron’s Younger Sibling

Many readers will be familiar with the TS100 soldering iron, a lightweight and powerful tool with an integrated temperature controller in its handle based upon an STM32 microcontroller. As an iron it’s a joy to use, it has hackable code, and it has become a firm favourite within our community. There have been rumours of a TS100 stablemate for some time now, with the model number being touted as a TS200 and with it being said to be USB-C powered. But beyond those tidbits, until now there has been not a lot to go on.

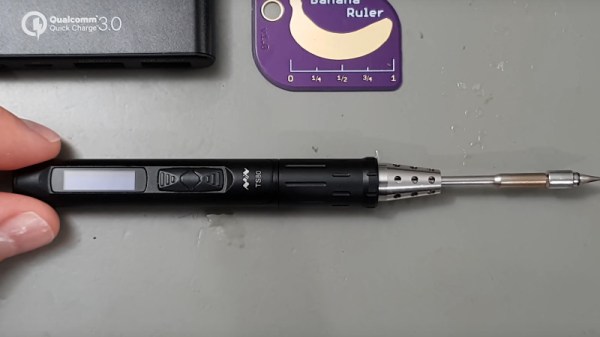
So [Marco Reps]’ video that we’ve placed below the break is a particularly interesting one, featuring as it does a prototype of the iron in question. It’s called the TS80 but there is evidence on its PCB that it has held the TS200 moniker in the past, it’s USB-C powered, and it features a new integrated heating element and bit with a Weller-style 3.5mm jack connector.

He runs it through a battery of tests and finds it to perform very well indeed, sometimes better than the TS100 despite his not having a USB-C power source capable of supplying the same voltage that his TS100 gets through its DC jack. To be clear, the TS100 is still a very good iron indeed, this one is simply a little bit better. Inside a sturdier metal barrel is a PCB with the STM32 on board as well as an OLED display that looks a little smaller than the one on the TS100. The shorter element receives praise, while the TS100 is hardly a long iron it is always good to get as close to the action as possible.

There is a concern over the lack of a DC jack and its reliance on USB-C, though he points out that with the appropriate cables and increasing USB-C adoption this should not remain a problem for long. We’d be interested to ensure that it can be powered through the USB-C socket from a simple DC power source such as a battery though, as that flexibility is such a bonus with the TS100.

So then, the TS80 is coming, but the TS100 is still a very good iron indeed so there’s no need to throw yours away any time soon. It’s an iron we look forward to seeing when it arrives though, and no doubt we’ll give you our verdict.

You can see our TS100 review if that takes your fancy, and while you’re at it take a look at one of the community’s most awesome TS100 hacks. [Marco] muses on how long it’ll be before someone has their TS80 playing audio through that 3.5mm jack.

Continue reading “A Sneak Peek At The TS100 Soldering Iron’s Younger Sibling”

Putting Crimpers To The Test: How Good Are Our Crimp Tools?

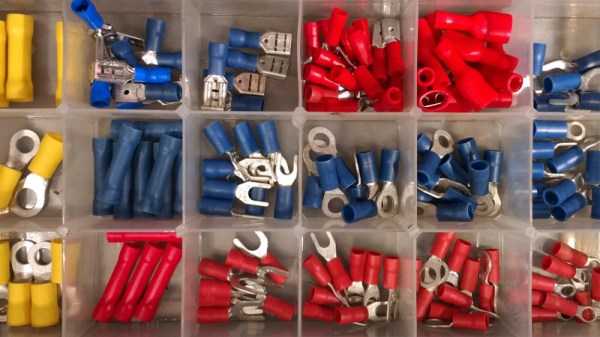
Almost every project of mine from the last quarter century, if it has contained any wiring, has featured somewhere at least one crimp connector. There are a multiplicity of different types of crimp, but in this case I am referring to the ubiquitous variety with a red, blue, or yellow coloured plastic sleeve denoting the wire size they are designed for. They provide a physically robust and electrically sound connection that is resistant to wire fatigue due to vibration, and that can carry hefty currents at high voltages without any problems.

You might expect this to now head off into the detail of crimp connection, but my colleague Dan has already detailed what makes a good or a bad crimp. Instead recently my constant searches for weird and wonderful things to review for your entertainment led me to a new crimp tool, and thence to a curiosity about the effectiveness of different styles of tool. So I’m going to evaluate the three different crimping methods available to me, namely my shiny new ratchet crimp pliers, my aged simple crimp pliers, and for comparison an ordinary pair of pliers. I’ll take a look at the physical strength of each crimping method followed by its electrical effectiveness, but first it’s worth looking at the tools themselves.

Continue reading “Putting Crimpers To The Test: How Good Are Our Crimp Tools?”

Dust To Dust And Jello To Jello: The Journey Of A Very Strange Knife

How do you feel about Jello? It’s alright tasting, but it’s much more about how jiggly it gets. Nobody — probably — would eat Jello if it was a hard candy. It would quickly become restricted to the bowl of strawberry candies that Grandma always seems to have. How do you feel about knives? We’re on Hackaday. Most everybody here has at least a couple in their toolbox. Some of them have more than a couple, including the whetstones to sharpen them. It’s safe to say they probably like the concept. Now, what if you could combine the two? Two favorites are always better than one. A Jello knife, while seemingly impossible, would be rather impressive, and [kiwami japan] does just that, as well as so much more.

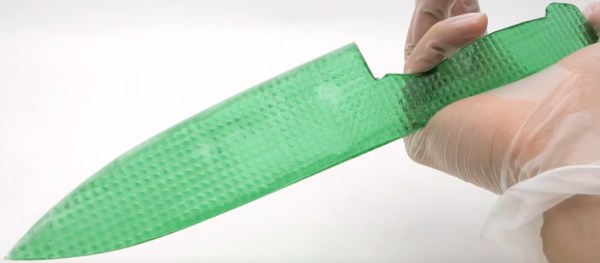
He starts with a couple dozen adorable Jello snacks (Jellos?), and from the wiggliest of foundations, he builds a masterpiece. The first order of business is to eat a couple of the stragglers while he decides what to do with the rest. A bit of blue food coloring, some more gelatin, and the help of several cow shaped bowls and pitchers later, [kiwami japan] has melted the survivors down and gotten a flat sheet. Once sufficiently cooled, it makes a nice knife-shaped Jello blank.

Continue reading “Dust To Dust And Jello To Jello: The Journey Of A Very Strange Knife”

Linear Track Makes Plasma Cuts Neat And Simple

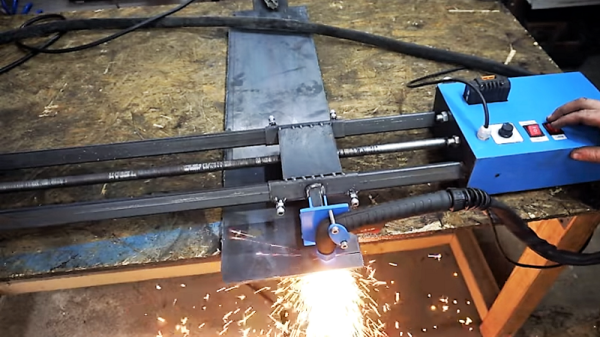
No microcontroller, no display, and not even an LED in sight. That’s how [Made in Poland] decided to roll with this motorized linear plasma cutter, and despite the simplicity it really gets the job done when there’s metal to be cut.

Plasma cutting makes slicing and dicing heavy stock a quick job, but it’s easy to go off course with the torch or to vary the speed and end up with a poor edge. This tool takes the shakes out of the equation with a completely homebrew linear slide fabricated from square tubing. A carriage to hold the plasma cutter torch moves on a length of threaded rod chucked into the remains of an old cordless drill. The original clutch of the drill removes the need for limit switches when the carriage hits either end of the slide, which we thought was a great touch. Simple speed and direction controls are provided, as is a connection in parallel with the torch’s trigger. One nice feature of the carriage is the ability to swivel the torch at an angle, making V-groove welds in thick stock a snap. No need for a complicated bed with sacrificial supports and a water bath, either — just hang the stock over the edge of a table and let the sparks fall where they may.

Simple is better sometimes, but a CNC plasma table may still be your heart’s desire. We understand.

Continue reading “Linear Track Makes Plasma Cuts Neat And Simple”

Beats An Extension Cord

What does your benchtop power supply have that [Pete Marchetto]’s does not? Answer: an extension cord draped across the floor. How often have you said to yourself, “I just need to energize this doodad for a couple seconds,” then you start daisy chaining every battery in the junk drawer to reach the necessary voltage? It is not uncommon to see battery packs with a single voltage output, but [Pete] could not find an adjustable one, so he built his own and put it on Tindie.

Presumably, the internals are not going to surprise anyone: an 18650 battery, charging circuit, a voltage converter, display, adjustment knob, and a dedicated USB charging port. The complexity is not what intrigues us, it is the fact that we do not see more of them and still wind up taping nine-volt batteries together. [Editor’s note: we use one made from an old laptop battery.]

This should not replace your benchtop power supply, it does not have the bells and whistles, like current regulation, but a mobile source of arbitrary voltage does most of the job most of the time. And it’s what this build hasn’t got (a cord) that makes it most useful.

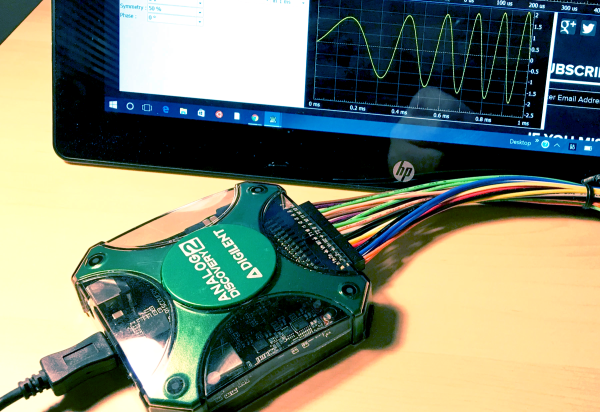
Analog Discovery 2 As A Vector Network Analyzer

A while back, I posted a review of the Analog Discovery 2, which is one of those USB “do everything” instruments. You might recall I generally liked it, although I wasn’t crazy about the price and the fact that the BNC connectors were an extra item. However, in that same post, I mentioned I’d look at the device’s capabilities as a network analyzer (NA) sometime in the future. The future, as they say, is now.

What’s an NA?

In its simplest form, there’s not much to an NA. You sweep a frequency generator across some range of frequencies. You feed that into some component or network of components and then you measure the power you get out compared to the power you put in. Fancy instruments can do some other measurements, but that’s really the heart of it.

The output is usually in two parts. You see a scope-like graph that has the frequency as the X-axis and some sort of magnitude as the Y-axis. Often the magnitude will be the ratio of the output power to the input power as a decibel. In addition, another scope-like output will show the phase shift through the network (Y-axis) vs frequency (X-axis). The Discovery 2 has these outputs and you can add custom displays, too.

Why do you care? An NA can help you understand tuned circuits, antennas, or anything else that has a frequency response, even an active filter or the feedback network of an oscillator. Could you do the same measurements manually? Of course you could. But taking hundreds of measurements per octave would be tedious and error-prone.

Continue reading “Analog Discovery 2 As A Vector Network Analyzer”