Dust To Dust And Jello To Jello: The Journey Of A Very Strange Knife

How do you feel about Jello? It’s alright tasting, but it’s much more about how jiggly it gets. Nobody — probably — would eat Jello if it was a hard candy. It would quickly become restricted to the bowl of strawberry candies that Grandma always seems to have. How do you feel about knives? We’re on Hackaday. Most everybody here has at least a couple in their toolbox. Some of them have more than a couple, including the whetstones to sharpen them. It’s safe to say they probably like the concept. Now, what if you could combine the two? Two favorites are always better than one. A Jello knife, while seemingly impossible, would be rather impressive, and [kiwami japan] does just that, as well as so much more.

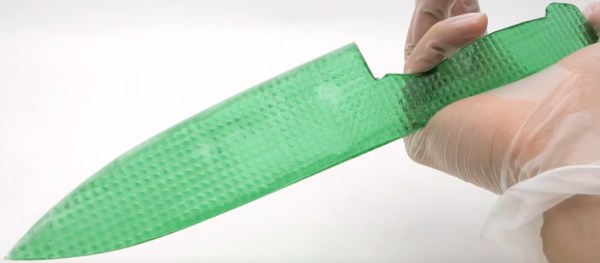
He starts with a couple dozen adorable Jello snacks (Jellos?), and from the wiggliest of foundations, he builds a masterpiece. The first order of business is to eat a couple of the stragglers while he decides what to do with the rest. A bit of blue food coloring, some more gelatin, and the help of several cow shaped bowls and pitchers later, [kiwami japan] has melted the survivors down and gotten a flat sheet. Once sufficiently cooled, it makes a nice knife-shaped Jello blank.

Continue reading “Dust To Dust And Jello To Jello: The Journey Of A Very Strange Knife”

Linear Track Makes Plasma Cuts Neat And Simple

No microcontroller, no display, and not even an LED in sight. That’s how [Made in Poland] decided to roll with this motorized linear plasma cutter, and despite the simplicity it really gets the job done when there’s metal to be cut.

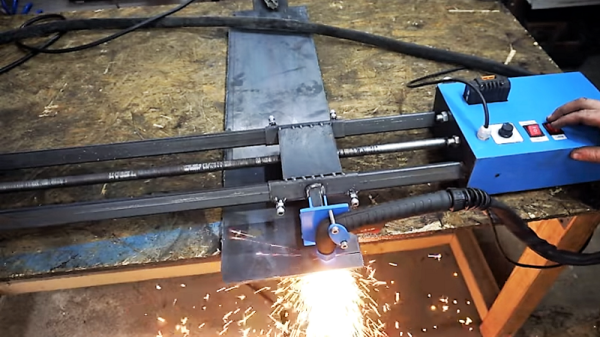
Plasma cutting makes slicing and dicing heavy stock a quick job, but it’s easy to go off course with the torch or to vary the speed and end up with a poor edge. This tool takes the shakes out of the equation with a completely homebrew linear slide fabricated from square tubing. A carriage to hold the plasma cutter torch moves on a length of threaded rod chucked into the remains of an old cordless drill. The original clutch of the drill removes the need for limit switches when the carriage hits either end of the slide, which we thought was a great touch. Simple speed and direction controls are provided, as is a connection in parallel with the torch’s trigger. One nice feature of the carriage is the ability to swivel the torch at an angle, making V-groove welds in thick stock a snap. No need for a complicated bed with sacrificial supports and a water bath, either — just hang the stock over the edge of a table and let the sparks fall where they may.

Simple is better sometimes, but a CNC plasma table may still be your heart’s desire. We understand.

Continue reading “Linear Track Makes Plasma Cuts Neat And Simple”

Beats An Extension Cord

What does your benchtop power supply have that [Pete Marchetto]’s does not? Answer: an extension cord draped across the floor. How often have you said to yourself, “I just need to energize this doodad for a couple seconds,” then you start daisy chaining every battery in the junk drawer to reach the necessary voltage? It is not uncommon to see battery packs with a single voltage output, but [Pete] could not find an adjustable one, so he built his own and put it on Tindie.

Presumably, the internals are not going to surprise anyone: an 18650 battery, charging circuit, a voltage converter, display, adjustment knob, and a dedicated USB charging port. The complexity is not what intrigues us, it is the fact that we do not see more of them and still wind up taping nine-volt batteries together. [Editor’s note: we use one made from an old laptop battery.]

This should not replace your benchtop power supply, it does not have the bells and whistles, like current regulation, but a mobile source of arbitrary voltage does most of the job most of the time. And it’s what this build hasn’t got (a cord) that makes it most useful.

Analog Discovery 2 As A Vector Network Analyzer

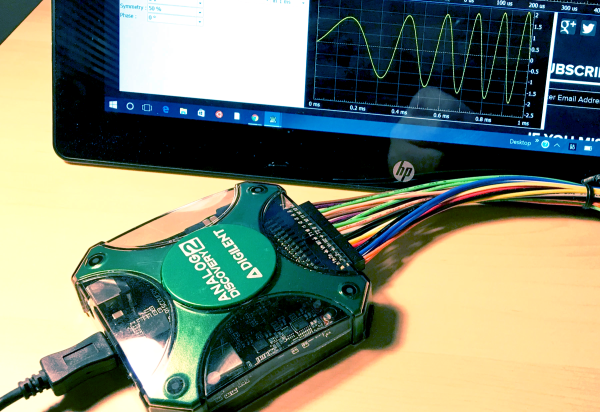
A while back, I posted a review of the Analog Discovery 2, which is one of those USB “do everything” instruments. You might recall I generally liked it, although I wasn’t crazy about the price and the fact that the BNC connectors were an extra item. However, in that same post, I mentioned I’d look at the device’s capabilities as a network analyzer (NA) sometime in the future. The future, as they say, is now.

What’s an NA?

In its simplest form, there’s not much to an NA. You sweep a frequency generator across some range of frequencies. You feed that into some component or network of components and then you measure the power you get out compared to the power you put in. Fancy instruments can do some other measurements, but that’s really the heart of it.

The output is usually in two parts. You see a scope-like graph that has the frequency as the X-axis and some sort of magnitude as the Y-axis. Often the magnitude will be the ratio of the output power to the input power as a decibel. In addition, another scope-like output will show the phase shift through the network (Y-axis) vs frequency (X-axis). The Discovery 2 has these outputs and you can add custom displays, too.

Why do you care? An NA can help you understand tuned circuits, antennas, or anything else that has a frequency response, even an active filter or the feedback network of an oscillator. Could you do the same measurements manually? Of course you could. But taking hundreds of measurements per octave would be tedious and error-prone.

Continue reading “Analog Discovery 2 As A Vector Network Analyzer”

Searchable KiCad Component Database Makes Finding Parts A Breeze

KiCad, the open source EDA software, is popular with Hackaday readers and the hardware community as a whole. But it is not immune from the most common bane of EDA tools. Managing your library of symbols and footprints, and finding new ones for components you’re using in your latest design is rarely a pleasant experience. Swooping in to help alleviate your pain, [twitchyliquid64] has created KiCad Database (KCDB). a beautifully simple web-app for searching component footprints.

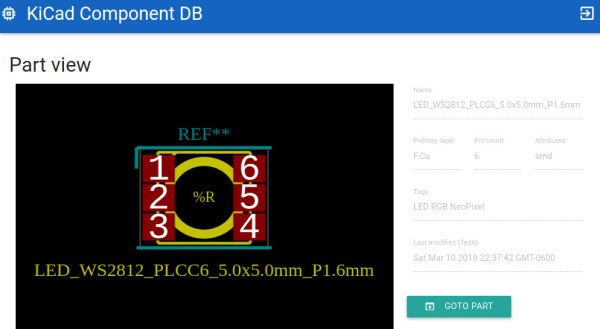
The database lets you easily search by footprint name with optional parameters like number of pins. Of course it can also search by tag for a bit of flexibility (searching Neopixel returned the footprint shown above). There’s also an indicator for Kicad-official parts which is a nice touch. One of our favourite features is the part viewer, which renders the footprint in your browser, making it easy to instantly see if the part is suitable. AngularJS and material design are at work here, and the main app is written in Go — very trendy.

The database is kindly publicly hosted by [twitchyliquid64] but can easily be run locally on your machine where you can add your own libraries. It takes only one command to add a GitHub repo as a component source, which then gets regularly “ingested”. It’s great how easy it is to add a neat library of footprints you found once, then forget about them, safe in the knowledge that they can easily be found in future in the same place as everything else.

If you can’t find the schematic symbols for the part you’re using, we recently covered a service which uses OCR and computer vision to automatically generate symbols from a datasheet; pretty cool stuff.

Learn Six Oscilloscope Measurements With One Arduino

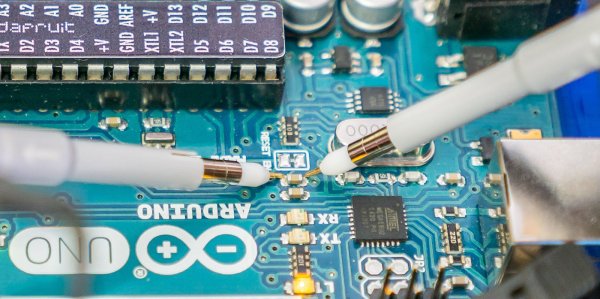
We won’t mention names, but we are always dismayed to see people twist knobs randomly on a scope until it shows a good picture. These days, there’s the dreaded auto button, too, which is nearly as bad. If you haven’t spent the time to learn how to properly use a scope [Bald Engineer] has a great introduction to making six measurements with an Arduino as a test device.

To follow along you’ll need an Arduino UNO and a two-channel (or better) scope. Actually, most of the measurements would probably work on any Arduino, but there are some that require the separate USB to serial chip like that found on the UNO and similar boards.

The six measurements are:

  1. The auto reset programming pulse
  2. Capture and decode serial data
  3. Noise on the power rail
  4. Observe probe loading effects
  5. PWM duty cycle
  6. The timing of pin manipulation code

Some of these measurements use a bit of Arduino code, while others just make use of the circuitry on the board no matter what software is running.

Not only does the post show you where to make the measurements and what the result should look like, there’s also a discussion of what the measurement means and some suggested things to try on your own.

If you go through this post, you might also enjoy learning more about probes. If you are feeling adventurous, you can even build your own current probe.

DIY Coil Winding Machine Counts The Hacky Way

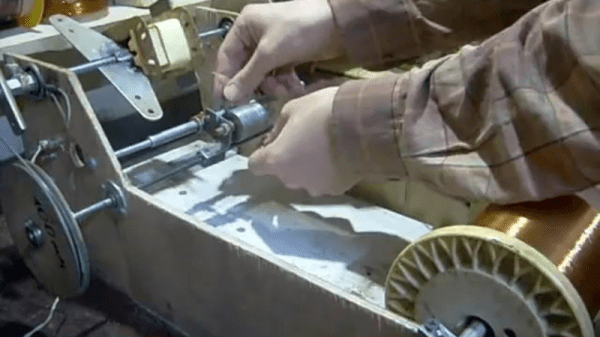
“Wait, was that 423 or 424?” When you’re stuck winding a transformer or coil that has more than a few hundred turns, you’re going to want to spend some time on a winding jig. This video, embedded below, displays a simple but sufficient machine — with a few twists.

The first elaboration is the addition of a shuttle that moves back and forth in sync with the main spindle to lay the windings down nice and smooth. Here, it’s tremendously simple — a piece of threaded rod and a set of interchangeable wheels that are driven by a big o-ring belt. We love the low-tech solution of simply adding a twist into the belt to swap directions. We would have way overthought the mechanism.

But then the hack is the digital counter made out of an old calculator. We’ve seen this before, of course, but here’s a great real-world application.

Thanks [Jānis] for the tip!

Continue reading “DIY Coil Winding Machine Counts The Hacky Way”